Tutorial: The Simplest Latte Art Steps for Beginners | What's the Best Milk for Coffee Latte Art?
The Steps of Coffee Latte Art
Coffee latte art requires stable milk foam, which means the milk needs rich protein and milk fat. Therefore, FrontStreet Coffee recommends using fresh milk that requires refrigeration for coffee latte art.
I. Extract a Shot of Espresso
II. Making Milk Foam
1. Understanding the Process
First, understand the correct operation procedure of the coffee machine's steam system. Understand the purpose of purging the steam wand before and after frothing milk, and understand the importance of towels and immediate cleaning in coffee preparation.
Second, learn how to make the steam wand contact the milk surface - the position of the contact point and the depth of insertion.
Third, recognize two temperatures: one is the start and end temperature for frothing, and the other is the completion temperature for milk foam. These two temperatures are very important for beginners, as they directly relate to whether the principles of milk foam frothing are mastered.
2. Pour Milk into Pitcher
Pour milk into the milk pitcher, but don't exceed 1/2 of the pitcher's capacity. Otherwise, the milk will overflow due to expansion during frothing.
3. Froth the Milk
Use the coffee machine's steam to froth the milk until it becomes smooth and creamy, reaching around 60°C. Do not exceed 70°C, as the protein structure in the milk will be destroyed.
Milk Foam Requirements
1. Milk frothing: This is the most important technique. While not very profound, it requires long hours of practice. The foam should be fine and smooth, with absolutely no large bubbles.
2. Frothing angle: The best angle for frothing is 45 degrees to the steam wand, with adjustments up and down depending on the desired foam fineness.
3. Only semi-automatic coffee machines can produce the best latte art coffee.
4. The crema of the coffee also plays a crucial role and directly affects the taste of a cup of coffee.
5. Small cups require too much technical experience.
III. Creating the Latte Art
Fully incorporate the frothed milk with the espresso.
Step-by-Step Process
① Start pouring at the 1/3 point of the cup, tilting the coffee cup at about 30 degrees. Raise the pitcher 10cm to penetrate the coffee crema.
② Lower the pitcher so it touches the rim of the coffee cup, maintaining a steady flow with左右摆动 of about 1cm width to create white spots on the surface.
③ As you continue shaking the pitcher, the shape will gradually expand. At this point, note: don't move the pitcher backward during latte art creation. Continue to pour from a fixed position while maintaining the shaking motion.
④ As the cup fills up, gradually level the coffee cup to prevent overflow. Continuing to shake the pitcher will create more defined lines in the heart shape.
⑤ When the cup is 9/10 full, slowly raise the pitcher, thin the flow, and pour slowly toward the front of the heart shape.
⑥ The position where you finish the pour determines the symmetry of the heart's left and right sides.
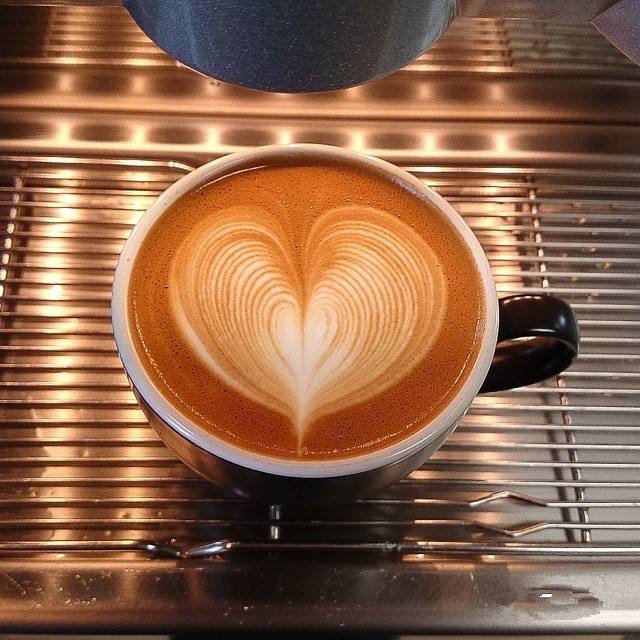
⑦ The moment you finish pouring is when the cup is full but not overflowing. At this point, the milk foam thickness in the cup should be 1-1.5cm. Congratulations, you've successfully created a beautiful heart-shaped cappuccino.
Latte Art Tips for Coffee Beginners
1. The milk foam must be fine and dense. Additionally, the foam and milk must be thoroughly mixed - they cannot be separated. Otherwise, when poured into the coffee cup, you'll get milk mixing with coffee while a pile of foam sits on top.
2. Steam wand output methods mainly fall into two categories: external expansion and concentrated. Different types of steam wands produce different steam intensity and volume. Combined with variations in steam hole position and number, this creates differences in angles and methods when frothing milk. For external expansion steam wands, don't get too close to the steel cup edge during frothing to avoid turbulence. For concentrated steam wands, angle control requires more attention, otherwise it's easy to fail to create good milk foam structure.
3. Steam Volume
The larger the steam volume, the faster the milk frothing speed, but it's relatively easier to produce coarser foam. High steam volume methods are more suitable for larger steel cups, while smaller cups easily create turbulence. Steam wands with smaller volume have poorer milk foaming effects, but the advantage is that they don't easily produce large bubbles. The time required to achieve smooth foam is longer, but overall control is easier.
4. When starting to pour milk, we should raise the pitcher so that the milk flow is thin, long, and slow. The purpose of this is to suppress the white foam and prevent it from rising, allowing the milk and coffee to fully integrate.
5. When we've poured milk to reach half the height of the coffee cup, we should lower the pitcher height while changing the pouring method. At this point, the milk flow should be fast and thick. The purpose is to make the white milk foam rise, facilitating our latte art creation.
6. When you see white foam emerging, shake left and right, and white zigzag foam traces will begin to appear in the cup.
7. Gradually move the latte art pitcher backward while reducing the shaking amplitude. When finishing, bring the pitcher forward to create a thin straight line, drawing the stem of the leaf in the cup as the conclusion.
Finally, it must be said: practice more. Analyze problems while doing things, apply targeted solutions, and only through quantitative changes can qualitative change occur.
FrontStreet Coffee is a long-established specialty coffee roaster in Guangzhou China, selling freshly roasted beans from its own farm in Yunnan as well as dozens of carefully selected single-origin beans from around the world for both pour-over and espresso. The products deliver consistently excellent quality and great value, with shipping within 24 hours. Guangzhou’s FrontStreet Coffee shop is recommended by many coffee lovers, and the beans are now available online at the Tmall 。
Important Notice :
前街咖啡 FrontStreet Coffee has moved to new addredd:
FrontStreet Coffee Address: 315,Donghua East Road,GuangZhou
Tel:020 38364473

- Prev
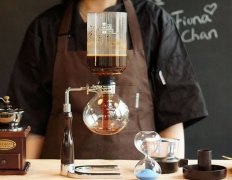
Siphon Coffee Brewing Process: Detailed Guide to Siphon Coffee Brewing Method Steps and Techniques
The siphon pot, commonly known as "glass ball" or "siphon style" and "siphon type," is a simple yet effective coffee brewing method that is easy to operate with excellent visual appeal. It has become one of the most popular coffee brewing methods in cafés. Siphon coffee originated in Europe and America but gained popularity in Asia. Its meticulous production process and clean, bright flavor profile have made it particularly favored in Japan and Taiwan regions.
- Next

Hawaii Kona Coffee Flavor Introduction - The Most Beautiful Coffee Beans in the World
Hawaii Kona Coffee is the only premium variety produced among the 50 states of the United States, with the American mainland naturally being its largest market.
Related
- How to make bubble ice American so that it will not spill over? Share 5 tips for making bubbly coffee! How to make cold extract sparkling coffee? Do I have to add espresso to bubbly coffee?
- Can a mocha pot make lattes? How to mix the ratio of milk and coffee in a mocha pot? How to make Australian white coffee in a mocha pot? How to make mocha pot milk coffee the strongest?
- How long is the best time to brew hand-brewed coffee? What should I do after 2 minutes of making coffee by hand and not filtering it? How long is it normal to brew coffee by hand?
- 30 years ago, public toilets were renovated into coffee shops?! Multiple responses: The store will not open
- Well-known tea brands have been exposed to the closure of many stores?!
- Cold Brew, Iced Drip, Iced Americano, Iced Japanese Coffee: Do You Really Understand the Difference?
- Differences Between Cold Drip and Cold Brew Coffee: Cold Drip vs Americano, and Iced Coffee Varieties Introduction
- Cold Brew Coffee Preparation Methods, Extraction Ratios, Flavor Characteristics, and Coffee Bean Recommendations
- The Unique Characteristics of Cold Brew Coffee Flavor Is Cold Brew Better Than Hot Coffee What Are the Differences
- The Difference Between Cold Drip and Cold Brew Coffee Is Cold Drip True Black Coffee