How to Properly Integrate Latte Art? What Details Should Be Noted When Pouring Latte? What Are the Key Points for Creating Patterns in Espresso?
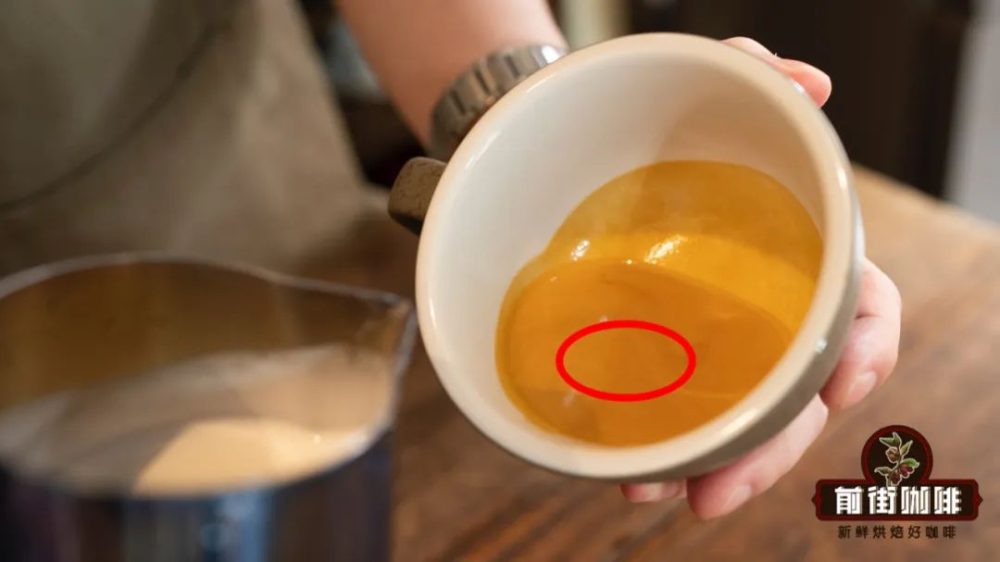
If you frequently create latte art, you've probably faced this frustrating issue: although you've created a beautiful latte art pattern, the overall aesthetic is often compromised by the white traces around the pattern.
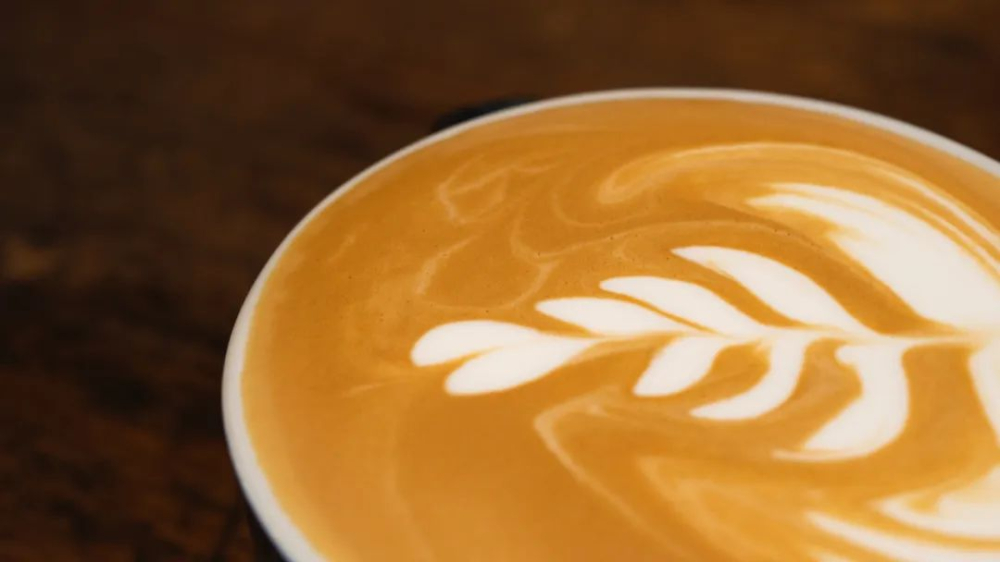
Most of you probably already know the root cause of this problem - it's improper integration, resulting in an unclean surface. A potentially stunning pattern loses its charm against a messy backdrop. Today, FrontStreet Coffee will explain in detail exactly how this integration should be done! Get your notebooks ready, FrontStreet Coffee's mini-class is starting!
What is Integration During Latte Art?
"Integration" is a crucial step in making espresso-based milk coffee. It specifically involves stirring and blending the poured steamed milk with espresso through gentle movements.
While it seems simple, there's actually considerable technique hidden in this process. The cleanliness of the pattern and the uniformity of the coffee both depend on whether this step is performed correctly. If not executed properly, not only will the final pattern look poor, but the taste will also be inconsistent (to put it dramatically - one sip of coffee, one sip of milk). Now, let's follow FrontStreet Coffee to explore the key points of integration!
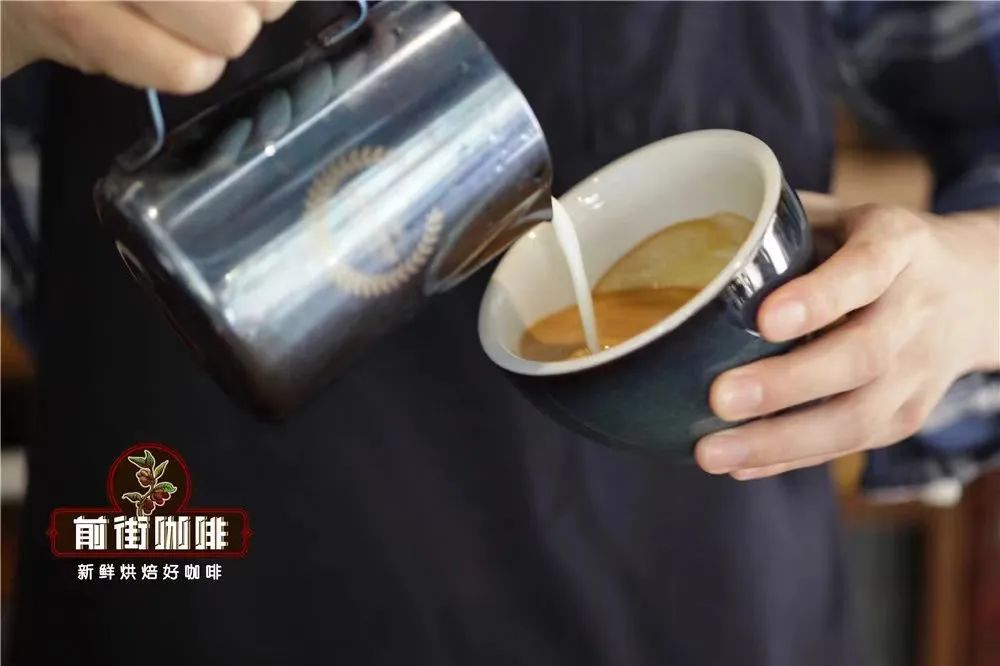
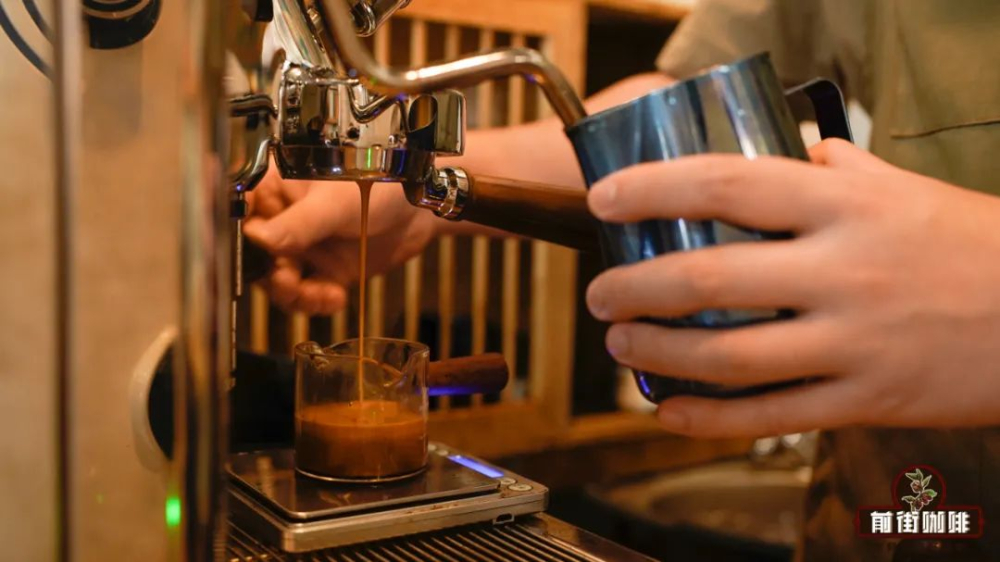
1. Milk Pouring Height
When creating latte art, we need to keep the milk pouring height as low as possible, close to the liquid surface, allowing the milk foam to float on the crema and form various patterns. However, integration is different! Integration requires greater impact force to push the milk foam into the espresso, preventing foam from appearing on the surface and maintaining the cleanliness of our "canvas." Of course, if the pouring height is too high, bubbles may form due to excessive impact. Therefore, during integration, we need to find the right height for pouring milk to reduce messy backgrounds.
FrontStreet Coffee recommends controlling the integration height at approximately 5-8 centimeters (distance from the pitcher spout to the coffee surface), about the height of a fist. Please make fine adjustments according to your specific situation. The impact force at this height is just right - it won't create a messy background due to being too low, nor will it create bubbles due to being too high.
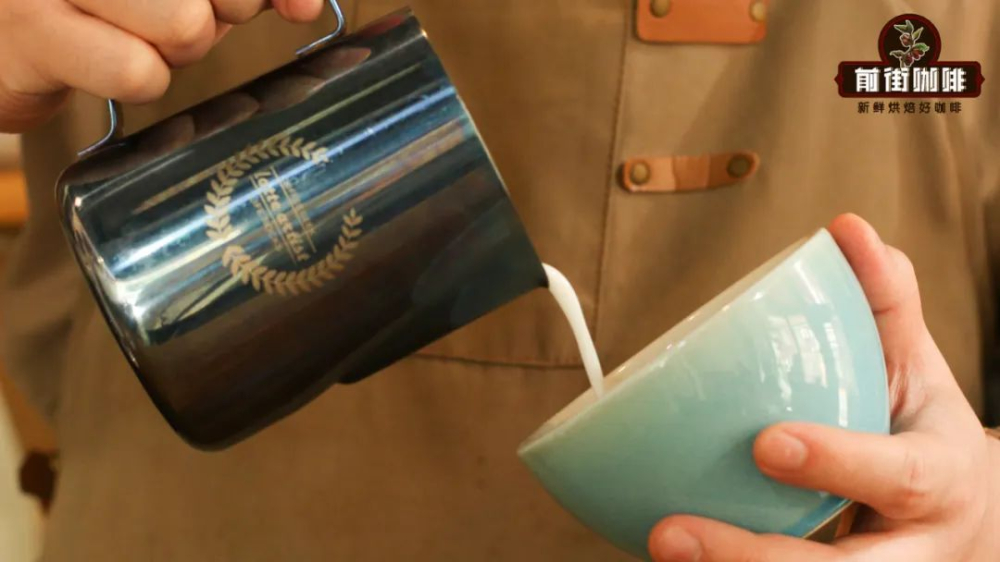
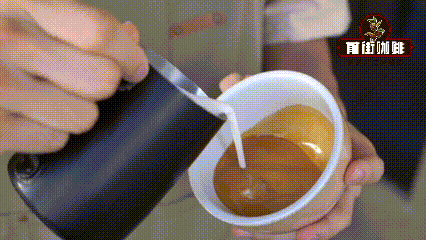
2. Amount of Milk Flow
Similar to water pouring in pour-over coffee, the amount of milk flow during integration is also critical. If our milk flow is too small, only the area where the milk is poured will be mixed. The milk cannot integrate with the crema and coffee in other areas, resulting in what we call uneven integration. When the milk flow is too large, the milk will bounce back due to excessive impact force, scattering the surface crema and coffee, creating a messy surface. Therefore, the milk flow during integration should be moderate, slightly less than what you'd use for the actual art creation.
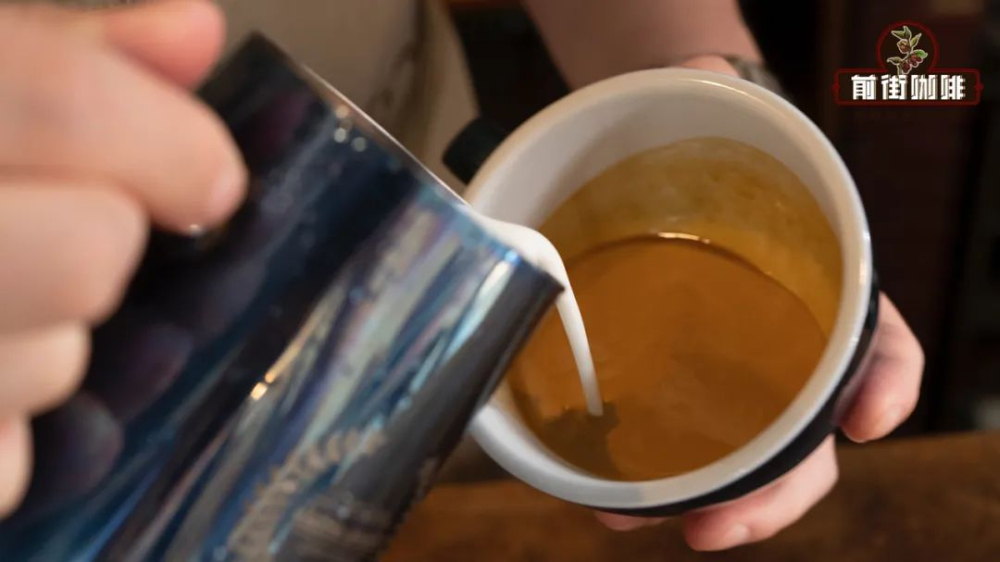
3. Milk Pouring Position
We tilt the coffee cup to ensure that a small amount of espresso has an appropriate depth, so the poured milk won't "bounce" up from touching the bottom. However, not all areas have the same depth! Therefore, finding the right position to pour milk is crucial. After tilting, the center of the coffee is usually the deepest, so we just need to pour milk at the center point. It's worth noting that when pouring milk, we use a circular motion for stirring, so the pouring range needs to be slightly expanded, still centered around the middle point.
4. Quality of Foam and Crema
Both crema and milk foam are essentially bubbles that gradually dissipate over time. If we wait too long before integrating and creating art, they will gradually lose their bubbles, clump together, and become less fluid, affecting the quality of integration. The best approach, as FrontStreet Coffee has always shared, is to calculate the time needed for espresso extraction and milk foaming separately, then control the time difference to complete both processes simultaneously. For example, if espresso extraction takes 30 seconds and milk foaming takes 20 seconds, you can start foaming milk at the 15-second mark of espresso extraction. This ensures both processes finish around the same time, allowing you to integrate at their optimal states!
The four key points above require very连贯的操作, so if you're not yet proficient, you can practice integration using water first. Once you've mastered the technique, you can move on to real practice with milk and coffee. It's worth mentioning that if you accidentally leave a small amount of foam on the surface at the beginning of integration, it's okay. Like FrontStreet Coffee does, you can use the subsequent milk foam to wash it away!
- END -
FrontStreet Coffee
No. 10, Bao'an Front Street, Yandun Road, Dongshankou, Yuexiu District, Guangzhou, Guangdong Province

FrontStreet Coffee is a long-established specialty coffee roaster in Guangzhou China, selling freshly roasted beans from its own farm in Yunnan as well as dozens of carefully selected single-origin beans from around the world for both pour-over and espresso. The products deliver consistently excellent quality and great value, with shipping within 24 hours. Guangzhou’s FrontStreet Coffee shop is recommended by many coffee lovers, and the beans are now available online at the Tmall 。
Important Notice :
前街咖啡 FrontStreet Coffee has moved to new addredd:
FrontStreet Coffee Address: 315,Donghua East Road,GuangZhou
Tel:020 38364473

- Prev

Is Catimor Arabica or Robusta? How Does Its "Devil's Aftertaste" Develop? What Are the Characteristics of Catimor?
As the two most commercially valuable coffee genera, Arabica and Robusta each have their own advantages and disadvantages. For instance, Arabica offers excellent flavor profiles but most varieties have relatively weak disease resistance, while Robusta demonstrates strong disease resistance but the vast majority lacks desirable flavor characteristics. Before the 20th century, coffee varieties worldwide
- Next

Brazil | Introduction to Coffee Bean Selection from Entry-Level Coffee Growing Regions
Brazil, officially known as the Federative Republic of Brazil, shares borders with 10 countries including Uruguay, Argentina, Peru, Colombia, and Bolivia. With a total land area of 8.5149 million square kilometers,
Related
- How to make bubble ice American so that it will not spill over? Share 5 tips for making bubbly coffee! How to make cold extract sparkling coffee? Do I have to add espresso to bubbly coffee?
- Can a mocha pot make lattes? How to mix the ratio of milk and coffee in a mocha pot? How to make Australian white coffee in a mocha pot? How to make mocha pot milk coffee the strongest?
- How long is the best time to brew hand-brewed coffee? What should I do after 2 minutes of making coffee by hand and not filtering it? How long is it normal to brew coffee by hand?
- 30 years ago, public toilets were renovated into coffee shops?! Multiple responses: The store will not open
- Well-known tea brands have been exposed to the closure of many stores?!
- Cold Brew, Iced Drip, Iced Americano, Iced Japanese Coffee: Do You Really Understand the Difference?
- Differences Between Cold Drip and Cold Brew Coffee: Cold Drip vs Americano, and Iced Coffee Varieties Introduction
- Cold Brew Coffee Preparation Methods, Extraction Ratios, Flavor Characteristics, and Coffee Bean Recommendations
- The Unique Characteristics of Cold Brew Coffee Flavor Is Cold Brew Better Than Hot Coffee What Are the Differences
- The Difference Between Cold Drip and Cold Brew Coffee Is Cold Drip True Black Coffee