How to Master the Double-Winged Swan Coffee Latte Art - A Complete Latte Art Tutorial
Introduction
Have you all mastered the tulip etching technique? In this issue, we'll continue our latte art secrets with the double-winged swan. Without further ado, let's begin.
Preparation Stage
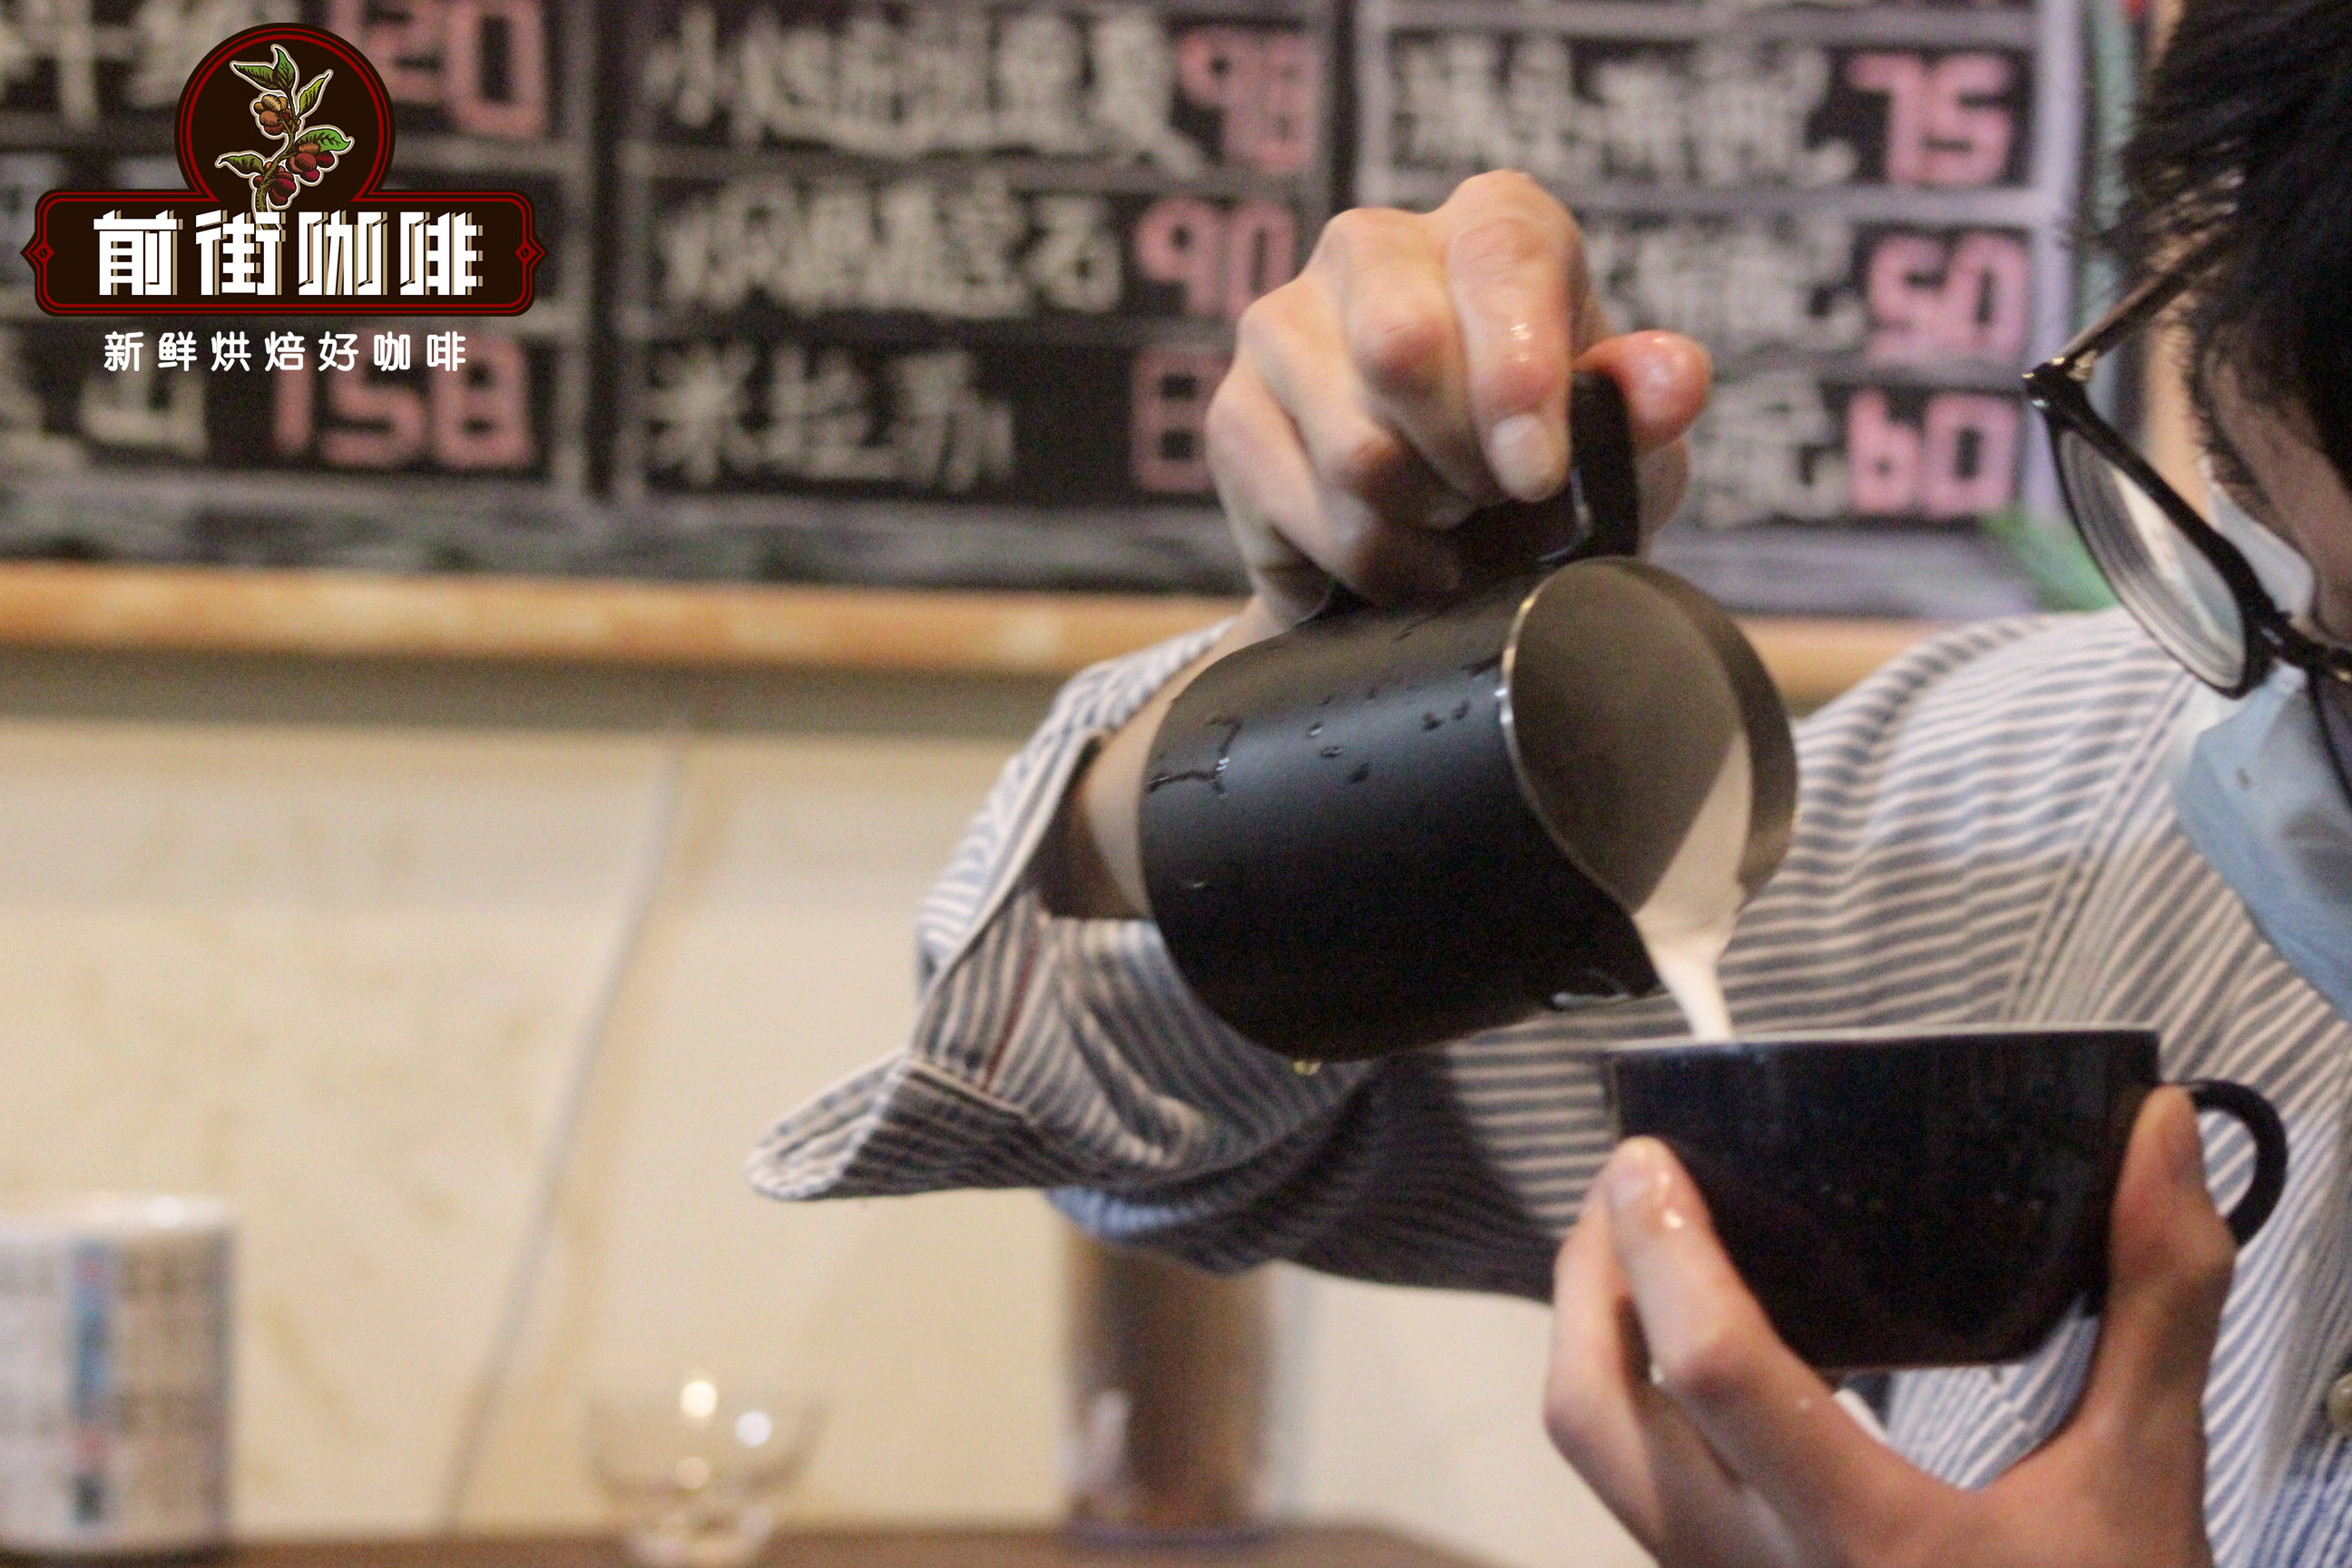
Use espresso with rich crema combined with lightly steamed milk. For the espresso, FrontStreet Coffee uses the Sunflower Warm Blend (Sherry + Red Cherry), with the sherry coffee beans providing rich coffee crema. The milk foam should be steamed from 50% to 60% full, requiring strong flowability and fine texture. Good flowability allows for creating beautiful lines for etching patterns, while fine texture extends the duration of the foam, preventing premature separation.
Latte Art Stage
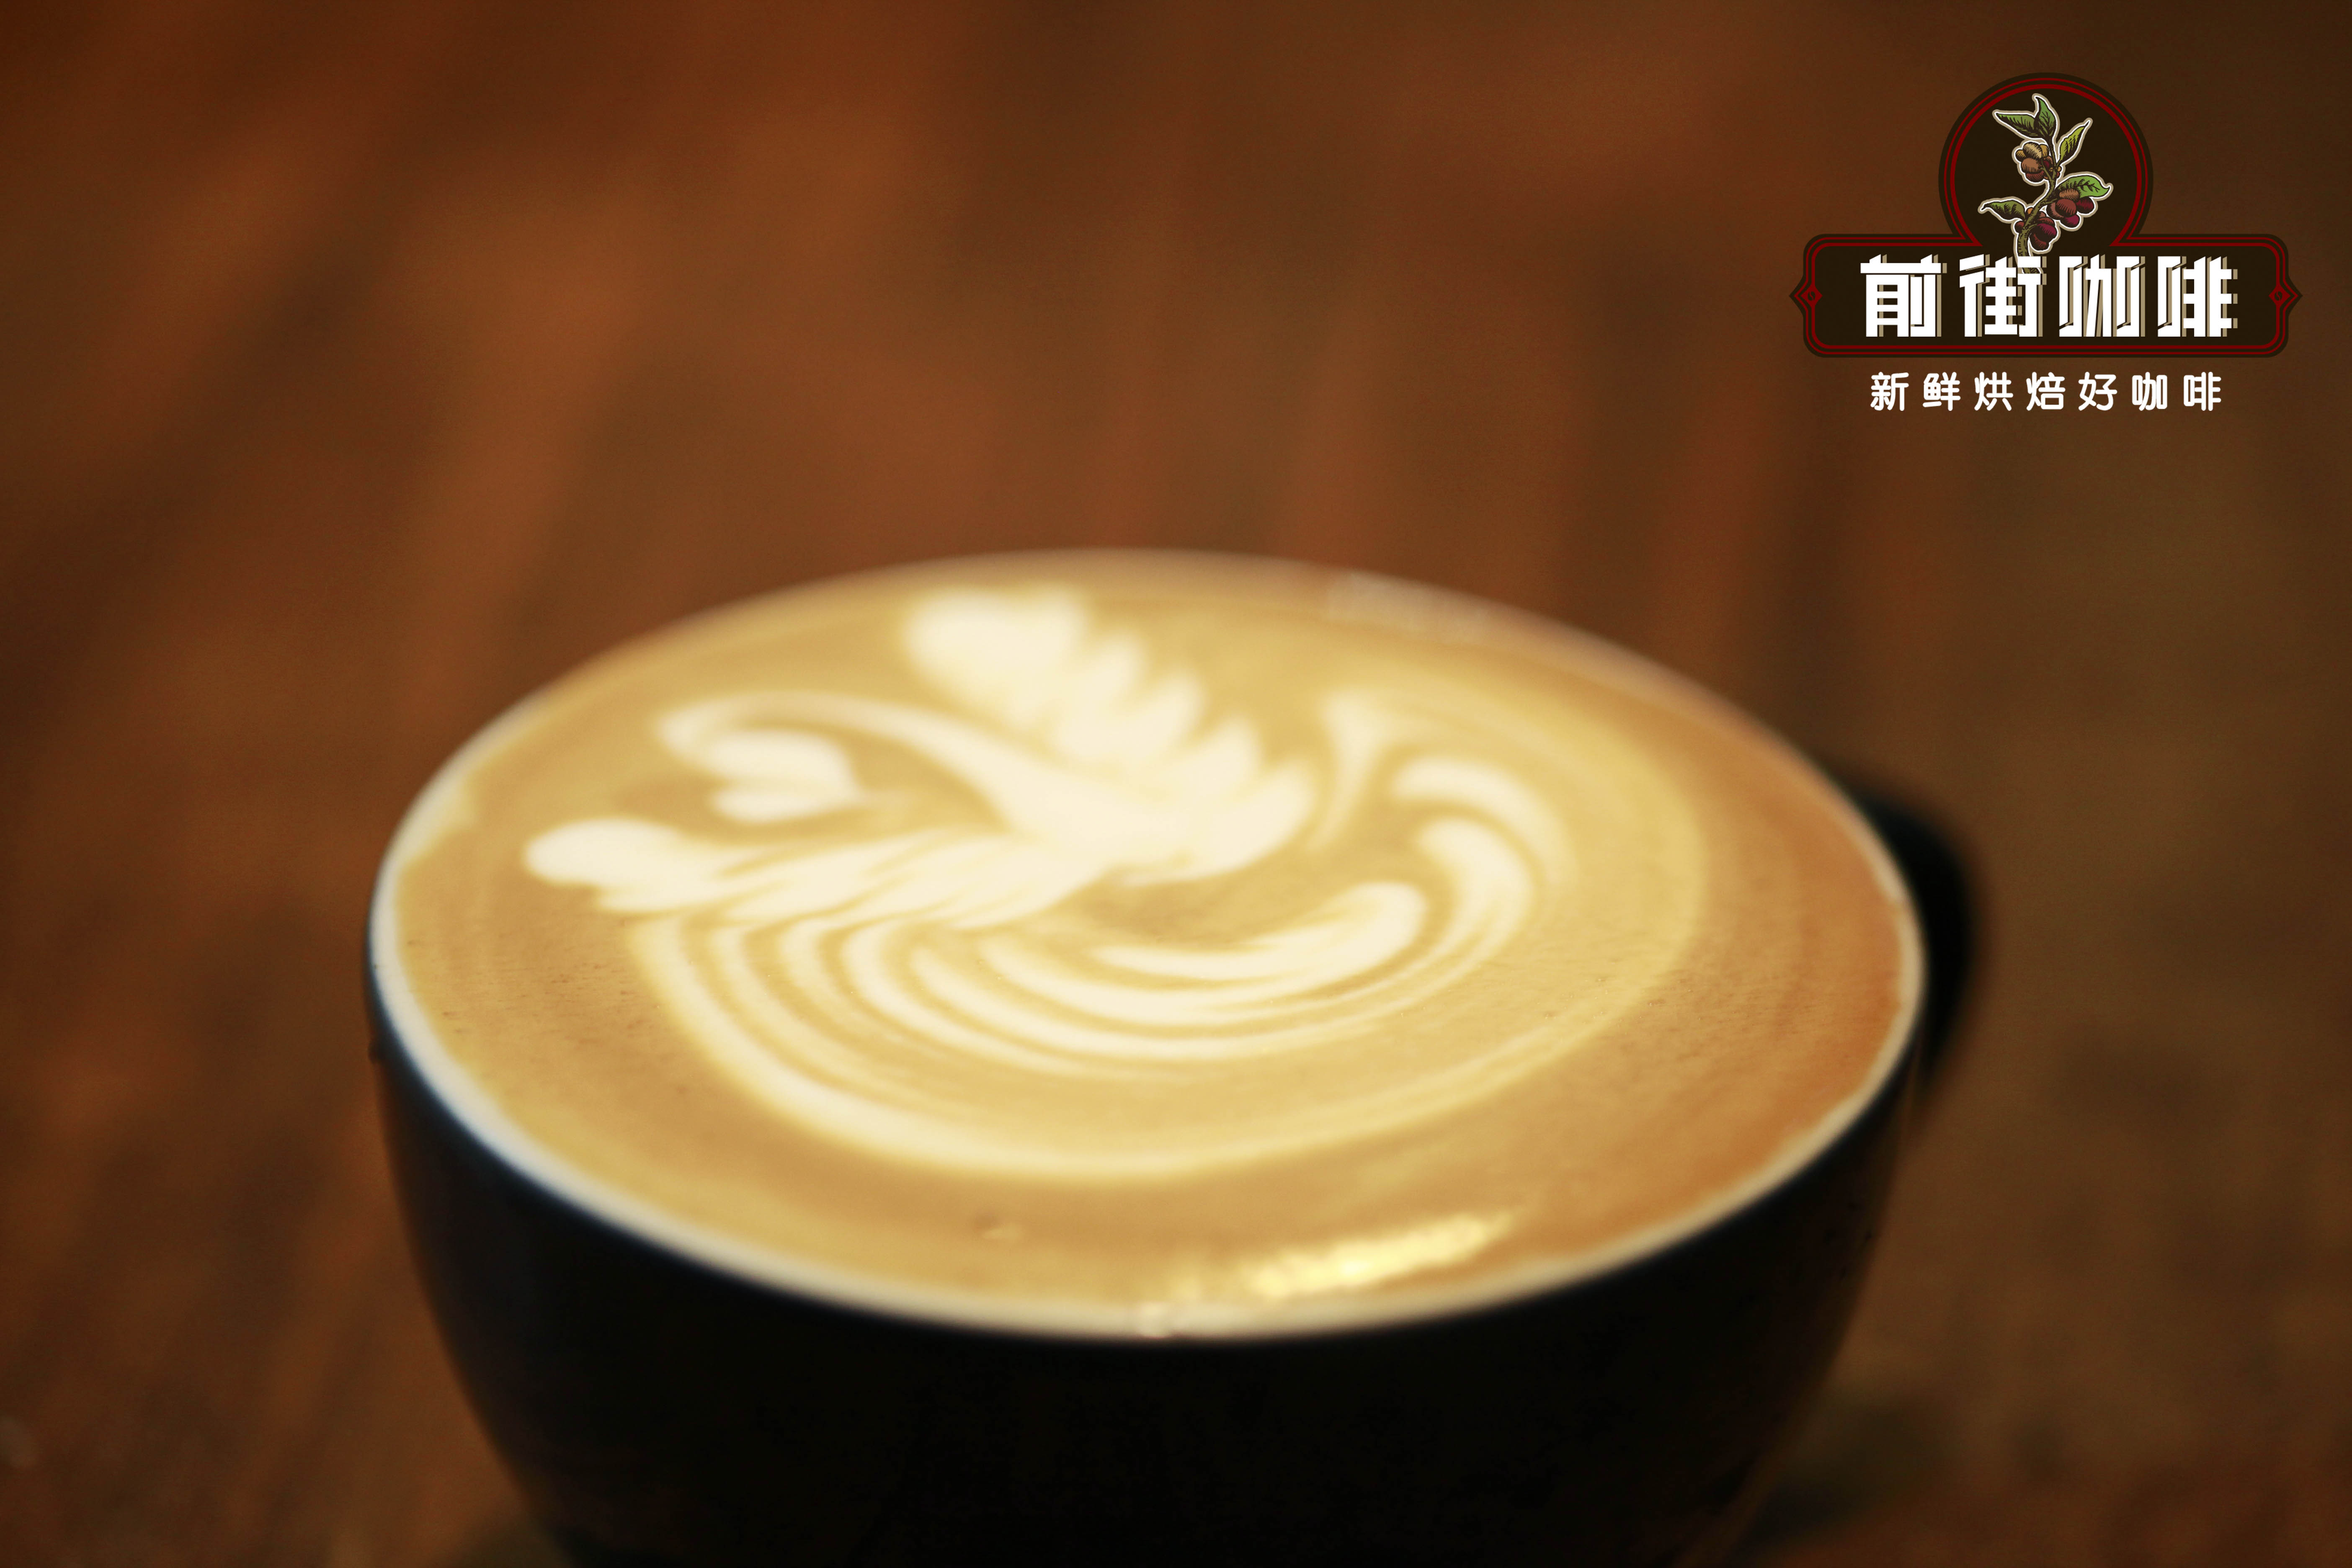
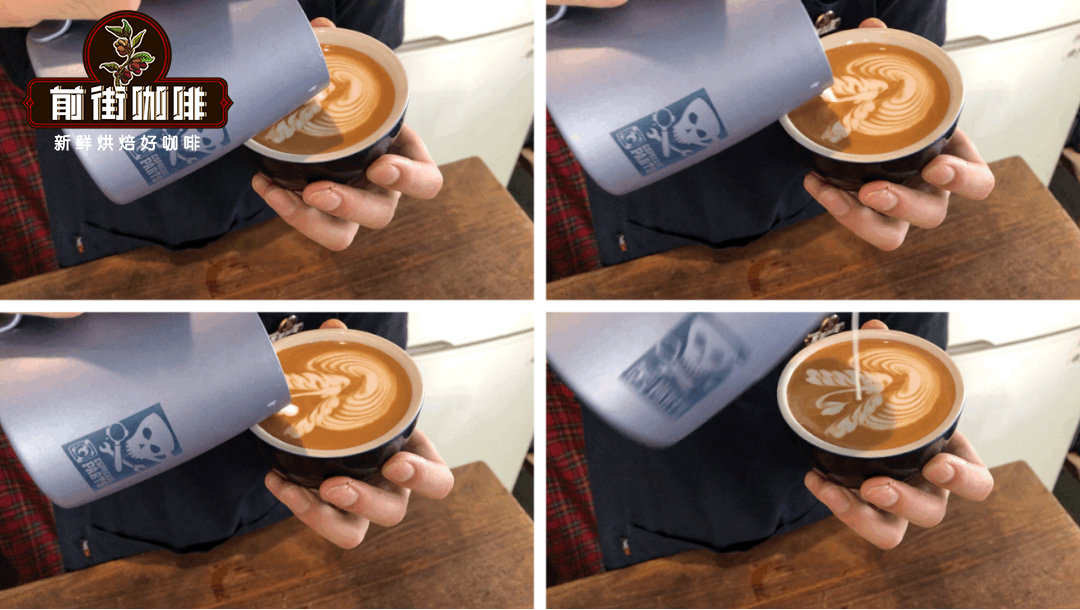
First, let's look at the finished product. This is a very simple double-winged swan pattern, which we can break down into four parts: 1) etched waves, 2) right wing of the swan, 3) left wing of the swan, and 4) swan neck and head.
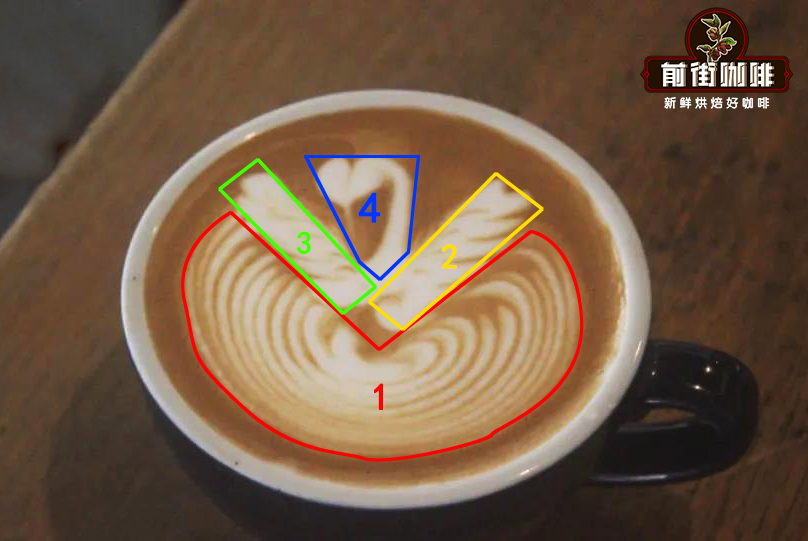
1. Etched Waves
This is very similar to the first etch in the tulip pattern from the previous issue. Use the uniform tapping of the latte art pitcher to create convection with the liquid surface, forming wave-like etched patterns.
When the cup is 40% full, begin uniform swaying from the center point while slowly moving the pitcher spout inward, pushing to the center and then lifting the pitcher.
2-3. The Swan's Double Wings
The swan's double wings can actually be seen as a variation of the wheat pattern. Without creating convection, find the starting point and begin with small, uniform swaying movements while pulling the pitcher backward. Then, lift the pitcher spout and return to one side of the wheat pattern back to the starting point to finish. The order of steps 2 and 3 can be interchanged based on personal preference.
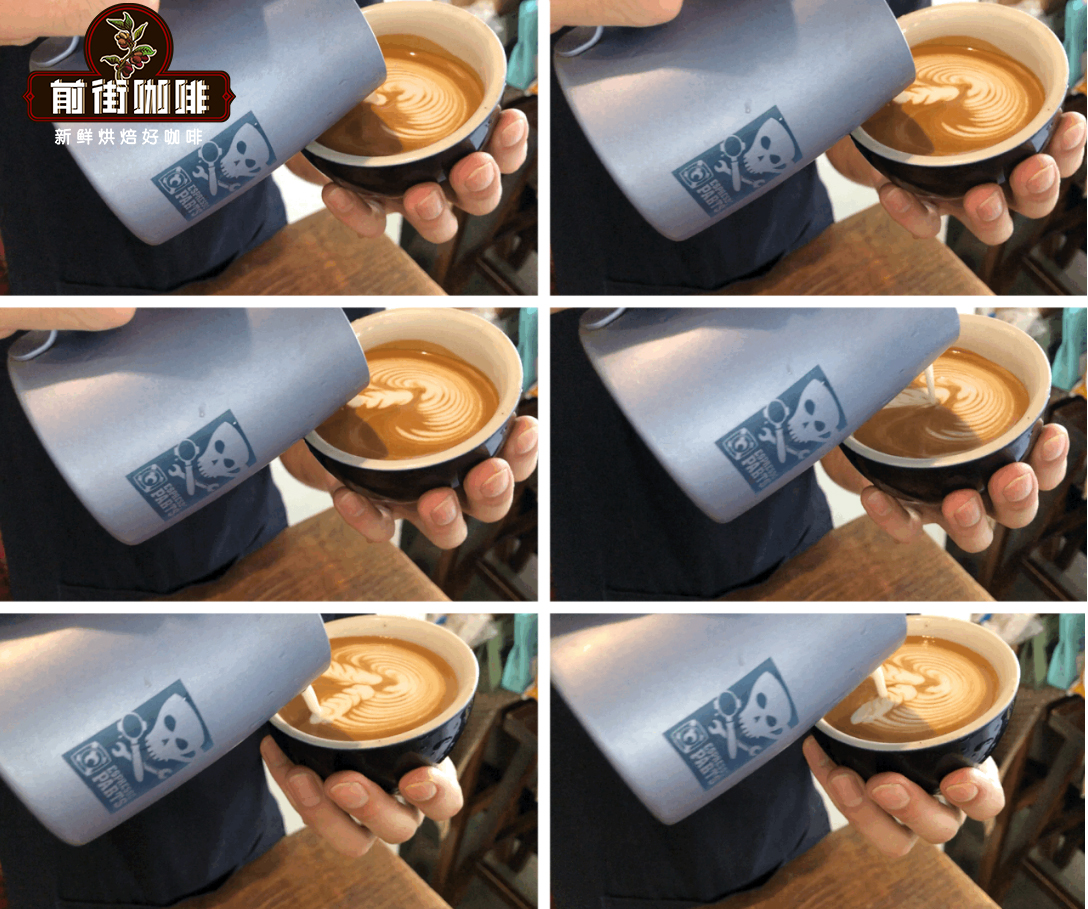
4. Swan Neck and Head
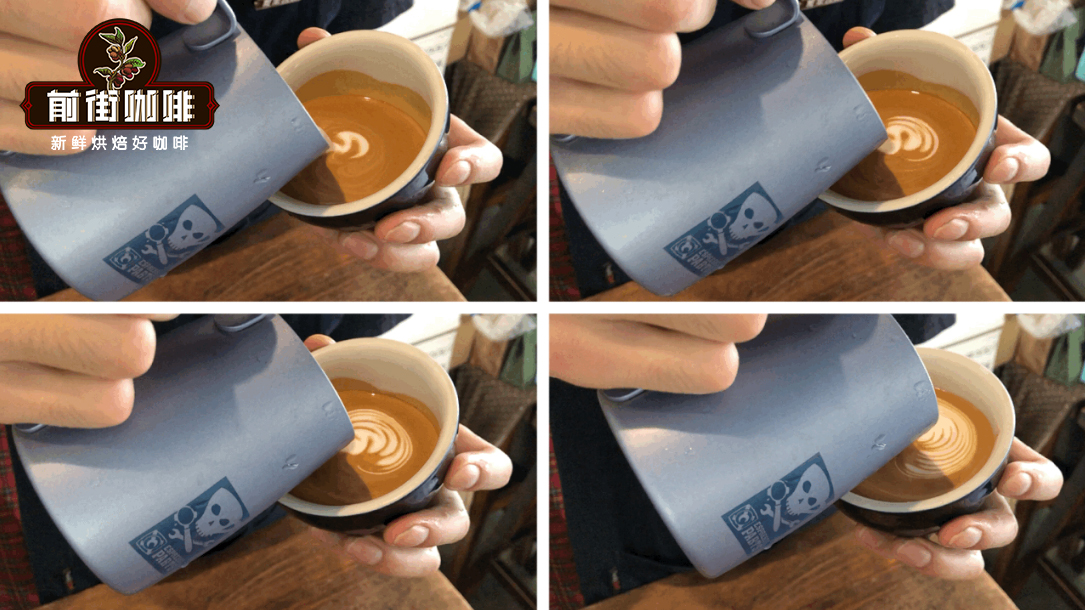
This is the final crucial stroke, which can be understood by breaking it down. First, the swan neck is truly drawn on the coffee surface using milk foam as a "pen" - in other words, this final stroke is primarily milk foam with minimal milk content (which is why you sometimes see baristas easily create a swan head even when the cup appears full). The swan head resembles a small heart - lower the pitcher spout at the end, release some foam to form a slightly larger white foam dot, then lift high to finish.
Important Notes
1. Don't leave too much milk in the pitcher, as one common reason for failing to create the swan neck is having too much milk in the pitcher, causing you to pour mostly milk rather than foam when drawing the neck, resulting in an unnaturally thin swan neck.
2. The milk foam shouldn't be too thick, as three out of the four steps in creating the double-winged swan require highly flowable foam for etching. If the foam is too thick, the result will appear bloated at best, or fail to form the pattern at worst.
3. If the liquid surface becomes dirty or you're unable to create the wings during the wing stage, it's likely that the milk foam isn't fine enough, requiring improvement in your milk steaming technique.
FrontStreet Coffee is a long-established specialty coffee roaster in Guangzhou China, selling freshly roasted beans from its own farm in Yunnan as well as dozens of carefully selected single-origin beans from around the world for both pour-over and espresso. The products deliver consistently excellent quality and great value, with shipping within 24 hours. Guangzhou’s FrontStreet Coffee shop is recommended by many coffee lovers, and the beans are now available online at the Tmall 。
Important Notice :
前街咖啡 FrontStreet Coffee has moved to new addredd:
FrontStreet Coffee Address: 315,Donghua East Road,GuangZhou
Tel:020 38364473

- Prev
The Relationship Between Pour Over Coffee Flow and Circling Speed? How to Brew Hanayotsuki Coffee?
In the process of pour over coffee technique, the size of water flow and circling speed are often unavoidable factors. FrontStreet Coffee previously tested the effects of water flow and circling speed on coffee separately when discussing techniques! When other factors remain constant, a small water flow prevents the liquid level from rising too high, resulting in a slightly thicker coffee bed
- Next
Sun-Dried Yirgacheffe Autumn Sakura Coffee Bean Origin Story Introduction_Is Sun-Dried Yirgacheffe Autumn Sakura Coffee Delicious
Professional coffee knowledge exchange For more coffee bean information Please follow Coffee Workshop (WeChat official account: cafe_style) Yirgacheffe Coffee - Autumn Sakura. Pour-over. The aroma of mixed Earl Grey tea, followed by the sweet and sour texture of cherry and lemon on the tongue, with a hint of sweet chamomile in the aftertaste. In this cup of Autumn Sakura, a 20-year-old girl captures the passionate joy of berries, while a 40-year-old gentleman can also find satisfaction in the aftertaste
Related
- How to make bubble ice American so that it will not spill over? Share 5 tips for making bubbly coffee! How to make cold extract sparkling coffee? Do I have to add espresso to bubbly coffee?
- Can a mocha pot make lattes? How to mix the ratio of milk and coffee in a mocha pot? How to make Australian white coffee in a mocha pot? How to make mocha pot milk coffee the strongest?
- How long is the best time to brew hand-brewed coffee? What should I do after 2 minutes of making coffee by hand and not filtering it? How long is it normal to brew coffee by hand?
- 30 years ago, public toilets were renovated into coffee shops?! Multiple responses: The store will not open
- Well-known tea brands have been exposed to the closure of many stores?!
- Cold Brew, Iced Drip, Iced Americano, Iced Japanese Coffee: Do You Really Understand the Difference?
- Differences Between Cold Drip and Cold Brew Coffee: Cold Drip vs Americano, and Iced Coffee Varieties Introduction
- Cold Brew Coffee Preparation Methods, Extraction Ratios, Flavor Characteristics, and Coffee Bean Recommendations
- The Unique Characteristics of Cold Brew Coffee Flavor Is Cold Brew Better Than Hot Coffee What Are the Differences
- The Difference Between Cold Drip and Cold Brew Coffee Is Cold Drip True Black Coffee