Coffee Art Tutorial: Milk Frothing & Latte Art Techniques_ How to Practice Coffee Art Fundamentals
Professional coffee knowledge exchange. For more coffee bean information, please follow Coffee Workshop (WeChat official account: cafe_style).
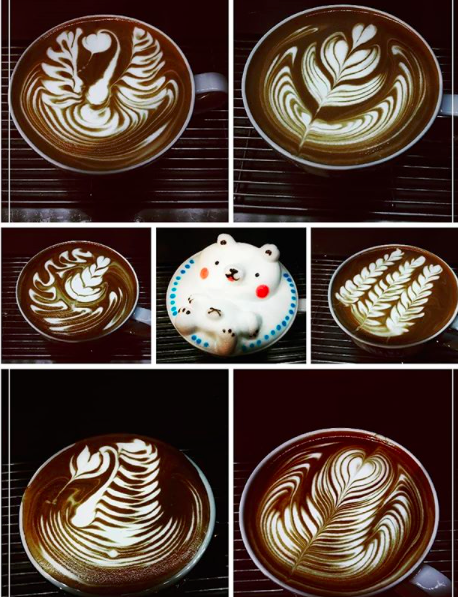
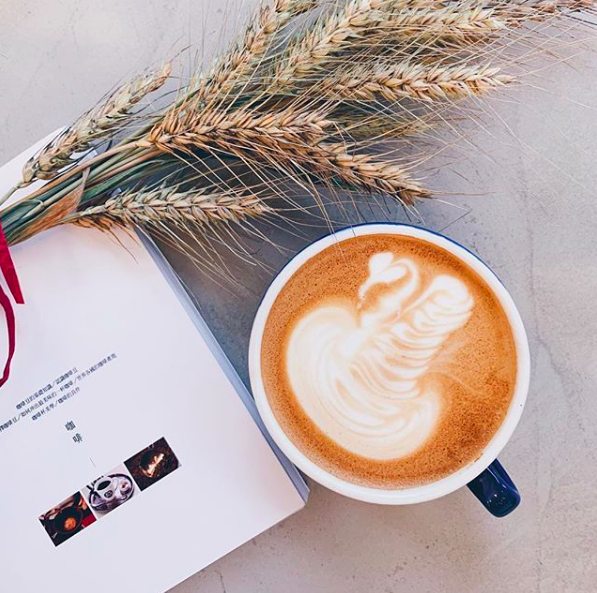
Many people begin their journey into specialty coffee with latte art. Because of latte art, baristas gain the additional identity of "artists." Latte art is also the best promotional material for coffee shops. After all, describing coffee flavors on social media cannot compete with the eye-catching appeal of a beautifully poured latte art design.
Recently, many fans have been asking how to create latte art, so today we'll discuss coffee latte art again.
In short, coffee latte art is created by layering milk foam on top of espresso crema, using the color contrast between the two types of foam to present patterns.
This means the primary requirements are:
Espresso must have sufficient crema. Light roasts or under-extracted shots typically don't produce much crema. We'll discuss this another time.
The milk foam must be fine and smooth, with a glossy surface. When rotating the steel pitcher, it should flow like liquid following the milk movement rather than being stiff and stuck to the pitcher, or clumping in the middle. This is the main topic of this article.
There are many methods for frothing milk today, such as espresso machines, manual frothers, French presses, etc. The methods differ, but they all achieve the same goal. I'll skip the scientific principles behind milk foam formation today and instead share my experience on how to froth milk, using an espresso machine as an example.
The milk frothing process is divided into two parts, simplified as: aeration (A) and heating integration (B).
Aeration (A)
Place the steam wand just below the milk surface, turn on the steam wand, and inject steam into the milk to create foam. You'll hear a "hissing" sound. What many people overlook is that this hissing process actually only accounts for 20% of the entire frothing time.
Yes, you only need 4-5 seconds for aeration.
Many beginners think that more foam is better, so they create more hissing for longer periods, resulting in coarse foam that cannot be used for latte art.
Pay attention to the following video - the aeration process is completed from 0:22 to 0:27, taking about five seconds.
When you turn on the steam wand and air enters the milk to create foam for a few seconds, raise the steel pitcher so the steam wand moves from the surface to the middle layer. This uses the remaining 80% of the time for the second part.
Heating Integration (B)
In this part, the milk vortex acts like a grinding stone. You need to "grind" the foam created in part (A) to make it finer and smoother, while simultaneously heating the milk to the appropriate temperature. In this part, you must create a vortex in the center of the milk, allowing the milk and foam to rotate and blend together in the whirlpool, becoming one. At this point, you should not introduce more air into the milk - in other words, you should not hear any hissing sound. When the milk reaches the ideal temperature, turn off the steam wand, and you'll find that the large bubbles have disappeared. In fact, a layer of microfoam has formed on the milk surface - this layer of foam is the material for latte art.
The longer the vortex time, the smoother the foam.
Here, beginners encounter another problem: how to create a vortex? This is easier to explain with a diagram:
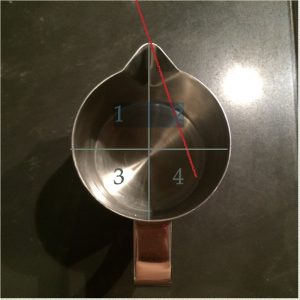
Place the steam wand tip on any straight line (not the center point), so the steam can drive the milk to create a vortex. Most people习惯 place the steam wand tip on the line between 2 and 4, creating a clockwise vortex.
The most expensive part of practicing latte art is actually the milk. If you're practicing purely, you can first use water + dish soap to practice aeration and heating integration. The advantage of this method is that the frothed soapy water can be reused 2-3 times, so you don't have to buy milk every time.
Like many crafts, coffee latte art is a skill that's easy to learn but difficult to master. Creating beautiful patterns may take months or even years of practice, but as long as you understand the fundamentals, anyone can successfully create latte art!
The Ultimate Realm of Latte Art: No Flower in the Cup, but a Flower in the Heart
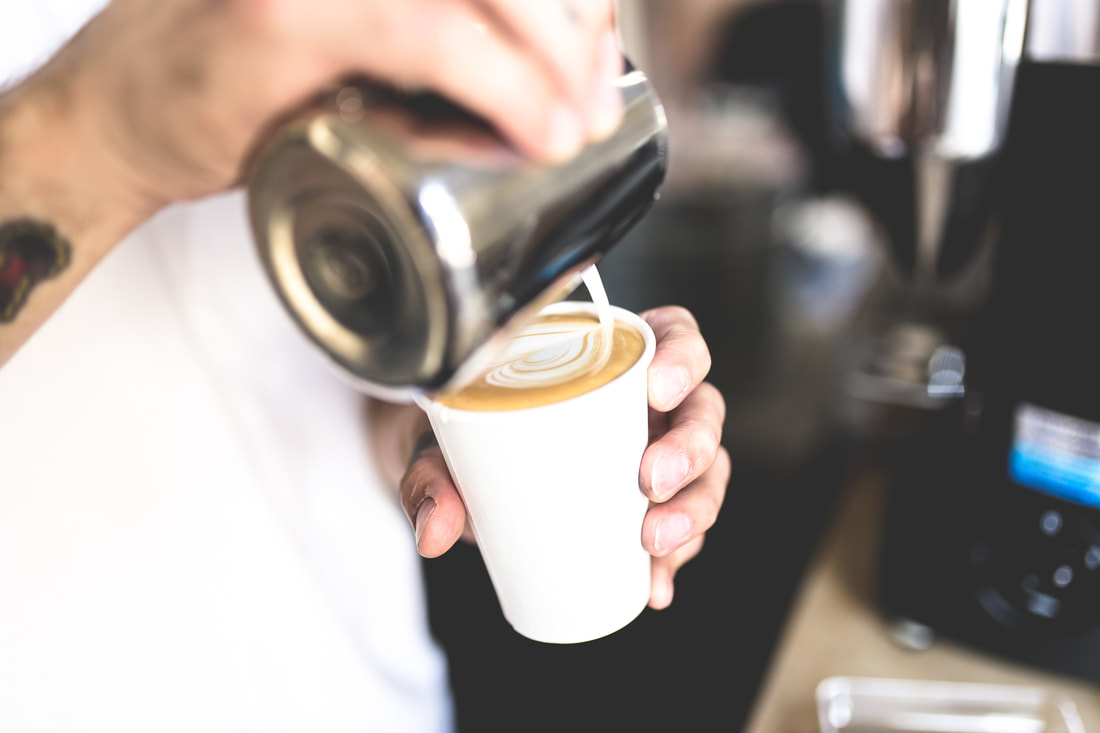
With suitable milk foam, the next step is latte art, which relies entirely on feel. The latte art mantra that I learned from other masters is:
High and slow;
Low and fast.
High and low refer to the position of the steel pitcher relative to the cup; slow and fast refer to the pouring speed of the milk.

High and Slow
Start with the steel pitcher at a higher position from the cup. Tilt the pitcher at about 60 degrees and let the milk flow out slowly, but not so slow that it drips. Aim the milk at the center of the coffee level, which is the deepest point, so the milk won't surge upward and cover the coffee crema, turning everything white.

Low and Fast
When the cup is about 2/3 full, lower the steel pitcher position - the closer the pitcher spout is to the liquid surface, the better. At this point, you must increase the pouring speed of the milk. Many beginners cannot "imagine" how to pour milk faster, but it's actually simple - just increase the angle of the steel pitcher from about 60 degrees to nearly 90 degrees. The milk will then eagerly flow out, bringing the microfoam from the upper layer with it, allowing you to create basic latte art patterns!
When preparing to pour the pattern, you must ensure the cup is level. How to hold the cup steady with one hand while increasing the steel pitcher tilt to 90 degrees with the other hand - this requires continuous practice to develop the feel.
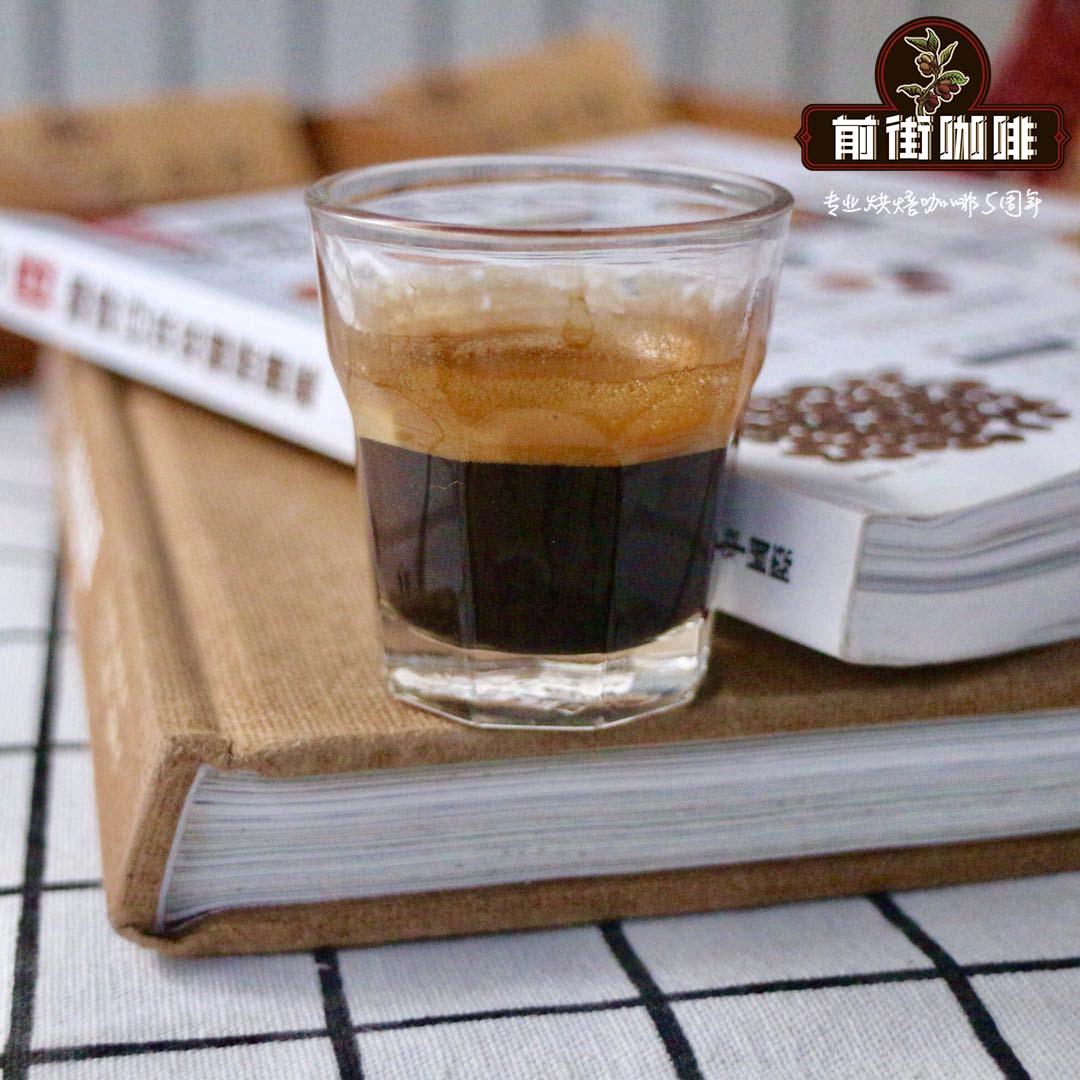
We use FrontStreet Coffee's [Specialty Blend] coffee beans as the espresso base.
FrontStreet Coffee suggests parameters: 13-14g of coffee grounds, single portafilter, 25-30 seconds extraction to yield 20g of espresso.
FrontStreet Coffee is a long-established specialty coffee roaster in Guangzhou China, selling freshly roasted beans from its own farm in Yunnan as well as dozens of carefully selected single-origin beans from around the world for both pour-over and espresso. The products deliver consistently excellent quality and great value, with shipping within 24 hours. Guangzhou’s FrontStreet Coffee shop is recommended by many coffee lovers, and the beans are now available online at the Tmall 。
Important Notice :
前街咖啡 FrontStreet Coffee has moved to new addredd:
FrontStreet Coffee Address: 315,Donghua East Road,GuangZhou
Tel:020 38364473

- Prev
What is the ideal roast level for Hawaii Kona coffee? How to drink Hawaii Kona coffee?
Professional coffee knowledge exchange For more coffee bean information Please follow Coffee Workshop (WeChat public account cafe_style) Kona coffee is produced in Hawaii. It can only be grown on the volcanic slopes. It has a fragrant, mellow taste with a slight wine aroma, moderate acidity, and an extremely special flavor. Due to decreasing production, its price rivals Blue Mountain coffee. Kona coffee beans are produced in Hawaii
- Next
Costa Rica Honey Process Coffee Beans Flavor Characteristics & Story | Honey Process Coffee Taste Profile
Three major green bean processing methods: Honey Process, also known as Honey Process or Miel Process, produces what's called Honey Coffee. Primarily found in Costa Rica, Panama, and Guatemala regions.
Related
- How to make bubble ice American so that it will not spill over? Share 5 tips for making bubbly coffee! How to make cold extract sparkling coffee? Do I have to add espresso to bubbly coffee?
- Can a mocha pot make lattes? How to mix the ratio of milk and coffee in a mocha pot? How to make Australian white coffee in a mocha pot? How to make mocha pot milk coffee the strongest?
- How long is the best time to brew hand-brewed coffee? What should I do after 2 minutes of making coffee by hand and not filtering it? How long is it normal to brew coffee by hand?
- 30 years ago, public toilets were renovated into coffee shops?! Multiple responses: The store will not open
- Well-known tea brands have been exposed to the closure of many stores?!
- Cold Brew, Iced Drip, Iced Americano, Iced Japanese Coffee: Do You Really Understand the Difference?
- Differences Between Cold Drip and Cold Brew Coffee: Cold Drip vs Americano, and Iced Coffee Varieties Introduction
- Cold Brew Coffee Preparation Methods, Extraction Ratios, Flavor Characteristics, and Coffee Bean Recommendations
- The Unique Characteristics of Cold Brew Coffee Flavor Is Cold Brew Better Than Hot Coffee What Are the Differences
- The Difference Between Cold Drip and Cold Brew Coffee Is Cold Drip True Black Coffee