Siphon Coffee: How to Use a Siphon Brewer and Master Coffee Grounds Technique
For professional coffee knowledge exchange and more coffee bean information, please follow Coffee Workshop (WeChat public account: cafe_style).
The siphon pot not only has an elegant appearance but its operation is also a visual delight. Siphon coffee is best at expressing coffee flavors and highlighting the taste differences between various single-origin coffees, resulting in richer and more mellow flavors. Due to heat source heating, the coffee creates high, medium, and low temperature differences during brewing, producing rich flavor variations.
Brewing coffee with a siphon pot is a test of technique, with strict requirements for time and water temperature. Just as there are several stirring methods for siphon coffee, the way coffee grounds are added is also particular. The most common methods are adding grounds first and adding grounds later, also known as bottom addition and top addition. These two addition methods have no right or wrong distinction—different methods simply have different advantageous control points. Now we'll use Yirgacheffe Wega as an example to brew coffee using both methods.

Working Principle
The main principle of coffee extraction with a siphon pot is achieved through pressure difference. First, heat the water in the lower chamber to boiling, then insert the upper chamber, creating a high-pressure state in the lower chamber. Due to the pressure difference between the lower and upper chambers, hot water rises to mix with coffee grounds in the upper chamber for extraction. After extraction ends, remove the heat source from the lower chamber, causing the pressure difference between the lower and upper chambers to instantly decrease. The siphon effect between the upper and lower chambers promotes the return of coffee extract to the lower chamber. To speed up the return of coffee extract, you can wipe the lower chamber with a wet cloth, which further reduces the pressure difference and accelerates the return flow.
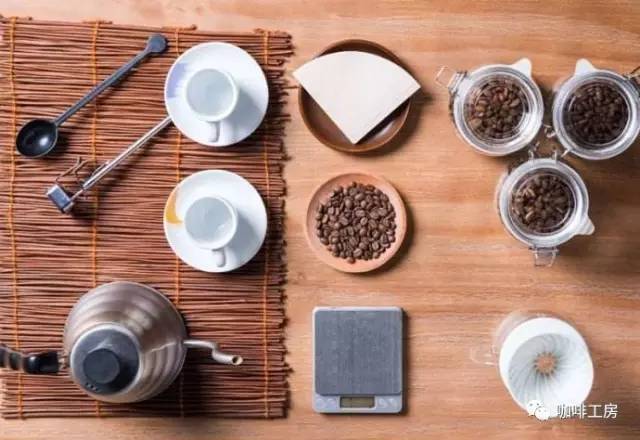
Preparation
1. Add water to the siphon pot's lower chamber. For making two servings of coffee, add water to 5mm above the 2-cup mark on the siphon pot. Since the grounds absorb water, you need to add slightly more water if you want to make two servings of coffee liquid.
2. Grind coffee beans, prepare 25g of coffee grounds (approximately 15g for single cup), using medium grind (Fuji mill setting 4), meaning particles are between white sugar and brown sugar in size.
3. After adding water, remember to wipe the outside of the lower chamber dry with a soft cloth, leaving no water stains to prevent the pot from bursting during heating.
4. Fill the lower chamber with hot water and heat with a gas stove. Generally, single-serve coffee uses about 180g of water, double serving uses 300g (ground-to-water ratio 1:12).
5. Once the above steps are completed, start heating the water.
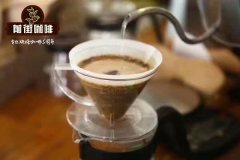
When the water is heated to brewing temperature, install the filter cloth in the upper chamber. Be sure to hook it as shown in the picture below! Otherwise, when water rushes from the lower chamber to the upper chamber, the filter will be pushed open.

Adding Grounds First
Adding grounds first means placing coffee grounds in the upper chamber first, then letting water rise to the upper chamber. This method requires higher control over heat intensity—you need to adjust the flame to appropriate size while water rises to avoid excessive bubbles that would disrupt the blooming. Additionally, when adding grounds first, it's best to pre-brew a pot of water to test whether the filter position is centered; if not centered, it will also generate continuous large bubbles. The advantage of adding grounds first is that it provides a gradual temperature and moisture process for the coffee grounds, reducing the number of initial stirs and better facilitating blooming effects. However, temperature control is poorer, so timing the insertion of the upper chamber into the lower chamber is particularly important. In other words, adding grounds first may seem simple, but it actually requires more practical experience compared to adding grounds later.
Technique (Using Washed Yirgacheffe Wega)
(1) When the lower chamber water temperature reaches 90°C, pour in the grounds and straighten the upper chamber;
(2) After water completely saturates the coffee grounds, perform the first stir and start timing. Adjust the flame to appropriate size as water nearly reaches the upper chamber;
(3) After 30 seconds of blooming, perform the second stir;
(4) Around 50 seconds, perform the final stir. After stirring, remove the heat source and let the coffee liquid return.

Adding Grounds Later
Contrary to adding grounds first, adding grounds later means waiting until water from the lower chamber has completely risen to the upper chamber before adding coffee grounds. Before adding grounds later, we have sufficient time to reduce the heat source flame to just enough to support the upper chamber water without falling back. Then adjust the lower filter position to keep it centered, and finally wait a few minutes to let the water temperature drop slightly. Generally, when water from the lower chamber first rises to the upper chamber, the temperature will be around 90-95°C, so we can let the water temperature drop by 2-5 degrees before adding coffee grounds. Generally, higher water temperatures result in more bitter coffee, even burnt flavors, while lower temperatures highlight acidity and aroma, but too low temperatures can cause under-extraction, reducing body and making acidity very sharp. Therefore, selecting an appropriate water temperature for adding coffee grounds based on the coffee being extracted is crucial.
Technique (Using Washed Yirgacheffe Wega as Example)
(1) When water temperature reaches 90°C, straighten the upper chamber. When water rises to the upper chamber, pour in coffee grounds, stir, and start timing;
(2) Adjust flame to appropriate size. After 30 seconds of blooming, perform the second stir;
(3) Around 50 seconds, perform the third stir. After stirring ends, remove the heat source and let the coffee liquid return.
Conclusion

Adding Grounds First emphasizes high cleanliness, abundant and long-lasting aroma, with prominent lemon acidity, citrus, and white grape juice flavors. However, it requires high precision in control—poor control can easily lead to under-extraction or significant over-extraction deviations.
Adding Grounds Later produces richer flavors, with more prominent mid-palate caramel and honey notes. Cleanliness is relatively weaker, aroma is less pronounced and upward, and temperature control is particularly important.
Everyone should try both addition methods. After accumulating certain experience, you can even choose different addition methods based on different coffee bean characteristics or extraction requirements.

Image source: FrontStreet Coffee (FrontStreet Coffee)
FrontStreet Coffee is a long-established specialty coffee roaster in Guangzhou China, selling freshly roasted beans from its own farm in Yunnan as well as dozens of carefully selected single-origin beans from around the world for both pour-over and espresso. The products deliver consistently excellent quality and great value, with shipping within 24 hours. Guangzhou’s FrontStreet Coffee shop is recommended by many coffee lovers, and the beans are now available online at the Tmall 。
Important Notice :
前街咖啡 FrontStreet Coffee has moved to new addredd:
FrontStreet Coffee Address: 315,Donghua East Road,GuangZhou
Tel:020 38364473

- Prev
Coffee Beginner's Guide: How to Brew Coffee with Hario V60 Dripper?
Professional coffee knowledge exchange For more coffee bean information Please follow Coffee Workshop (WeChat official account: cafe_style) When we make pour-over coffee, if we simply pour hot water into the filter cup, this action can only be described as letting the ground coffee soak in hot water, not truly brewing coffee. Today we're sharing 6 basic pour-over technique details for an enjoyable
- Next
Is Americano Pour-Over Coffee? The Difference Between Americano and Espresso Coffee
For professional coffee knowledge discussions and more coffee bean information, please follow Coffee Workshop (WeChat public account: cafe_style). Italians call coffee made with espresso as a base and then diluted with water "Americano," but in reality, the true Americano—the coffee most commonly consumed by Americans—is actually drip coffee.
Related
- How to make bubble ice American so that it will not spill over? Share 5 tips for making bubbly coffee! How to make cold extract sparkling coffee? Do I have to add espresso to bubbly coffee?
- Can a mocha pot make lattes? How to mix the ratio of milk and coffee in a mocha pot? How to make Australian white coffee in a mocha pot? How to make mocha pot milk coffee the strongest?
- How long is the best time to brew hand-brewed coffee? What should I do after 2 minutes of making coffee by hand and not filtering it? How long is it normal to brew coffee by hand?
- 30 years ago, public toilets were renovated into coffee shops?! Multiple responses: The store will not open
- Well-known tea brands have been exposed to the closure of many stores?!
- Cold Brew, Iced Drip, Iced Americano, Iced Japanese Coffee: Do You Really Understand the Difference?
- Differences Between Cold Drip and Cold Brew Coffee: Cold Drip vs Americano, and Iced Coffee Varieties Introduction
- Cold Brew Coffee Preparation Methods, Extraction Ratios, Flavor Characteristics, and Coffee Bean Recommendations
- The Unique Characteristics of Cold Brew Coffee Flavor Is Cold Brew Better Than Hot Coffee What Are the Differences
- The Difference Between Cold Drip and Cold Brew Coffee Is Cold Drip True Black Coffee