Pour-Over Coffee Beginner Notes - Sharing Insights on Coffee Beans, Water-to-Coffee Ratio, Grinding, Water Temperature, Equipment, and Pour-Over Steps
Professional coffee knowledge exchange and more coffee bean information, please follow Cafe_Style (WeChat official account: cafe_style)
Pour-Over Coffee Tutorial, Videos, Techniques & Ratios
I started researching coffee at the beginning of the year because of a bag of coffee beans given by my mother's friend.
Although I liked the aroma of coffee, I never enjoyed drinking it.
It wasn't until I started experimenting with pour-over that I discovered coffee could be so delicious, with so many layers and flavors.
The aroma of successfully brewed coffee is incredibly relaxing and brings joy, and I started drinking coffee in 2017.
(Limited to pour-over coffee and siphon coffee - other methods still taste bad...)
Pour-Over Experience
While pour-over coffee is easy to start with, making good coffee requires skill.
Slight differences in technique result in completely different flavors.
This is precisely why pour-over is the brewing method that allows for the most variation in coffee.
Most of my experience comes from online tutorials and discussions, then adjusted through my own brewing experiments and conversations with friends.
I'm still a beginner, so please feel free to correct and discuss any errors.
Many factors affect coffee taste: variety, altitude, processing method, bean selection, roasting, grinding, water temperature, water quantity, time, etc.
During the pour-over process, each step influences the others, so let's first establish the easily controllable variables:
Coffee Beans
Coffee beans reach their peak flavor 7 days to two weeks after roasting.
Fresh coffee beans continuously release carbon dioxide.
The best storage method is a coffee bag with a one-way valve, which should be properly sealed to squeeze out air and prevent oxidation.
Once ground, coffee beans begin to lose aroma and carbon dioxide, oxidizing faster and becoming stale.
Without carbon dioxide to create gaps between coffee particles, water flow becomes obstructed, leading to over-extraction and bitterness.
Therefore, the freshest approach is grinding immediately before brewing.
Generally speaking:
Light roast beans absorb water slowly, resulting in more acidic coffee with higher caffeine content.
Dark roast beans absorb water quickly, resulting in more bitter coffee with lower caffeine content.
Water-to-Coffee Ratio
Weigh the coffee beans.
My most commonly used coffee-to-water ratio is 1:15.
20 grams of coffee grounds to brew 300ml of coffee.
This is probably the most common ratio, though you can slightly reduce the coffee amount for larger quantities.
Some say the best ratio is 16 grams of coffee to 240ml of coffee, but I don't notice much difference...
Additionally, some people drink strong coffee at 1:10, while others prefer weak coffee at 1:20.
Adjust according to your personal preference.
Grinding
The weighed coffee beans need to be ground.
The recommended grind size for pour-over is similar to #2 sugar crystals, approximately 0.7-1mm particles.
Finer particles extract more easily but can also obstruct water flow, leading to over-extraction and bitterness.
Even extraction results in more distinct flavor layers.
Pour-over grinding emphasizes uniformity - the fewer fine particles, the better.
More meticulous brewers use filters to remove unwanted fine particles.
Also, the silver skin after grinding - too much silver skin can cause astringency, but the impact is minimal, so most people don't bother with it.
Grinders:
There are electric grinders and manual grinders.
Online recommendations for electric grinders are mostly Little Flying Eagle or Little Flying Horse.
The ghost tooth version is more uniform with fewer fines, but also more expensive.
For great value manual grinders, there's the Mainland Anonymous 2 or Helor 101.
Though considered great value, they're not much cheaper than the Little Flying Eagle or Little Flying Horse...
They're considered value-for-money because high-quality European and American manual grinders are even more expensive...
If you don't need to grind large quantities, a manual grinder will suffice.
I purchased the Anonymous 2 manual grinder, which online users say is more uniform than electric grinders.
The Anonymous 2 comes in single-origin and espresso versions.
While the espresso version can grind both single-origin and espresso, making it more versatile, the single-origin version supposedly has fewer fines and is more uniform.
I bought the November 2016 new model single-origin version.
The official recommendation for pour-over setting is one turn back.
I go back one and a half turns, producing coffee grounds about 1mm in diameter.
I prefer coarser particles for smoother water flow (afraid of bitterness and astringency).
I usually clean my grinder with a blower and brush.
Only when changing beans do I disassemble it for cleaning (the Anonymous 2 central column isn't stainless steel - avoid water).
Regarding silver skin: supposedly, electric grinders cause silver skin to adhere to the grinder interior due to static electricity and rotation, leaving less silver skin in the coffee grounds. Manual grinders require post-grinding processing.
Personally, I place the coffee grounds in a bowl and stir it like a frying pan.
After stirring, the lighter silver skin rises to the surface, then I use a blower to gently blow from a distance.
Maintain just enough strength to blow away the silver skin, then continue stirring while blowing.
This method is inefficient, requiring many stirs and blows, and also blows away about 1g of coffee grounds.
Personally, I don't notice much difference - I just find the silver skin visually unappealing...
Water Temperature
Brewing water temperature varies depending on coffee bean roast level.
Currently I use:
Light roast: 93°C
Medium roast: 90°C
Dark roast: 87°C
Online recommendations are:
Light roast: 90-92°C
Medium roast: 85-87°C
Dark roast: 82-85°C
I use higher temperatures because I use coarser coffee grounds.
Previously, I used a generic manual grinder that produced very uneven and coarse grounds, requiring about 3 degrees higher temperature.
Therefore, water temperature should be adjusted according to coffee ground coarseness.
Thermometer:
Initially, I used a dial probe thermometer, which was somewhat slow to respond and had several inaccurate experiences (freshly boiled water showing 8X degrees)...
Later, I switched to a digital probe thermometer, commonly known as "Black Tofu" (or "White Tofu"), which is much more accurate.
Dripper & Filter Paper
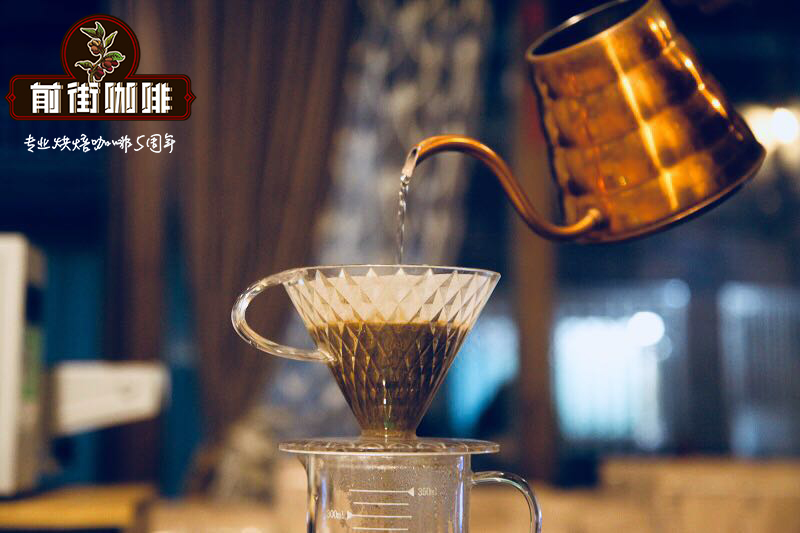
I use a Hario V60 02 dripper with Hario filter paper.
The ribs (spiral raised lines) on the dripper relate to water flow smoothness during pour-over.
The technique for folding filter paper is to first fold the seam, then unfold and press slightly.
This way, when placed in the dripper, the thicker seam will fit snugly and won't curl up.
Pre-wet the filter paper with hot water to remove paper taste or bleaching agents.
Pour-Over Kettle
Pour-over kettles are divided into gooseneck kettles and narrow-spout kettles.
Gooseneck kettles supposedly provide smoother water flow, but I haven't had the chance to use one yet.
Narrow-spout kettles make it easier to pour small streams of water. I bought a Bluebird kettle.
At the time, I didn't do much research - just bought it because I liked the design.
Only recently did I discover the advantage of this Bluebird kettle is its spout design.
Regardless of water quantity, it allows water to fall vertically at 90 degrees, which is very convenient.
Most narrow-spout kettles create arced water streams when water volume is high due to spout angle, making it harder to control where the water falls.
However, regardless of the pour-over kettle type, the most important thing is that it feels comfortable to use.
Practice more until you can control water output arbitrarily and maintain stable circular motions.
I find the most difficult part is stable dripping.
I'm clumsy and easily nervous. During practice, I can maintain stable dripping, but during actual brewing, I often over-control the water flow, causing it to break into intermittent thin streams...
This causes my brew flavors to vary each time...
2017 Final Coffee Equipment
Pour-Over Steps
General Pour-Over Method:
1. Weigh coffee beans, grind coffee beans.
2. Fold filter paper, unfold filter paper, place in dripper.
3. Use hot water to rinse away paper taste or bleaching agents, and preheat the coffee pot with hot water.
4. Pour coffee grounds into the dripper, gently tap the side of the dripper to level the coffee bed, place the dripper on the coffee pot.
5. Depending on roast level, use 85-93°C hot water. Start pouring from the center of the coffee grounds and slowly spiral outward, then back to the center.
(Don't pour on the filter paper at the outer edge). After pouring an amount equal to or slightly more than the coffee grounds, stop pouring.
Fresh coffee grounds release carbon dioxide when they encounter hot water, puffing up like a castle. Bloom for 30 seconds.
6. After blooming, continue pouring to brew. The water stream size should gradually increase over time.
Start from the center and slowly spiral outward, then back to the center, repeating back and forth. Don't pour on the filter paper at the maximum circle.
The coffee grounds will continue to release carbon dioxide, creating gaps between particles and helping water flow smoothly without pooling.
Try not to let the puffed-up coffee bed collapse to avoid blockage.
If the liquid level rises too quickly, it means too much water is being poured too fast, or the coffee grounds are blocking. Slow water flow leads to over-extraction and bitterness.
The pouring process can be divided into continuous and interrupted pouring:
A. Interrupted pouring method:
Stop pouring when the liquid reaches a certain height, wait until the level drops close to the coffee bed (don't let it run dry).
Then perform a second or third pour, extending extraction time for full extraction. The flavor will be stronger and more bitter.
B. Continuous pouring method:
Maintain the coffee bed at a certain height. Water flow needs to be smooth and steady without coffee ground blockage. This results in shorter brewing time.
Less likely to over-extract and become bitter, resulting in cleaner flavor.
7. When the coffee in the pot reaches the desired amount, remove the dripper (don't let the foamy, impure coffee liquid in the dripper flow into the pot).
Shake the coffee pot or stir the coffee liquid, then let it rest.
* The total time is recommended not to exceed 2.5 minutes. Brewing too long combined with dropping water temperature will start extracting undesirable flavors *
There are many other different pour-over methods:
Japanese KONO orthodox method (dripping for the first half, only circling at the end, total time up to 6 minutes).
Kanazawa Masayuki method (normal blooming first, then dripping).
Stirring method (stir during blooming to accelerate extraction, results in stronger flavor, requires shorter total time).
YouTube has many demonstration videos by fellow enthusiasts.
Many people online share their flavor experiments.
I haven't researched these too deeply due to my lack of skill.
I only use one brewing method that suits my taste, which I'll describe later.
Blooming
This is the most important and influential step.
The amount of water and time for blooming are crucial.
Try several times and adjust according to your desired flavor profile.
Change blooming time and water amount to achieve desired concentration.
Blooming allows coffee grounds to absorb water, release carbon dioxide, and begin activation.
Only after complete release can they absorb water again and release substances.
However, the normal blooming process doesn't completely release everything.
During subsequent brewing, they will continue to release, possibly not achieving optimal extraction.
This is probably the purpose of dripping.
Slow dripping allows water to slowly diffuse and infiltrate, extending time for complete release from coffee grounds.
The entire dripping process is part of blooming.
However, due to extended time, coffee will release impurities.
To reduce impurity release, try not to disturb the coffee grounds.
Only use central dripping for slow infiltration, and the final circular extraction also requires gentler water flow.
Brewing
After activation, coffee grounds use dialysis to transfer substances into the water.
Therefore, not letting coffee grounds emerge above the water surface during brewing is the most efficient extraction method.
Interrupted pouring mainly extends extraction time, resulting in stronger flavor but also more astringency.
Continuous short brewing results in cleaner flavor.
This is also why siphon brewing, which only takes one minute, has clean flavor.
Some mention that inconsistent, intermittent water flow results in uneven flavor but higher sweetness.
My own experiments indeed show higher sweetness, but often accompanied by astringency and off-flavors.
Coffee Wall/Coffee Bed
Often see people believe that a beautiful coffee wall after brewing represents successful brewing.
Forming a coffee wall does make water flow smoother (reducing central coffee grounds to avoid blockage).
For this reason, some people only circle in the center to create a coffee wall.
But brewing a coffee wall doesn't necessarily mean good coffee.
Personally, I believe the most important factors are:
Smooth water flow and stable pouring.
Personal Pour-Over Notes (Dripping Variation):
1. 20g grounds to brew 300ml coffee. Weighing beans, grinding, filter paper, dripper, preheating, adding grounds, leveling, heating water - all as above.
2. Start dripping from the center of the coffee grounds. It doesn't matter if the dripping isn't perfect - the focus is on stable, minimal water flow.
Use the smallest possible water amount to maintain moisture in the grounds without drying out, but don't pour too aggressively.
3. Observe the coffee grounds' wetting state and adjust dripping position. When all grounds are wet.
After a thin layer of coffee liquid drips into the lower pot, switch to a thin stream circling the size of a one-dollar coin for 4 seconds, then stop. Bloom for 5 seconds.
* From the start of dripping to the end of blooming, try not to exceed 1 minute 30 seconds *
4. After blooming, continue central dripping for a while, then start circling with a thin stream, gradually expanding the circle range over time.
5. Expand the circle from one-dollar, five-dollar coin size to ten-dollar, fifty-dollar. It's okay not to circle the outermost edge.
Don't stop pouring, but also try not to let the coffee bed get too high (don't use too large a water stream).
6. When the last 50ml remains, switch to a large stream for circling. When the desired coffee amount is reached, remove the dripper.
Shake the coffee pot or stir the coffee liquid, then let it rest.
* Total time is recommended not to exceed 3 minutes. Brewing too long combined with dropping water temperature will start extracting astringent flavors *
Through continuous experimentation, this method currently produces coffee that best suits my taste.
Slight acidity, flavor (characteristics), throat feel, and aftertaste are all balanced and appropriately expressed without being bitter or astringent.
The flavor is between traditional circular pour-over and siphon coffee.
However, the problems I encounter due to my lack of skill are:
A. If the initial dripping water flow is unstable (stopping too long then gushing), sometimes it over-extracts, sometimes under-extracts, and the flavor is less smooth.
B. In the later stages of step 5, because the coffee grounds have stopped releasing gas.
Sometimes this causes the coffee bed to collapse and block (this is when a coffee wall is really needed).
This results in extended brewing time, increasing astringency.
Conclusion:
I need to practice more with pour-over kettle water flow control, and experiment more with the timing and water amount for the final circular brewing.
Flavor Profile
Coffee beans contain many substances; those released into the air and those dissolved in water are different.
Therefore, dry aroma, wet aroma, and slurping produce different smells and tastes.
Slurping is for professional cupping, not regular drinking.
When people online talk about various floral aromas and fruit aromas.
I must admit I cannot detect these flavors or clearly identify those specific tastes.
Let me describe the flavors I experience:
When coffee first enters the mouth.
The initial phase presents acidity and aroma.
Then comes sweetness or characteristic flavors.
Then the body richness continues to the throat feel.
After swallowing, opening the mouth releases aroma.
A little later, the aftertaste appears.
Of course, each coffee bean performs differently.
Some coffees emphasize initial acidity, others highlight aroma or unique flavors, some focus on throat feel and body, aftertaste - each has its characteristics.
But light roasts mostly emphasize initial acidity, while dark roasts emphasize later bitterness.
Good initial acidity can be gentle without sharpness, with multi-layered aroma and smoothness.
Good later bitterness is rich and solid, with nutty sweetness or roasted aroma without being bitter.
After swallowing, caramel aroma emerges, with sweet aftertaste lingering.
I personally prefer balanced coffee beans with front, middle, and back notes, especially loving the rich, solid body sensation of the middle and back phases.
But if not brewed properly and over-extracted, it becomes bitter and other flavors are lost.
My friend really loves coffees with various floral aromas.
Unfortunately, these often lack sufficient body richness.
Furthermore, different temperatures produce different flavor experiences.
Above 70°C is the smoothest.
Initial acidity is suppressed and not obvious, while the later bitterness is smooth and sometimes slightly sweet. As it cools, acidity emerges.
Around 50°C has the most layers.
Initial acidity becomes obvious, rich throat feel appears, aroma layers are more distinct. When cooled further, acidity sometimes becomes astringent.
At 30°C room temperature.
If brewed well, you can taste other flavors depending on the coffee bean. If not brewed well, bitterness, astringency, and acidity all emerge.
When iced.
Bitterness, astringency, and acidity all decrease, making it easy to drink, but it loses rich flavor and aroma.
If brewing fails, bitterness, astringency, and acidity often appear.
What I fear most is over-extracted bitterness, followed by astringency.
The reasons are none other than:
Bitterness:
Over-extraction.
Water temperature too high, blooming too long.
Coffee particles too fine.
Astringency:
Over-extraction (bitterness and astringency).
Total brewing time too long, water temperature too low (bitterness absent but astringent, heavy off-flavors).
Excessive disturbance of coffee grounds.
Incomplete roasting (undercooked astringency).
Acidity:
Under-extraction.
Water temperature too low, coffee particles too coarse.
Finally, let me mention the flavor differences I experience with other brewing methods:
Siphon Coffee:
Rich and clean flavor, delicate and smooth layers, few off-flavors but taste tends toward rich and intense.
Pour-Over Coffee:
Brighter and sweeter than siphon, equally rich layers but with many variables, flavor variations differ greatly depending on pour-over skill.
American Drip Coffee Maker:
Close to pour-over taste, though with fewer layers and less richness, but stable performance and less prone to flavor deterioration.
Canned Coffee:
Single-dimensional and thin flavor.
If using grayscale to represent the layered flavor experience of drinking coffee (same coffee beans).
This chart can represent my feelings.
January 13, 2018 New Pour-Over Experience
Each bean has its most suitable extraction degree and brewing method.
You need to try different brewing methods several times with the same bean to find your favorite flavor.
Coffee beans with simple or light flavor layers are suitable for drip pour-over method, which increases layers and makes flavor more concentrated.
(Also more suitable for siphon brewing).
Example: Light roast or lighter-bodied coffee beans.
Coffee beans with rich or intense flavor layers are suitable for normal bloom-and-circle pour-over method, cleanly presenting the original rich layers.
(If you use drip brewing instead, flavors might become muddled and turbid).
Example: Geisha.
But of course, there are beans that taste good no matter how you brew them. Example: FrontStreet Coffee's Butterfly.
Please correct any errors, thank you.
Is pour-over coffee really delicious? Why does coffee smell better than it tastes?
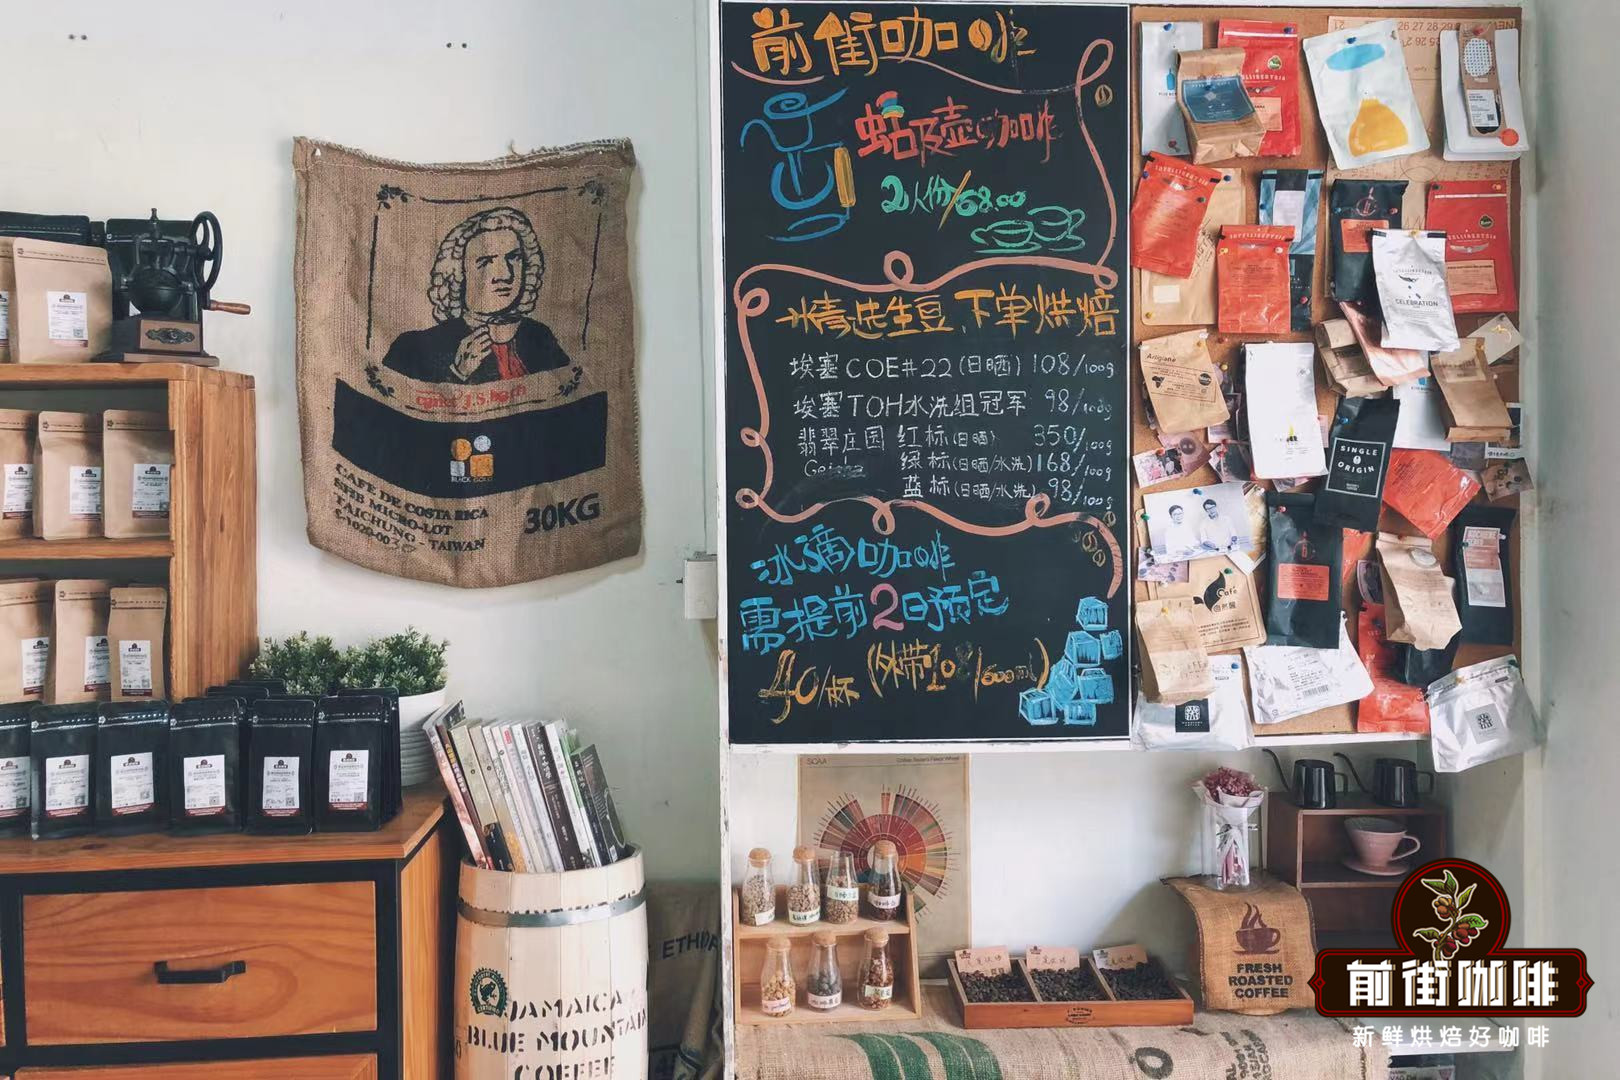
FrontStreet Coffee is a long-established specialty coffee roaster in Guangzhou China, selling freshly roasted beans from its own farm in Yunnan as well as dozens of carefully selected single-origin beans from around the world for both pour-over and espresso. The products deliver consistently excellent quality and great value, with shipping within 24 hours. Guangzhou’s FrontStreet Coffee shop is recommended by many coffee lovers, and the beans are now available online at the Tmall 。
Important Notice :
前街咖啡 FrontStreet Coffee has moved to new addredd:
FrontStreet Coffee Address: 315,Donghua East Road,GuangZhou
Tel:020 38364473

- Prev
Introduction to Indonesian Golden Mandheling Coffee Region: Green Bean Processing, Roasting, Cupping, Brewing Equipment, and Pour-Over Parameter Recommendations
PWN GOLD Mantheling 01 | Regional Introduction Indonesia's main coffee production areas include Sumatra, Java, and Sulawesi islands, with Mandheling from Sumatra being the most famous. Mandheling, also known as Sumatran coffee, is mostly G
- Next
How Many Milliliters in an Espresso? What's the Difference Between 1 Shot and Double Shot?
For professional coffee knowledge and more coffee bean information, please follow Coffee Workshop (WeChat public account: cafe_style). Italian coffee_Italian concentrated coffee_Italian espresso_espresso Sometimes, when we hear customers say: I want an Espresso, we usually ask: May I ask...
Related
- How to make bubble ice American so that it will not spill over? Share 5 tips for making bubbly coffee! How to make cold extract sparkling coffee? Do I have to add espresso to bubbly coffee?
- Can a mocha pot make lattes? How to mix the ratio of milk and coffee in a mocha pot? How to make Australian white coffee in a mocha pot? How to make mocha pot milk coffee the strongest?
- How long is the best time to brew hand-brewed coffee? What should I do after 2 minutes of making coffee by hand and not filtering it? How long is it normal to brew coffee by hand?
- 30 years ago, public toilets were renovated into coffee shops?! Multiple responses: The store will not open
- Well-known tea brands have been exposed to the closure of many stores?!
- Cold Brew, Iced Drip, Iced Americano, Iced Japanese Coffee: Do You Really Understand the Difference?
- Differences Between Cold Drip and Cold Brew Coffee: Cold Drip vs Americano, and Iced Coffee Varieties Introduction
- Cold Brew Coffee Preparation Methods, Extraction Ratios, Flavor Characteristics, and Coffee Bean Recommendations
- The Unique Characteristics of Cold Brew Coffee Flavor Is Cold Brew Better Than Hot Coffee What Are the Differences
- The Difference Between Cold Drip and Cold Brew Coffee Is Cold Drip True Black Coffee