Key Tips for Frothing Milk: Espresso Machine Milk Frothing Methods & How to Make Perfect Espresso Coffee
For professional coffee knowledge exchange and more coffee bean information, please follow Coffee Workshop (WeChat official account: cafe_style)
Making a delicious and visually appealing latte requires creating delicate milk foam and extracting a quality espresso shot. There are some details and techniques that can help you better understand the process of making latte coffee. FrontStreet Coffee would like to share some experience in making latte coffee.
Milk Frothing Techniques: How to Froth Milk with an Espresso Machine
Although there are many methods for frothing milk, using an espresso machine is one of the easiest methods for beginners to succeed with. The approach involves first creating foam and then making it smooth.
1. Milk Foam Production
Production Steps
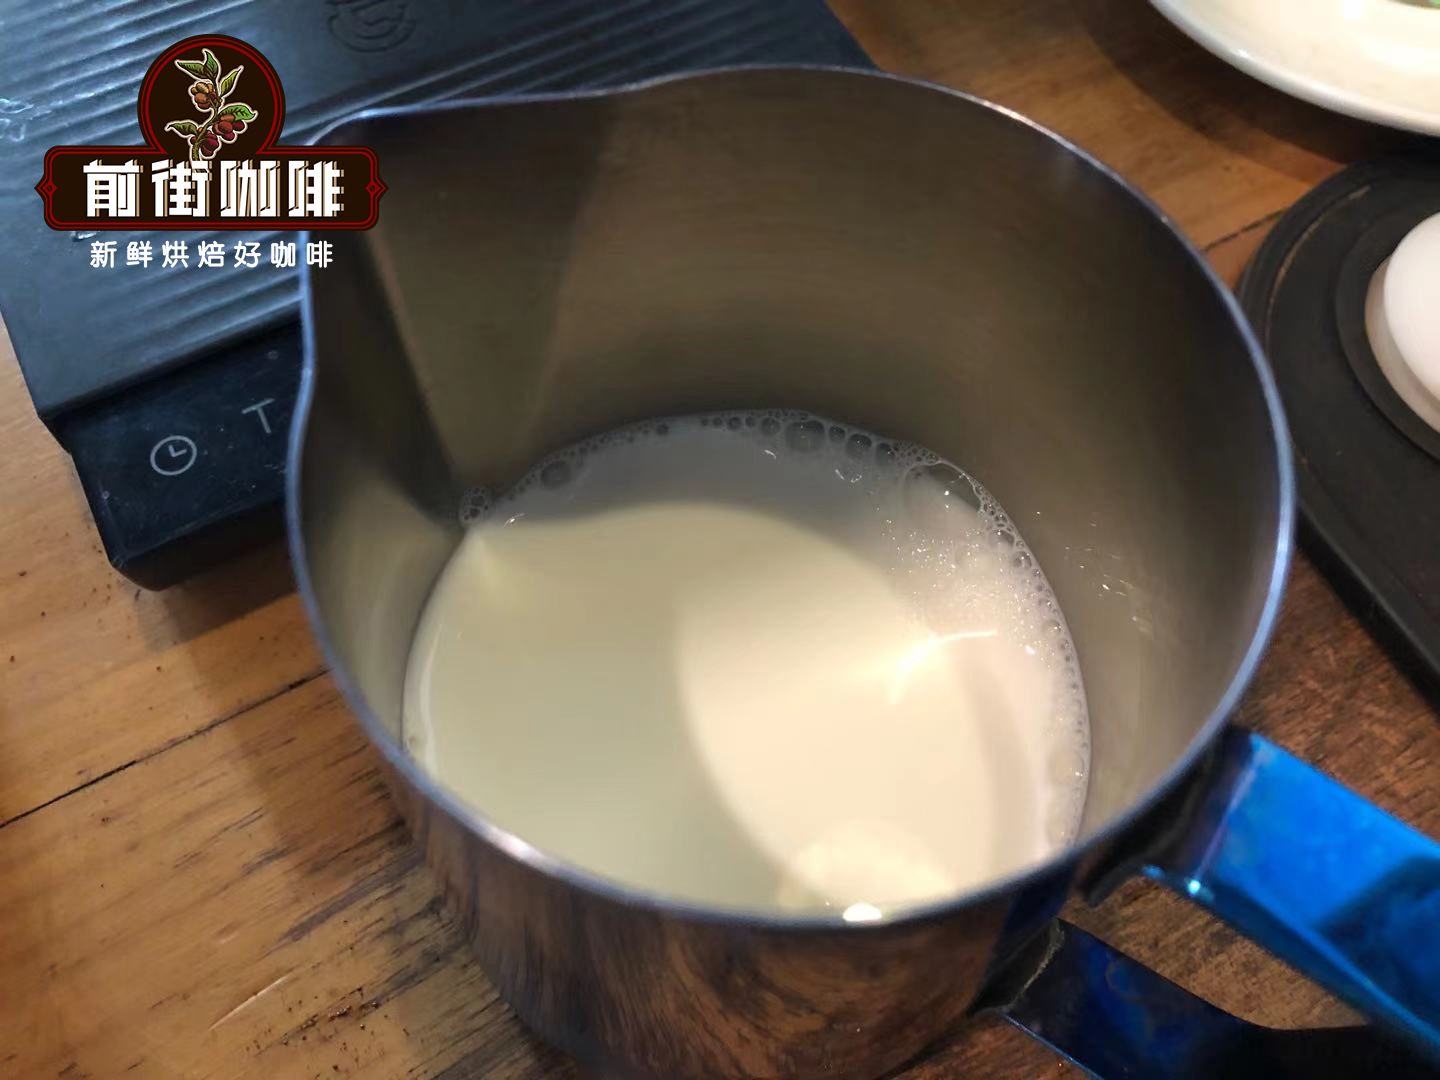
(1) Pour approximately 225g of chilled milk (about 5°C) into a frothing pitcher (about 1/3 full of the pitcher).
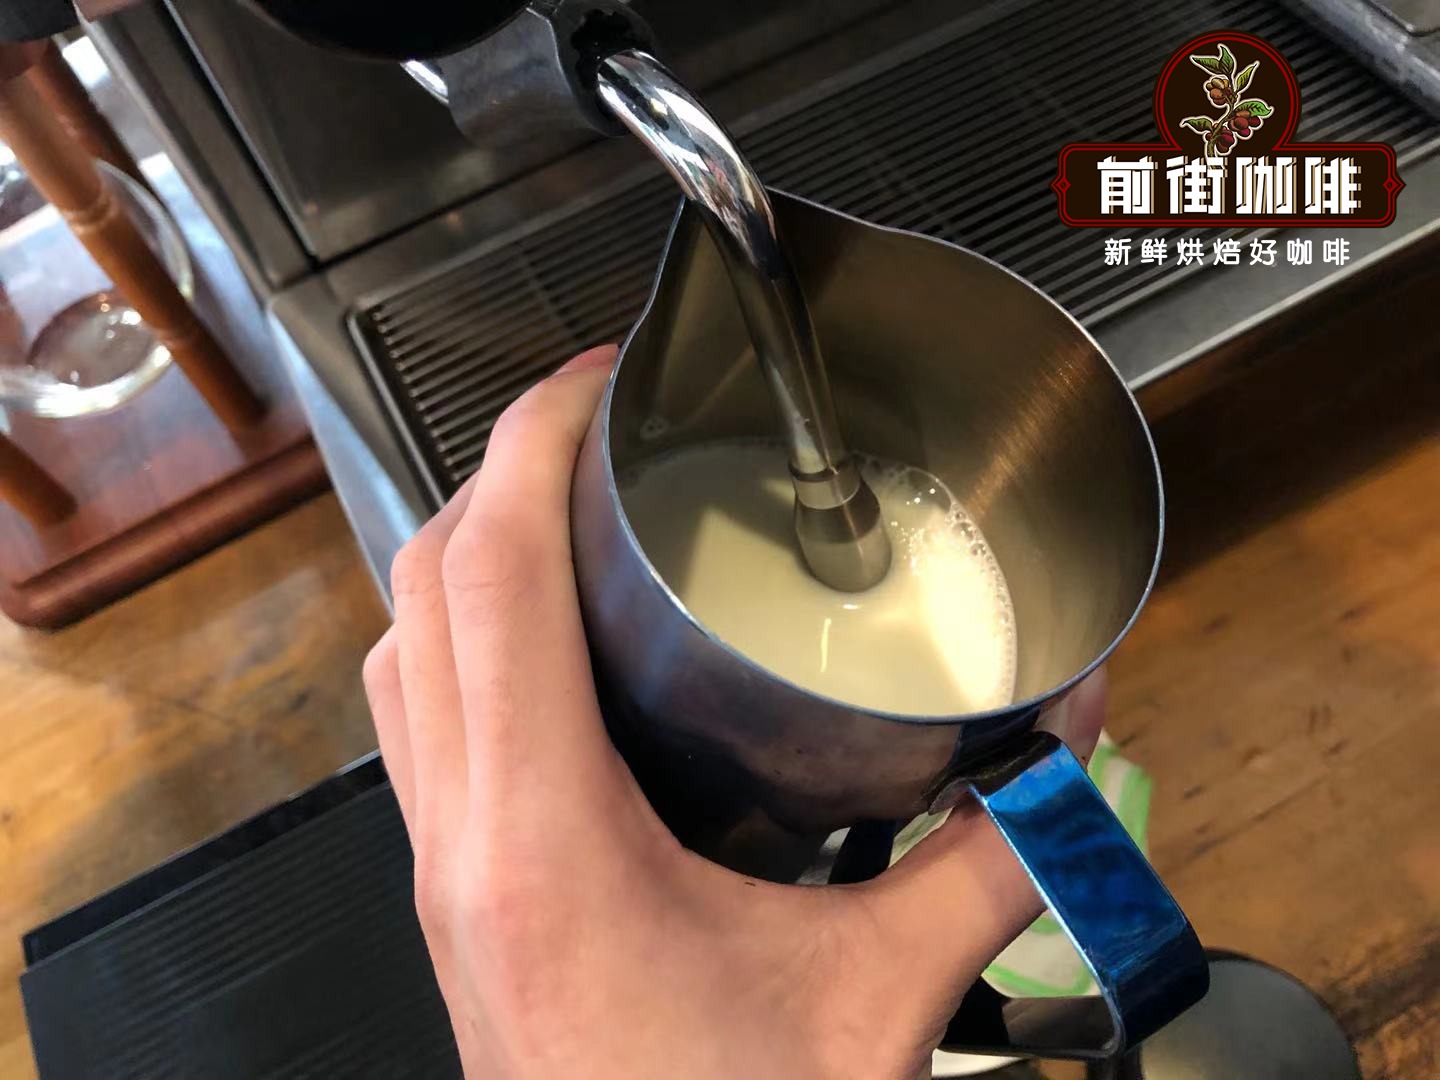
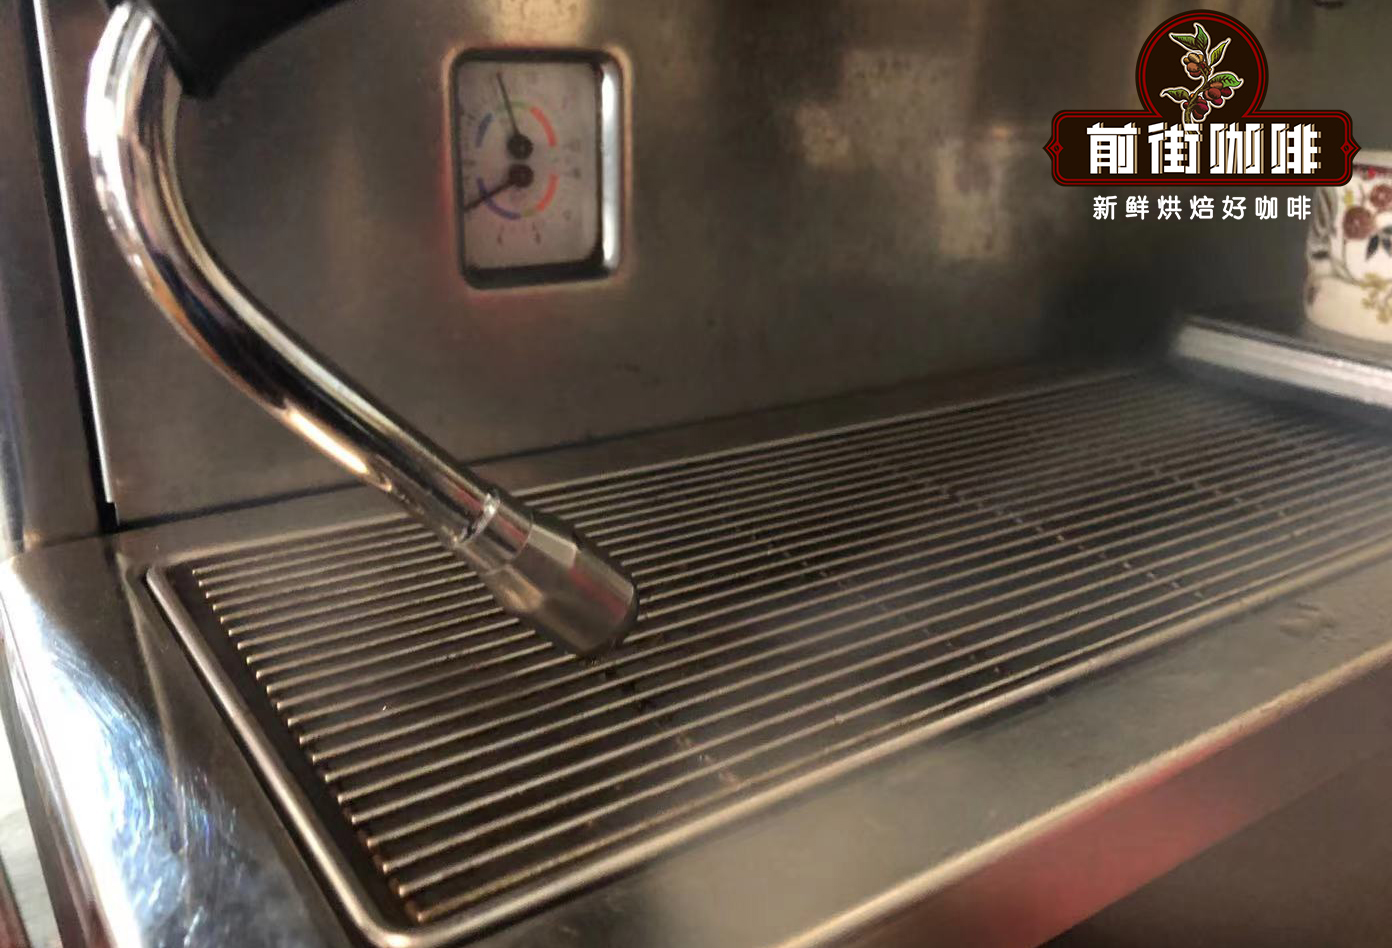
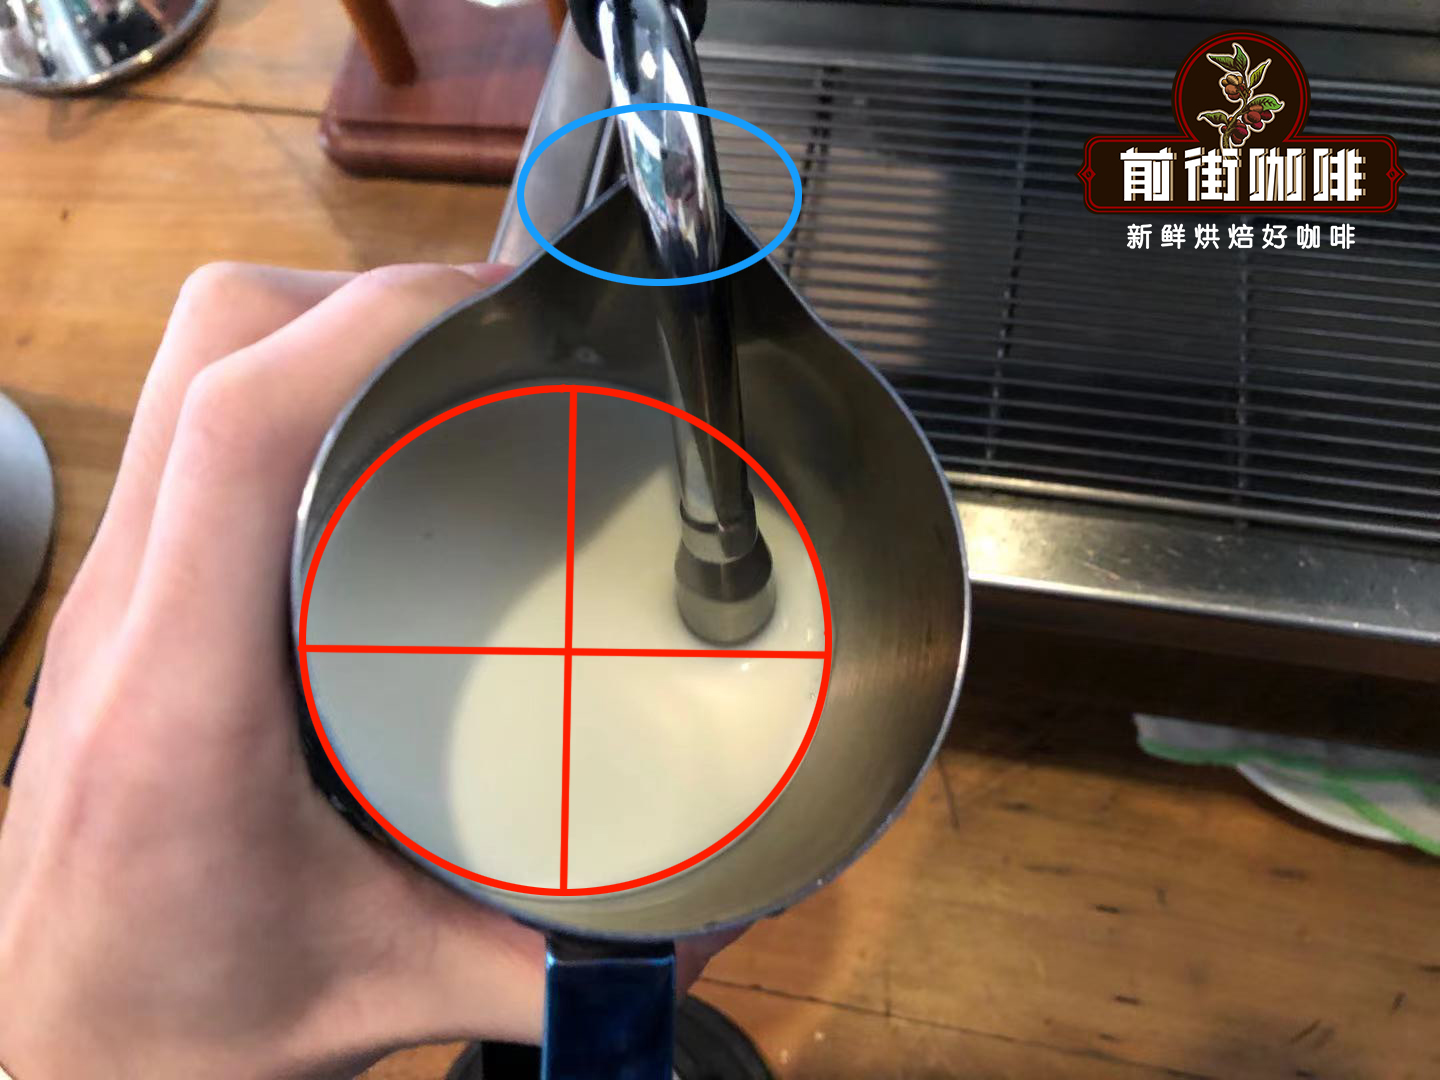
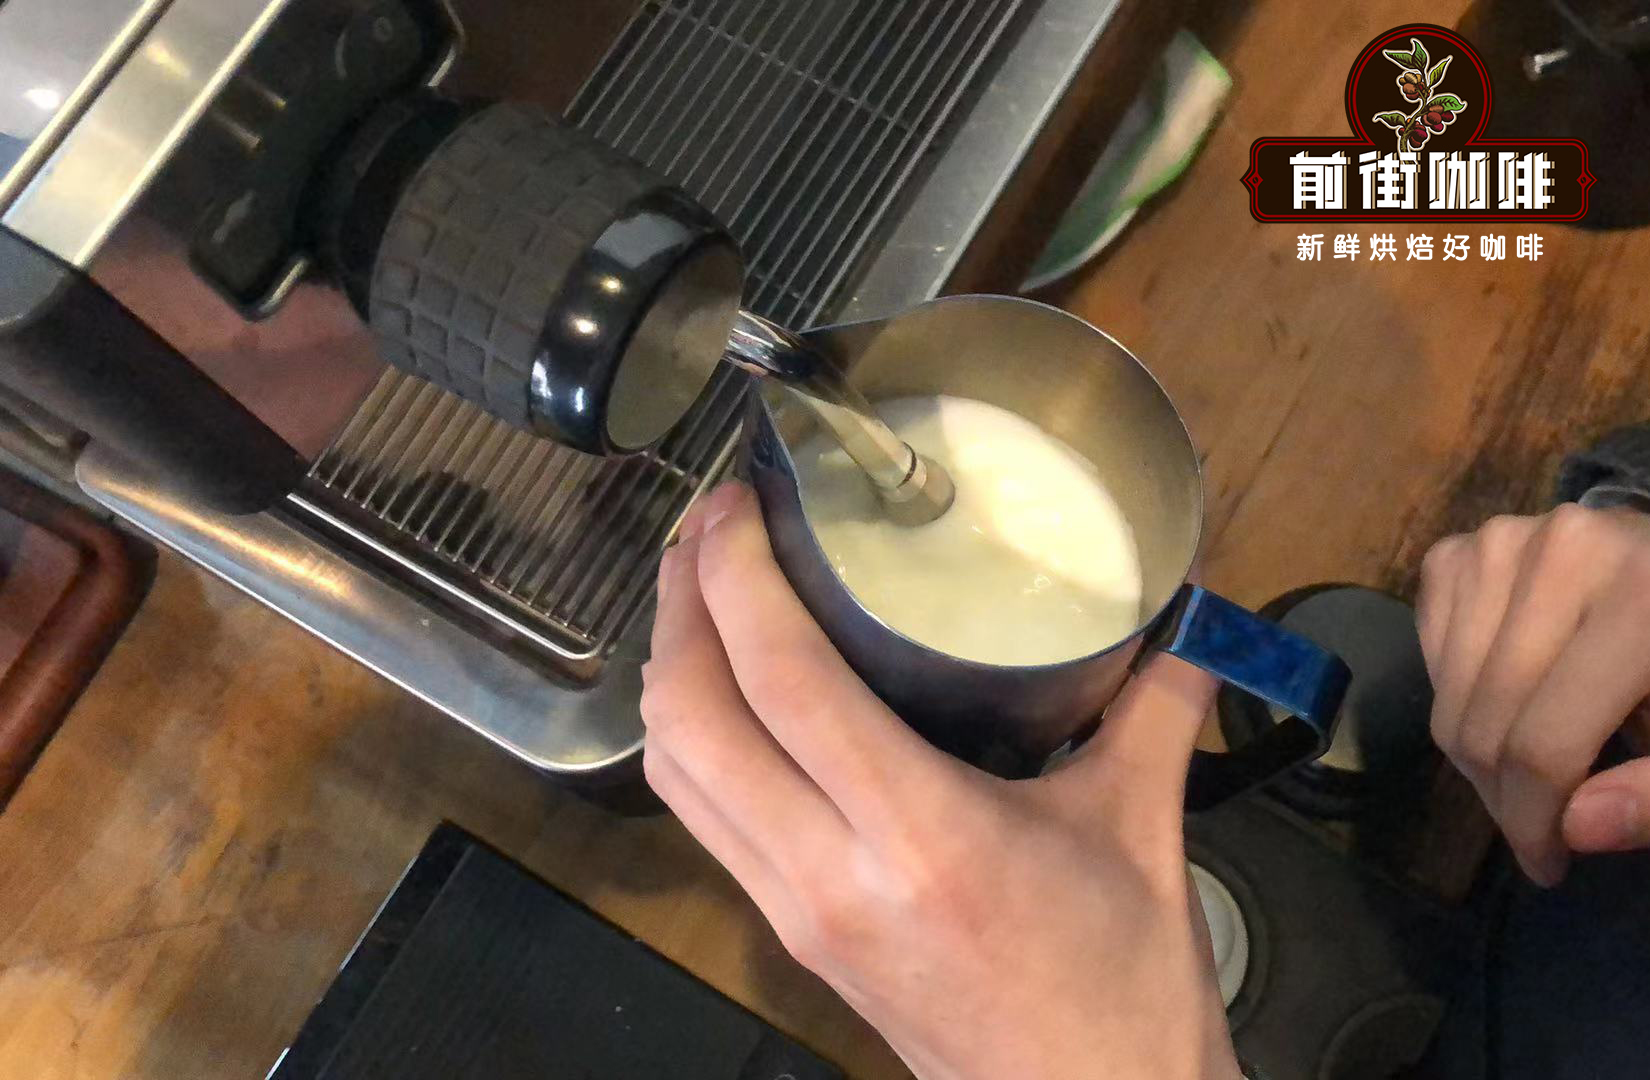
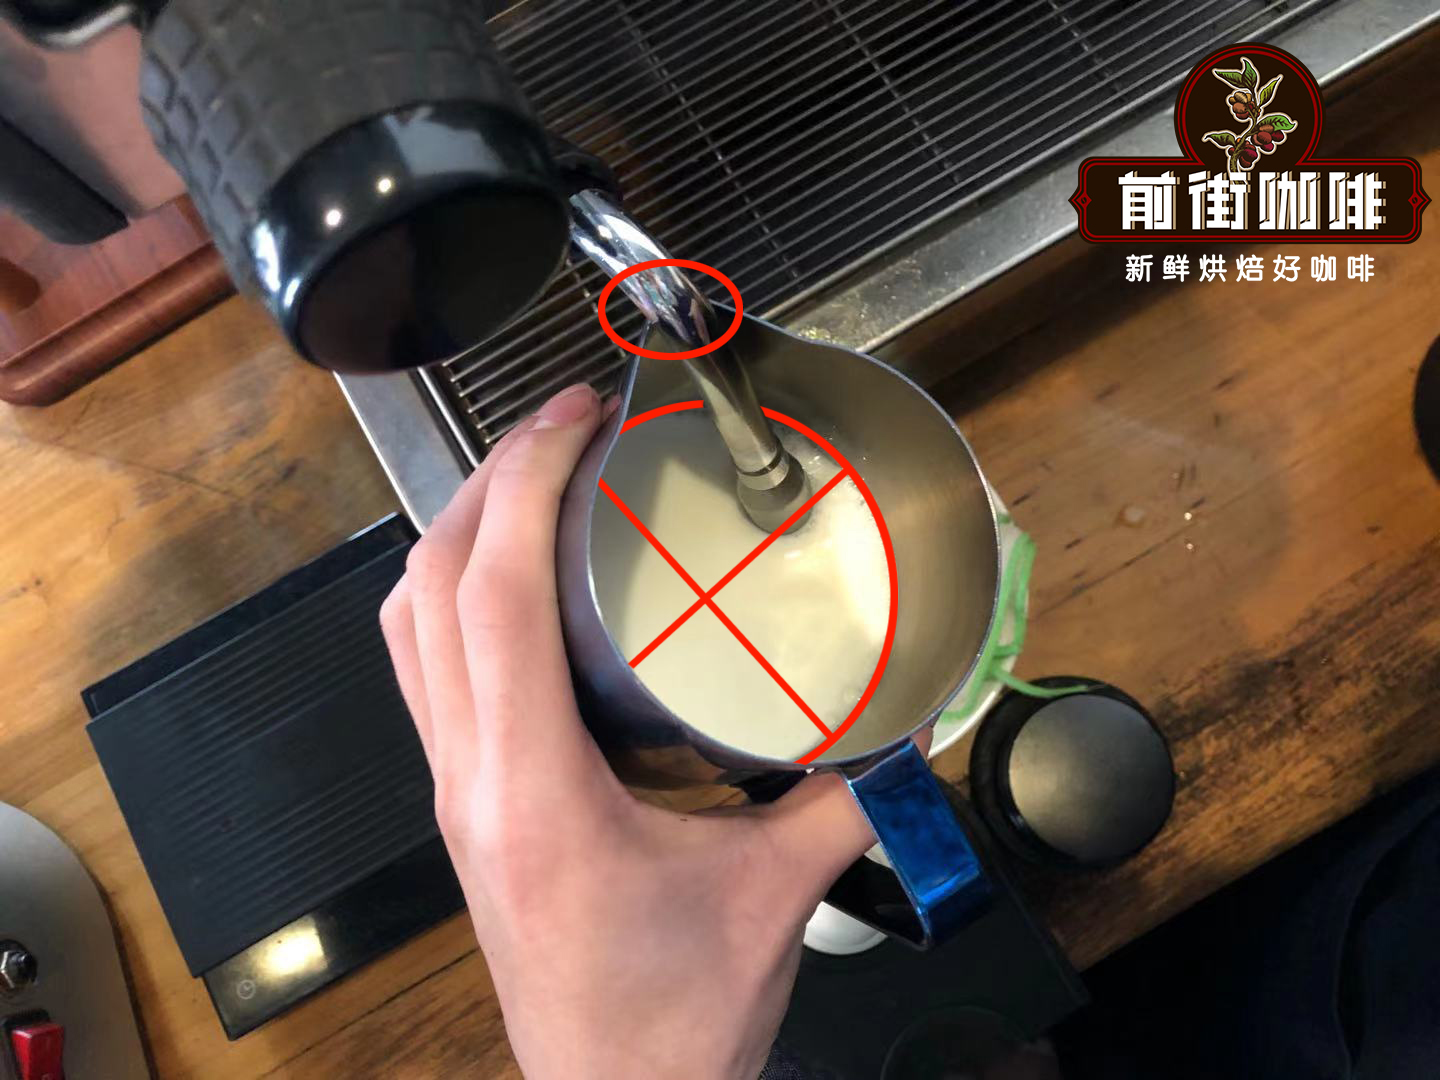
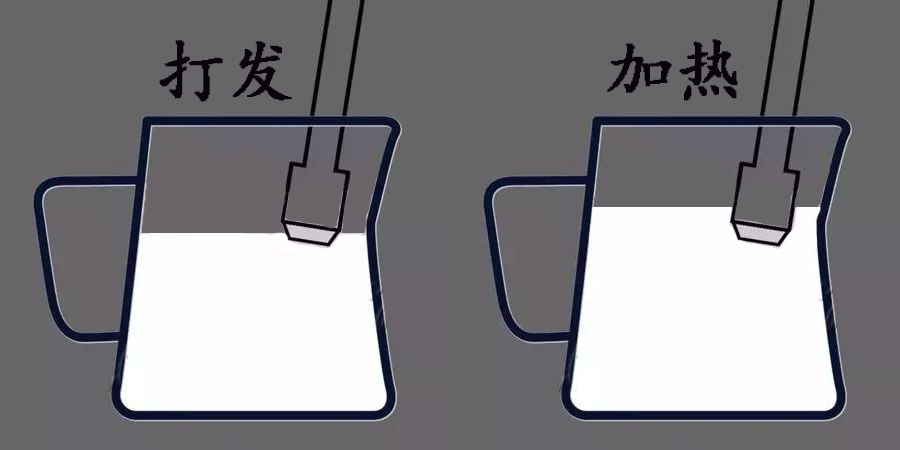
(2) Turn on the steam wand. Before placing the steam wand into the milk pitcher, first release a burst of steam to both preheat the wand and flush out any condensed water. Then gently insert the steam tip into the milk surface at a 30-40 degree angle (with the tip inserted about 0.7cm deep) or tilt the steel pitcher at a 30-40 degree angle, inserting at a position 1/4 from the center-left (or right). Keep the steam wand about one finger's width away from the inner wall of the milk pitcher. The purpose of this is to create a vortex. If the steam wand is too deep in the milk, no vortex will form in the pitcher, and the milk will only heat up without creating beautiful foam.
(3) Then turn on the steam machine switch (milk control key), but don't open it too wide, otherwise the milk foam won't form before the milk boils, making it impossible to create foam. Similarly, it can't be too small, as insufficient steam will also prevent foam formation. Usually, press the button halfway first, and when the milk begins to circulate, turn the control key to maximum. Initially, you'll hear a "hissing" sound. When it feels warm (or when you think there's enough foam), a vortex will clearly appear on the surface. At this point, the foam volume will increase, and the steel pitcher should be lowered (keeping the steam tip depth consistently at 0.7cm). The purpose of this is to make the foam denser. Continue until the frothed milk reaches about nine-tenths full in the pitcher or the temperature approaches 65°C. If you hear a "hissing" sound that is particularly harsh, it indicates incorrect frothing.
(4) When the cup becomes slightly warm, turn off the steam and immediately remove the steel pitcher. Continuing to froth will make the foam too stiff. When stiff foam is poured into coffee, it won't mix with the coffee but will accumulate on top like fluffy, whipped cream. If frothed for too long, it will separate into 90% flowing milk with a thick, stiff foam cap floating on top. When poured into coffee, the milk will flow out of the frothing pitcher first. Overheating will also cause the foam to disappear. The frothed milk should not sit for too long after preparation, or it will also separate. The temperature after frothing should be around 65°C, and the frothing time should be 8-15 seconds.
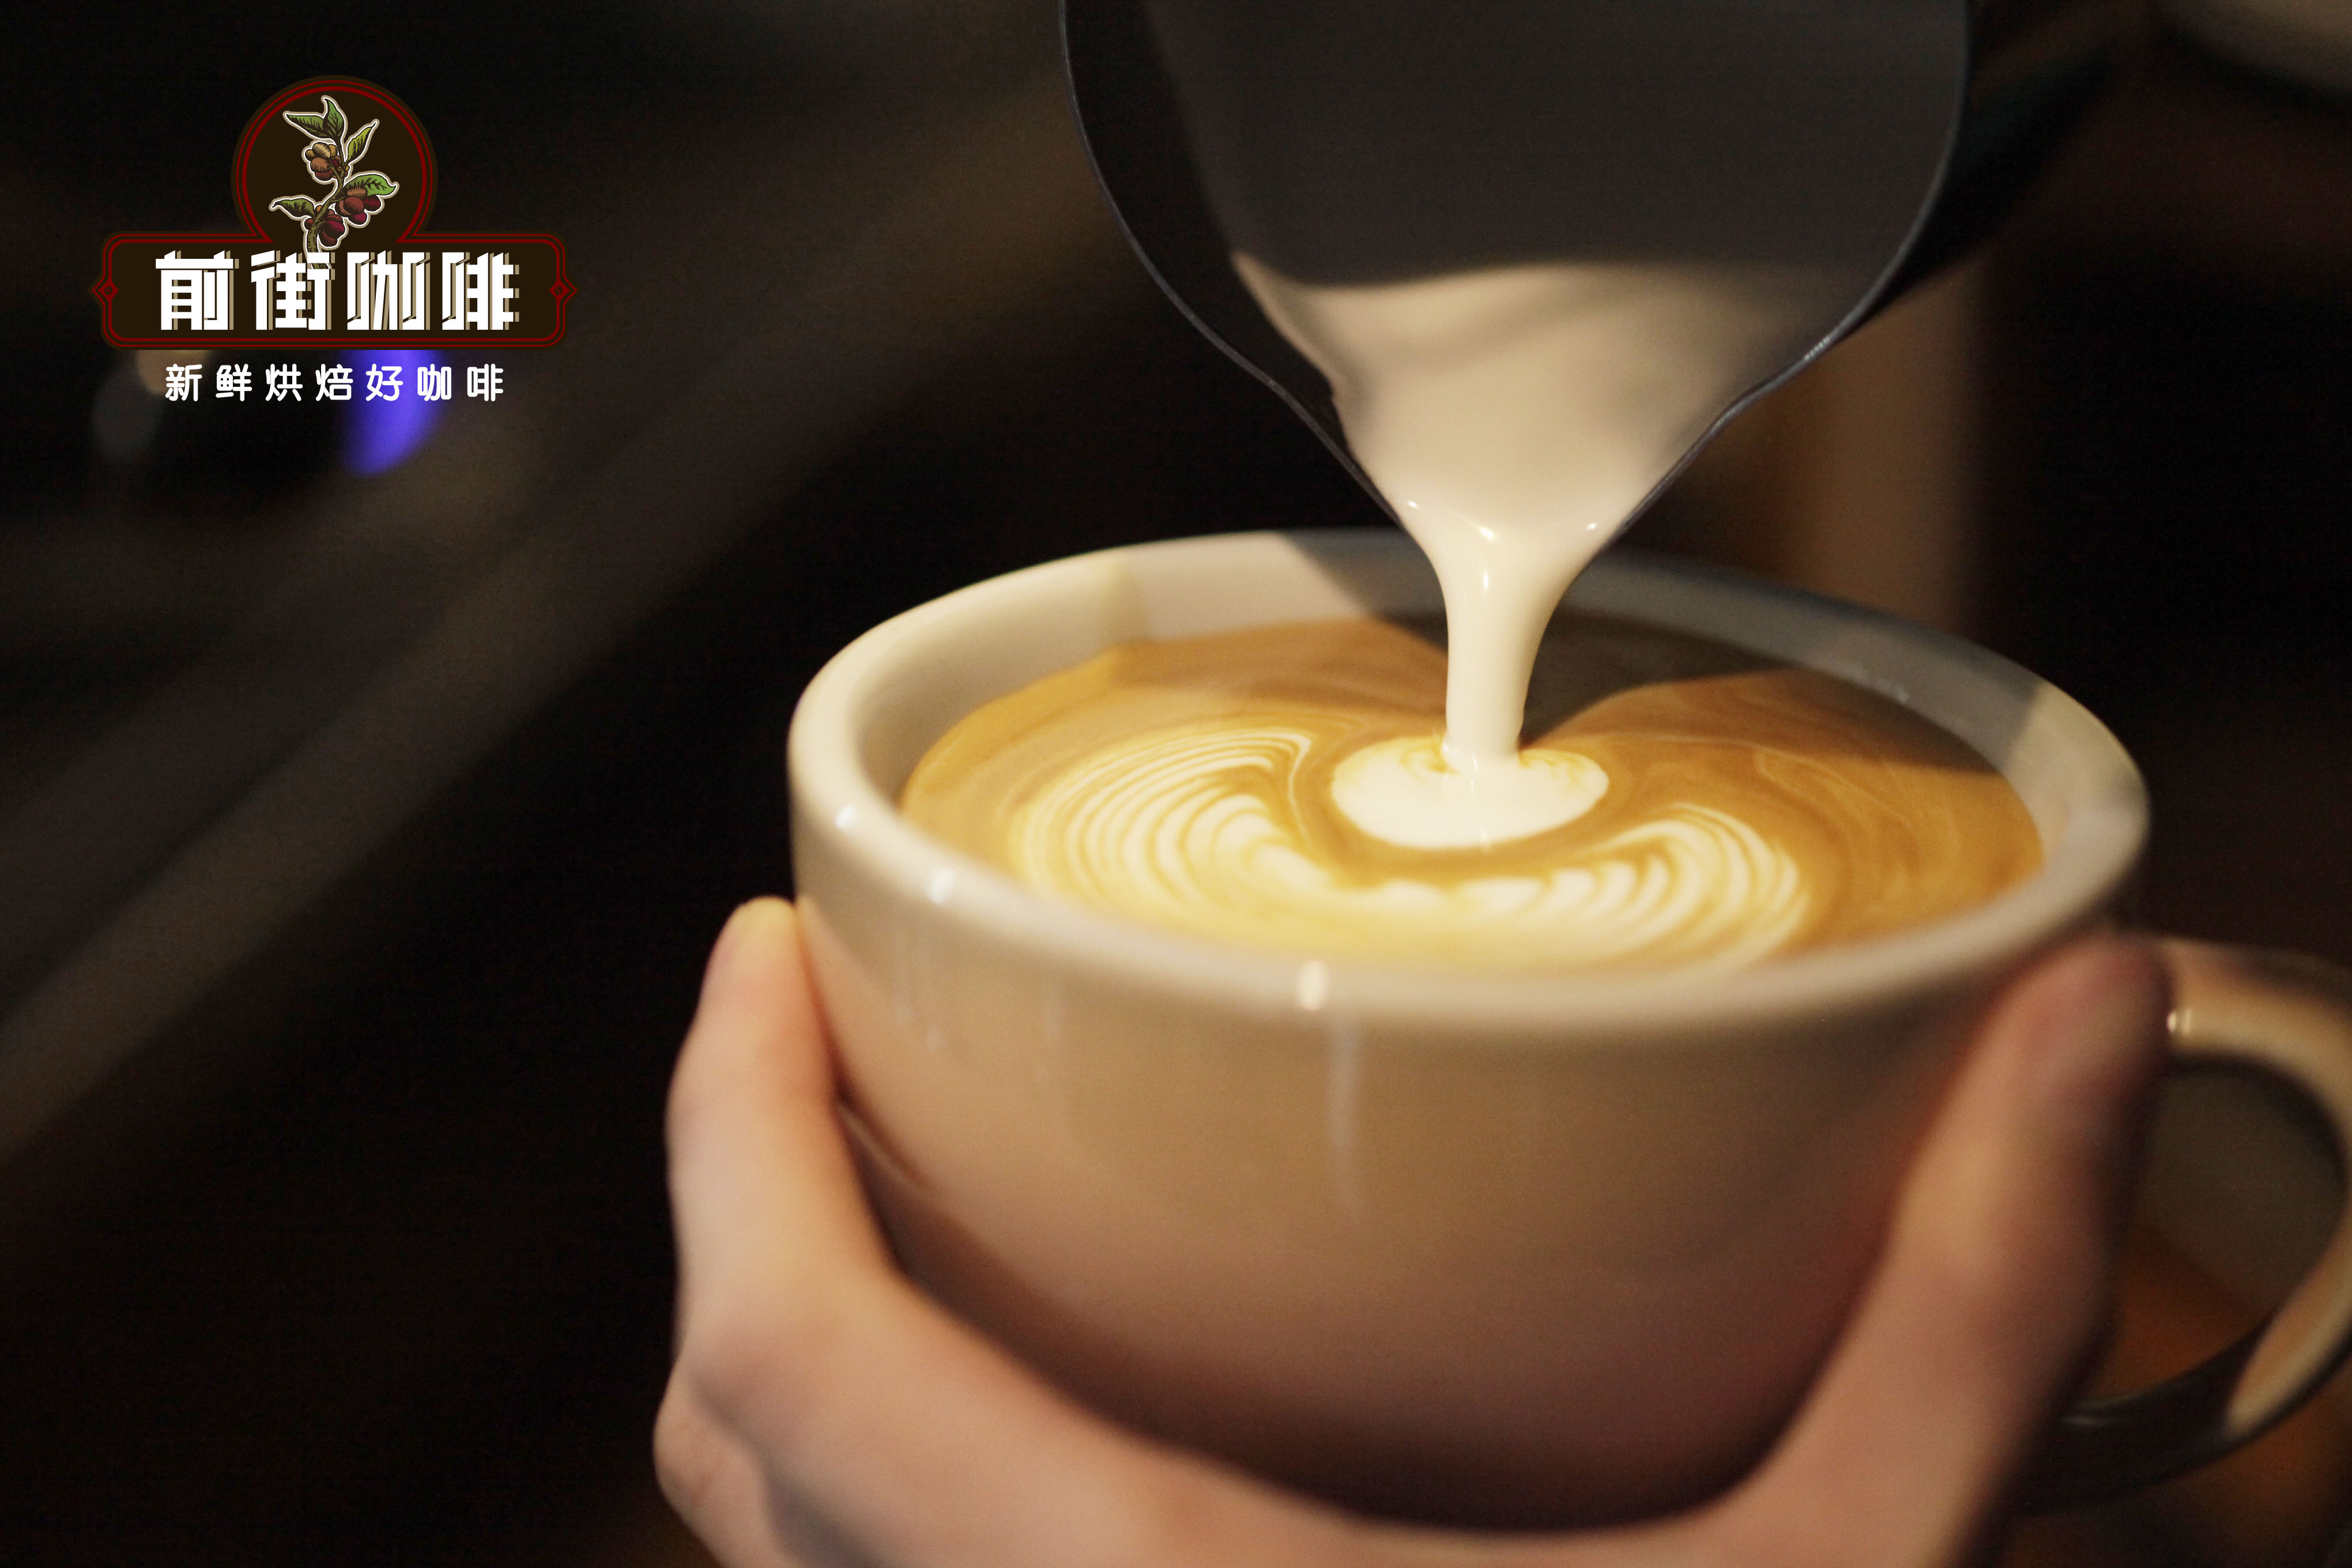
Texture of properly frothed milk: Neither coarse foam nor soft, light foam. Ideal milk foam should have a dense texture, and when poured out, it should flow like yogurt - overall thick and smooth, giving a moderate sense of richness.
(5) After frothing, clean the machine. Turn on the steam, remove the steam wand, and release any residual milk. Otherwise, dried milk will block the wand opening and breed bacteria. Wipe the milk stains from the steam tip, and finally return the steam tip to its position.
Using Milk Foam
When presented in the milk pitcher: The upper layer is floating foam, and the lower layer is hot milk. If using for latte art, hold the milk pitcher and tap the bottom of the pitcher on the table a few times. Then hold the pitcher and swirl it clockwise a few times to reduce foam. The purpose is to make the frothed milk texture denser and better integrate the foam and milk in the pitcher. Then scoop out the coarser foam from the surface, and you're ready for latte art.
If you've followed the above steps but still aren't getting good milk foam, besides issues with the milk itself, there are only two reasons:
(1) Insufficient steam. It's recommended to switch to a steam wand with greater pressure.
(2) The angle, depth of the steam tip, and the milk rotation are incorrect. Pay attention to these two factors, and the basic problems can be solved. Beginners often lose focus, causing the steam wand to be above the milk surface instead of just below it. This will cause milk splashing and create larger bubbles. This might also result in a lot of foam in the latte art pitcher, but the texture will be poor.
2. Precautions for Beginners Frothing Milk
Key factors for successful milk frothing include:
Milk Selection
Milk selection is essentially the selection of milk fat content. There are three types of milk available on the market: skim milk with less than 0.5% fat content, low-fat milk with 0.5%-1.5% fat content, and whole milk with more than 3% fat content. Usually, milk for latte art is whole milk with about 3% fat content, because milk with less fat produces stiffer foam, while we want smooth foam. Generally, the quality of fresh milk is not very stable, and winter fresh milk is easier to froth than summer fresh milk. If summer milk cannot produce beautiful foam, it might not be a technical issue but rather a problem with the milk's purity itself.
Milk Temperature for Frothing
The milk used for frothing needs to be thoroughly refrigerated in advance (at least 2 days). The optimal storage temperature for milk is around 4°C. The purpose of thorough refrigeration is to slow down the temperature rise during frothing. When using an espresso machine, the steam pressure is high, and the milk will heat up in十几 seconds. When the temperature exceeds 65°C, the components in the milk will deteriorate and lose flavor, affecting the taste (the milky aroma will be lost). When it exceeds 80°C, it will break down the protein structure in the milk, leading to failed frothing.
Frothing Duration
To avoid the milk temperature exceeding 65°C, the frothing time should not be too long. Therefore, when using a high-powered espresso machine to froth milk, the time should be controlled within 15 seconds. Of course, this may vary depending on the coffee machine.
3. How to Make Espresso
Taking FrontStreet Coffee's standard for making espresso as an example, FrontStreet Coffee uses the Sunflower Warm Sunshine Blend for espresso beans.
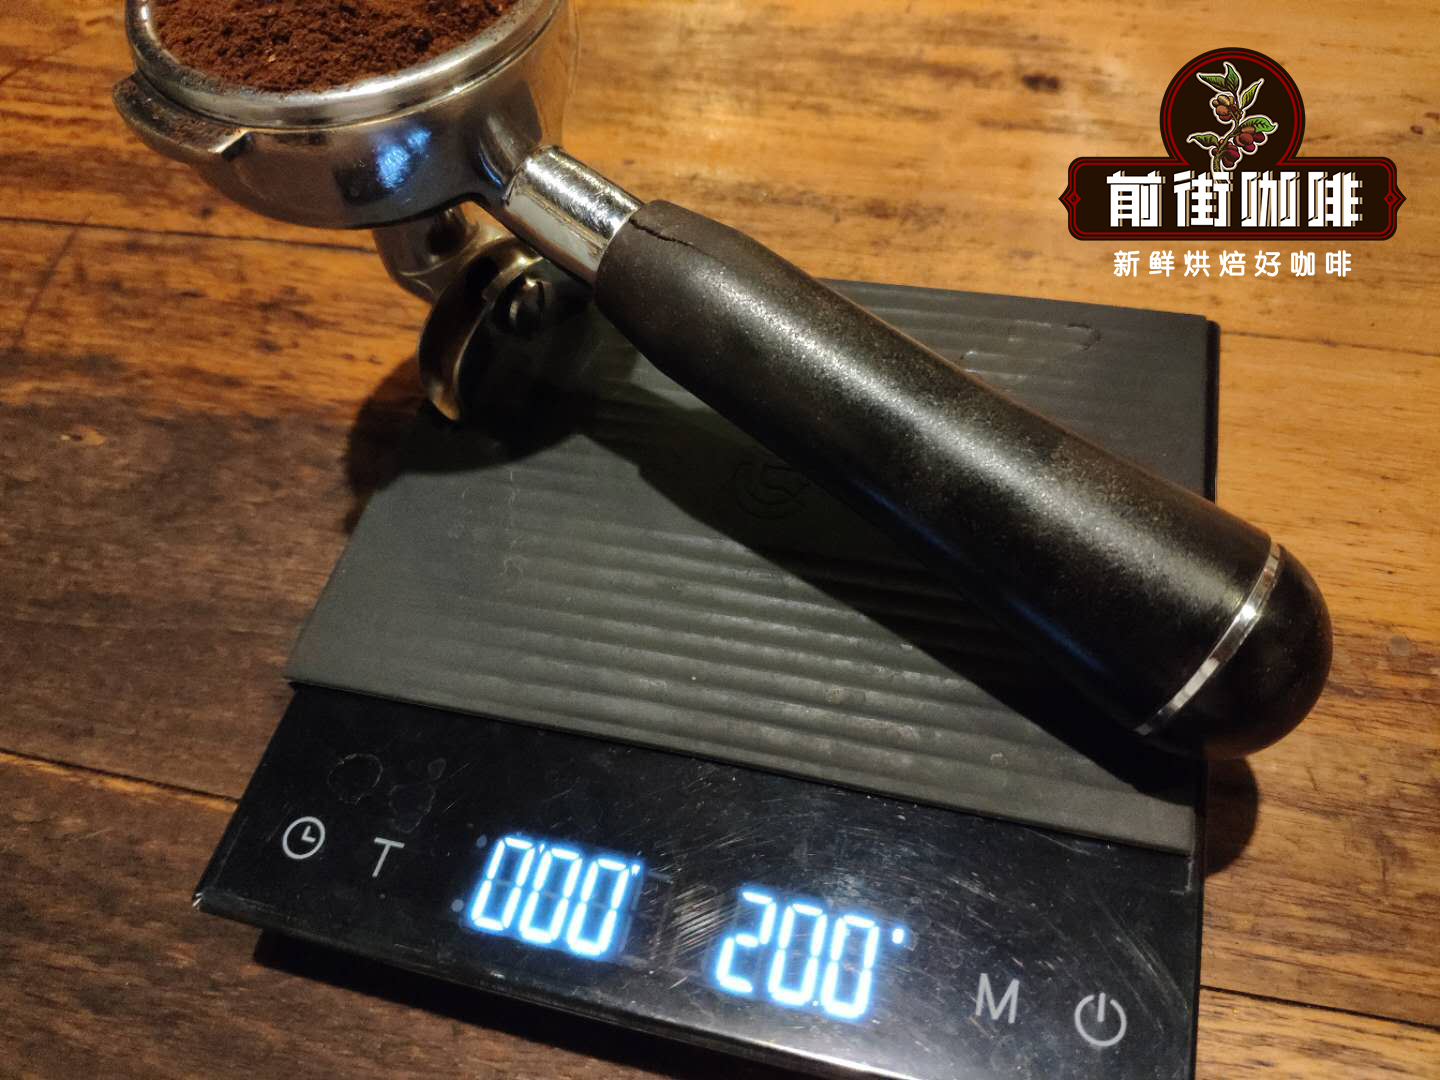
(1) Weigh the coffee grounds. First, clean and dry the portafilter, then place it under the grinder outlet. Weigh 20g of coffee grounds.
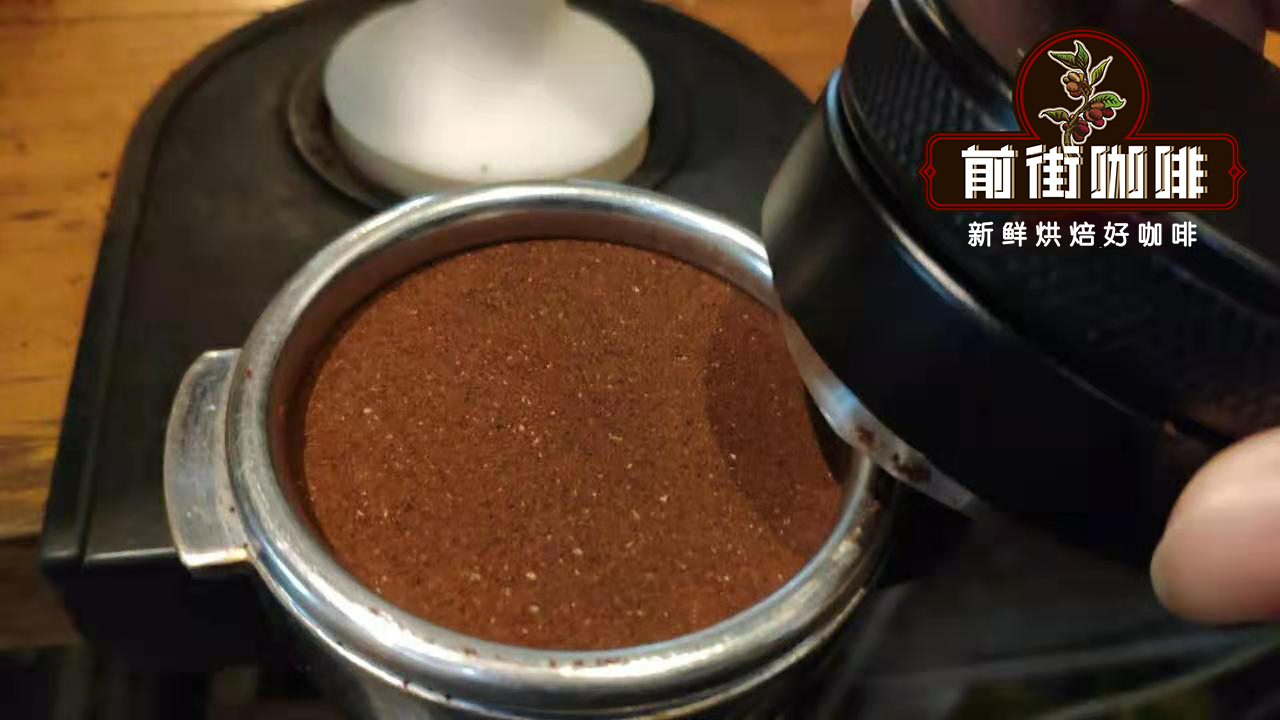
(2) Distribute the grounds. You can use a distribution tool to distribute the grounds. Place the distribution tool vertically over the filter basket and rotate it several times to level the coffee grounds in the basket.
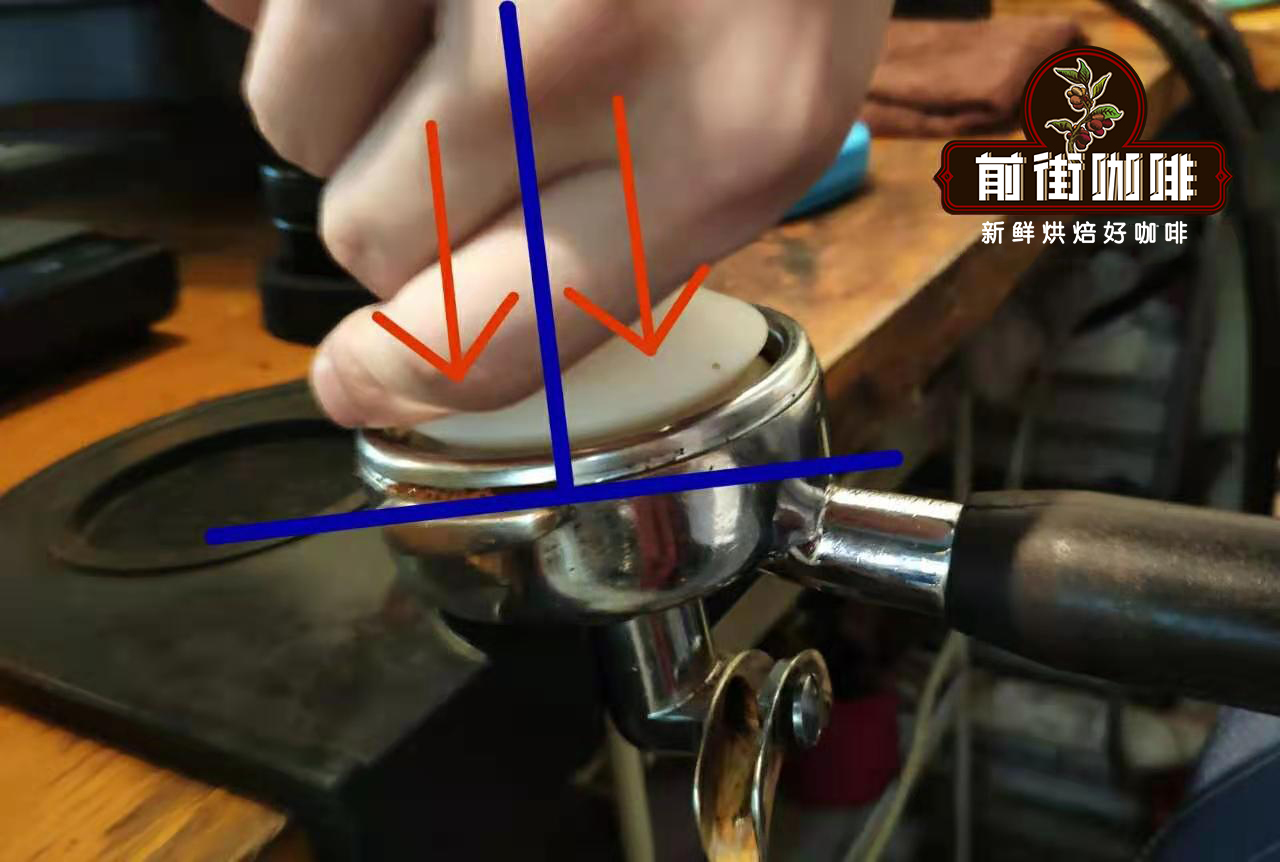
(3) Tamp the grounds. Use a tamper to press down vertically.
(4) Wipe away any coffee powder distributed around the portafilter.
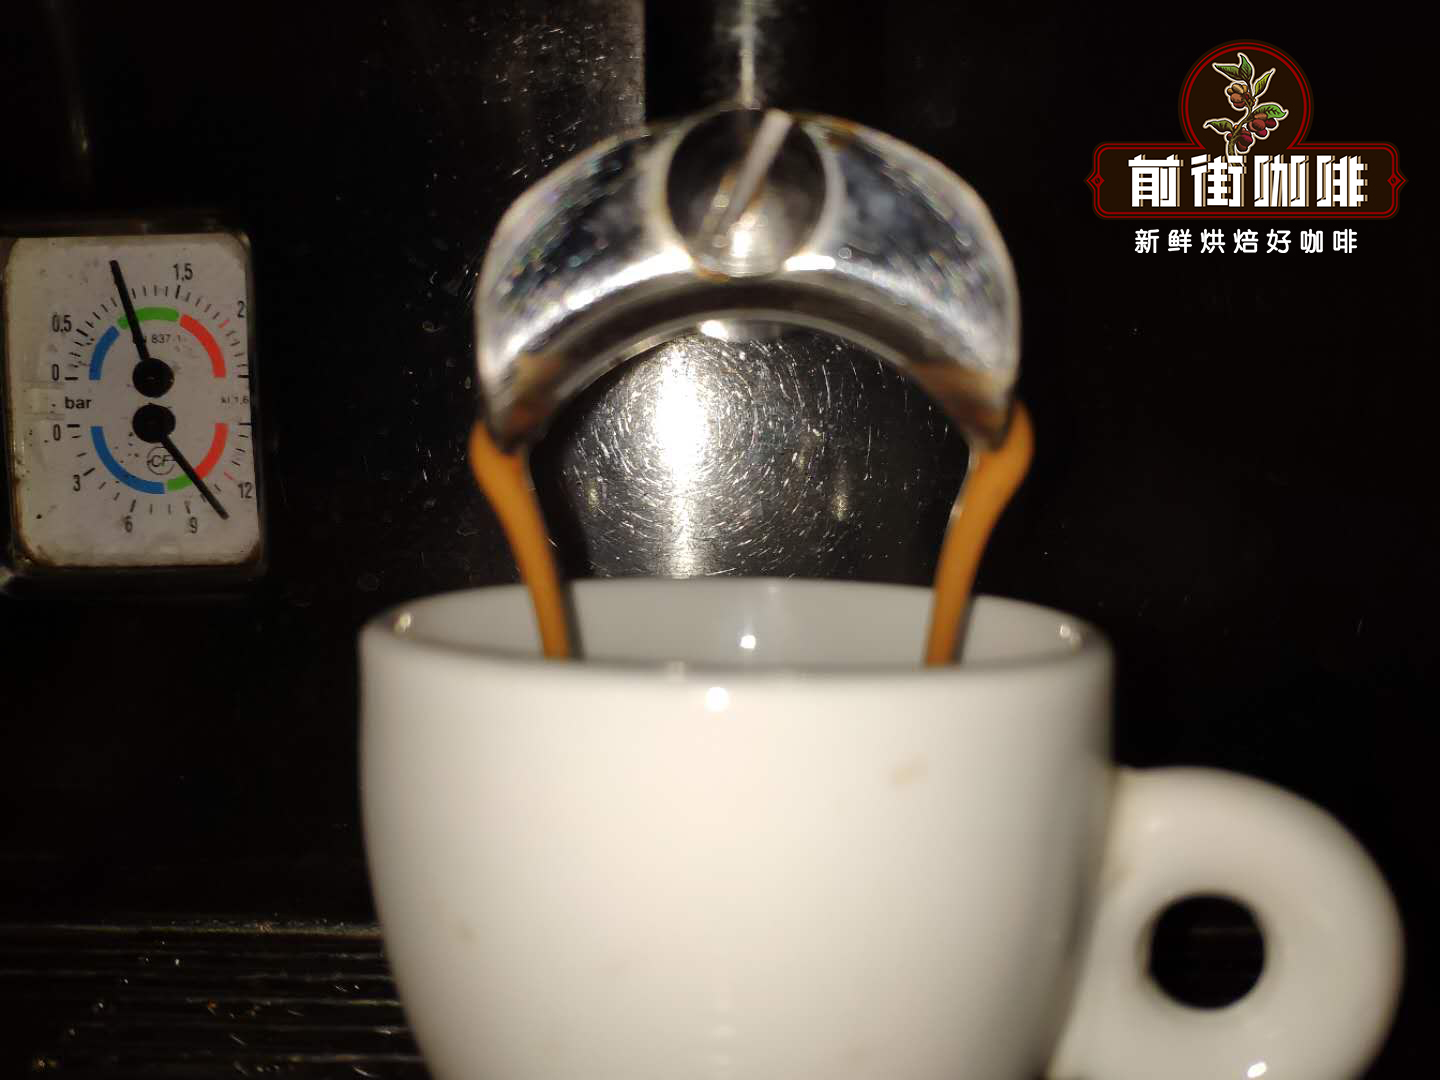
(5) Attach the portafilter to the group head and press the extraction button. Extract until 40g is reached, stopping the extraction. The time should be 26-28 seconds.
Detailed Tamping Explanation
Before tamping, you should first understand the quality of the coffee, blending methods, flavor profile, roast degree, grind size of the coffee powder, and equipment performance. Decide on the tamping pressure based on these different conditions. Usually, if the coffee powder is finer, don't apply too much pressure during tamping, otherwise water won't pass through easily, causing over-extraction. Conversely, if the coffee powder is coarser, you need to tamp more firmly, otherwise the water flow will be too fast, resulting in a raw, astringent light taste (Figure 5).
Tips:
(1) We generally use semi-automatic espresso machines, which operate at 0.8-0.9MPa pressure (with a 0.1MPa fluctuation depending on different beans). After water moistens the coffee powder, it uses 0.9MPa pressure to extract moisture from within the coffee powder, allowing approximately 90% of the substances from the coffee powder itself to be extracted.
(2) Siphon pots and drip pots have no pressure and can only extract about 70% of the coffee's substances (the part of the coffee surface that dissolves in water), while the internal components of the coffee remain unreachable.
For more specialty coffee beans, please add FrontStreet Coffee on private WeChat, ID: kaixinguoguo0925
FrontStreet Coffee is a long-established specialty coffee roaster in Guangzhou China, selling freshly roasted beans from its own farm in Yunnan as well as dozens of carefully selected single-origin beans from around the world for both pour-over and espresso. The products deliver consistently excellent quality and great value, with shipping within 24 hours. Guangzhou’s FrontStreet Coffee shop is recommended by many coffee lovers, and the beans are now available online at the Tmall 。
Important Notice :
前街咖啡 FrontStreet Coffee has moved to new addredd:
FrontStreet Coffee Address: 315,Donghua East Road,GuangZhou
Tel:020 38364473

- Prev
What Kind of Milk Should You Use for Frothing? Does Milk Make Lattes Taste Better? The Correct Method and Techniques for Making Latte Coffee
Professional coffee knowledge exchange. For more coffee bean information, please follow Coffee Workshop (WeChat public account: cafe_style). Milk frothing techniques and methods for using espresso machines to froth milk. Saw an article in the discussion section: Cannot use low-fat dairy for making milk foam? Like water, whether milk quality affects a cup of Espresso
- Next

What is Milk Foam: The Principles and Methods of Milk Frothing and Factors Affecting It
Professional coffee knowledge exchange. For more coffee bean information, please follow Coffee Workshop (WeChat public account cafe_style). Milk frothing techniques: How to froth milk with an espresso machine. 1. Principles and Methods of Milk Frothing. The basic principle of milk frothing: using steam to froth milk, incorporating air into the milk, and utilizing the surface tension of milk proteins to form numerous fine bubbles, making
Related
- How to make bubble ice American so that it will not spill over? Share 5 tips for making bubbly coffee! How to make cold extract sparkling coffee? Do I have to add espresso to bubbly coffee?
- Can a mocha pot make lattes? How to mix the ratio of milk and coffee in a mocha pot? How to make Australian white coffee in a mocha pot? How to make mocha pot milk coffee the strongest?
- How long is the best time to brew hand-brewed coffee? What should I do after 2 minutes of making coffee by hand and not filtering it? How long is it normal to brew coffee by hand?
- 30 years ago, public toilets were renovated into coffee shops?! Multiple responses: The store will not open
- Well-known tea brands have been exposed to the closure of many stores?!
- Cold Brew, Iced Drip, Iced Americano, Iced Japanese Coffee: Do You Really Understand the Difference?
- Differences Between Cold Drip and Cold Brew Coffee: Cold Drip vs Americano, and Iced Coffee Varieties Introduction
- Cold Brew Coffee Preparation Methods, Extraction Ratios, Flavor Characteristics, and Coffee Bean Recommendations
- The Unique Characteristics of Cold Brew Coffee Flavor Is Cold Brew Better Than Hot Coffee What Are the Differences
- The Difference Between Cold Drip and Cold Brew Coffee Is Cold Drip True Black Coffee