How to Froth Milk for Latte? What to Do When Milk Foam is Too Thick? What's the Ideal Milk Temperature for Cappuccino?
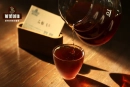
The Rise of Home Brewing
With the advancement of times, the emergence of high-pressure extraction tools such as manual presses and dual-valve moka pots has made expensive full/semi-automatic coffee machines no longer the only choice for "home brewing." These tools can also produce strong coffee comparable to (approaching) espresso. By using this strong coffee as a substitute for espresso base in making specialty coffee, the final coffee will have excellent performance very close to traditional methods.

The Milk Frothing Challenge
However, there are some operations that these tools cannot provide like coffee machines, such as milk frothing. If you want to drink a "latte" with dense milk foam or a "cappuccino," these tools cannot meet such requirements. This has successfully troubled many friends—coffee can be made, milk can be heated, but how should one obtain milk foam?

Excellent! Next, FrontStreet Coffee will share how to make milk with foam at home. But before that, we need to understand how milk foam is formed.
The Science Behind Milk Foam
The theory of milk foam formation is actually very simple. As the name suggests, milk foam is bubbles made from milk. By injecting air into the milk surface, the milk's own proteins and lipids wrap around it, forming countless bubbles. Then through a series of operations, these larger milk bubbles are refined, ultimately forming the dense milk foam we know well.

Therefore, we only need to find a tool to inject air into milk to form bubbles, and then find ways to make them fine, and we can obtain milk with dense foam! The making of "latte" and "cappuccino" (because what's produced isn't technically a real latte, hence the quotation marks) will no longer be a problem!
How to Froth Milk
Before frothing, we still need to heat the milk first. Any heat source will work—first heat the milk to the 60°C~70°C range to activate the sweetness of lactose, then proceed with milk frothing.

Currently, tools suitable for frothing milk include: automatic frothers, and French presses (truly versatile)! Their frothing methods are different, but both can give milk a layer of dense foam. Next, FrontStreet Coffee will share how milk should be frothed! (This guide mainly focuses on electric frothers—for French press frothing methods, please refer to the article "How to Froth Milk with a French Press~")

The Frothing Process
First, we need to create foam, which means injecting air into the milk to form large bubbles. The specific operation is: submerge half of the stirring head into the milk, leaving the other half exposed on the milk surface, then start the machine. The stirring head will draw air into the milk to form bubbles! If the frother can adjust speed, FrontStreet Coffee suggests using a lower speed during the foaming stage to better control the thickness of the milk foam.

Next comes the refinement and integration, which is a very important step. Because it will cut the large bubbles produced into countless small bubbles, while making them more integrated with the milk for a denser texture. Therefore, what we need to do is completely submerge the portion of the stirring head exposed to the air surface into the milk. This will allow the milk to form a vortex in the pitcher, drawing in large particle bubbles and cutting them into small bubbles.

When there are no large particle bubbles on the milk surface, we can speed up the stirring to promote the completion of the milk foam. Until the liquid surface is very smooth, we can stop stirring and declare the frothing complete. Finally, simply combine the milk foam with coffee, and you can enjoy a "latte"/"cappuccino" with a dense texture!
Important Tips
Perhaps many times, the thickness of the frothed milk foam doesn't meet our expectations. In such situations, we can use a spoon to remove part of the milk foam to obtain milk foam with the ideal thickness!

After frothing is complete, you might also encounter milk foam that isn't smooth and feels rough! The best way to handle this situation is to prepare an extra cup. By pouring the milk foam back and forth between cups, you can eliminate the rough large bubbles, and the milk foam will gradually become smoother with an improved texture!

FrontStreet Coffee is a long-established specialty coffee roaster in Guangzhou China, selling freshly roasted beans from its own farm in Yunnan as well as dozens of carefully selected single-origin beans from around the world for both pour-over and espresso. The products deliver consistently excellent quality and great value, with shipping within 24 hours. Guangzhou’s FrontStreet Coffee shop is recommended by many coffee lovers, and the beans are now available online at the Tmall 。
Important Notice :
前街咖啡 FrontStreet Coffee has moved to new addredd:
FrontStreet Coffee Address: 315,Donghua East Road,GuangZhou
Tel:020 38364473

- Prev

What's the Difference Between Espresso, Pour-Over, Three-Stage, and Single-Stage Brewing? The Origin of Americano and How to Make It
In the world of coffee, there are numerous technical terms. While they may sound similar, they actually have distinctly different meanings. For example, terms like espresso, Americano, and drip coffee all contain the word "style," but some refer to specific types of coffee while others describe brewing
- Next
What is Flower Queen Coffee? What's the difference between Flower Queen 8.0 and 7.0? Is Flower Queen the same as Geisha?
Flower Queen, as one of the essential daily coffees for countless fruit acidity coffee lovers, has now不知不觉迎来 its 8th year since debut. The latest batch follows the long-standing naming convention and is marketed as "Flower Queen 8.0." Trying the new Flower Queen has become a top priority for loyal fans. So, this year's "Flower
Related
- How to make bubble ice American so that it will not spill over? Share 5 tips for making bubbly coffee! How to make cold extract sparkling coffee? Do I have to add espresso to bubbly coffee?
- Can a mocha pot make lattes? How to mix the ratio of milk and coffee in a mocha pot? How to make Australian white coffee in a mocha pot? How to make mocha pot milk coffee the strongest?
- How long is the best time to brew hand-brewed coffee? What should I do after 2 minutes of making coffee by hand and not filtering it? How long is it normal to brew coffee by hand?
- 30 years ago, public toilets were renovated into coffee shops?! Multiple responses: The store will not open
- Well-known tea brands have been exposed to the closure of many stores?!
- Cold Brew, Iced Drip, Iced Americano, Iced Japanese Coffee: Do You Really Understand the Difference?
- Differences Between Cold Drip and Cold Brew Coffee: Cold Drip vs Americano, and Iced Coffee Varieties Introduction
- Cold Brew Coffee Preparation Methods, Extraction Ratios, Flavor Characteristics, and Coffee Bean Recommendations
- The Unique Characteristics of Cold Brew Coffee Flavor Is Cold Brew Better Than Hot Coffee What Are the Differences
- The Difference Between Cold Drip and Cold Brew Coffee Is Cold Drip True Black Coffee