How to Create Smooth and Fine Milk Foam? Reasons for Rough Latte Foam

In the world of latte art, there's a popular saying: "If your milk foam is perfect, latte art becomes effortless." This highlights that creating beautiful latte art patterns begins with producing fine, smooth, and flowable quality milk foam. As the saying goes, "all things are difficult before they become easy." Recreating that perfect milk foam at home, the kind you find in specialty coffee shops, is precisely what challenges many beginners at first.

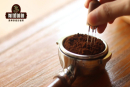
Today, FrontStreet Coffee will take out a commonly used pitcher and show you step-by-step how to create fine and smooth milk foam!
Key Points to Remember
First, let's briefly explain how the steam wand on an espresso machine actually works.
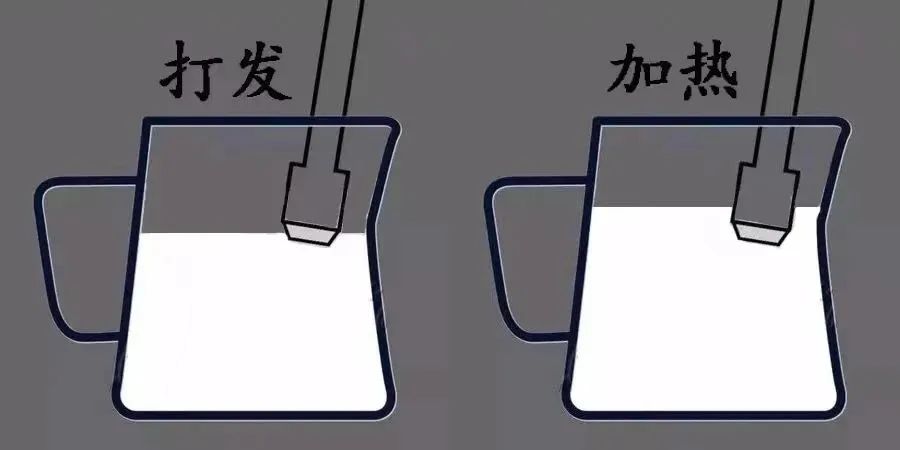
When we open the steam valve, hot water vapor jets out from several small holes in the steam wand, directly hitting the milk surface and heating it rapidly – this is how the steam wand heats milk. The "frothing" of milk, which can also be understood as "foaming," requires us to adjust the angle of the pitcher/steam wand to force air into the milk using the escaping steam. The proteins in milk then encapsulate this air, forming a soft milk foam layer that floats on the surface.
In practice, the initial step involves keeping the steam holes half exposed to air and half submerged in the milk. Then, based on the desired foam thickness, you determine the air intake amount by listening to the duration of the "tss~tss~tss~" sound to know when to stop. Only after air incorporation is complete should the milk completely "submerge" the steam holes to avoid continued foaming and proceed to the next stage: texturing.
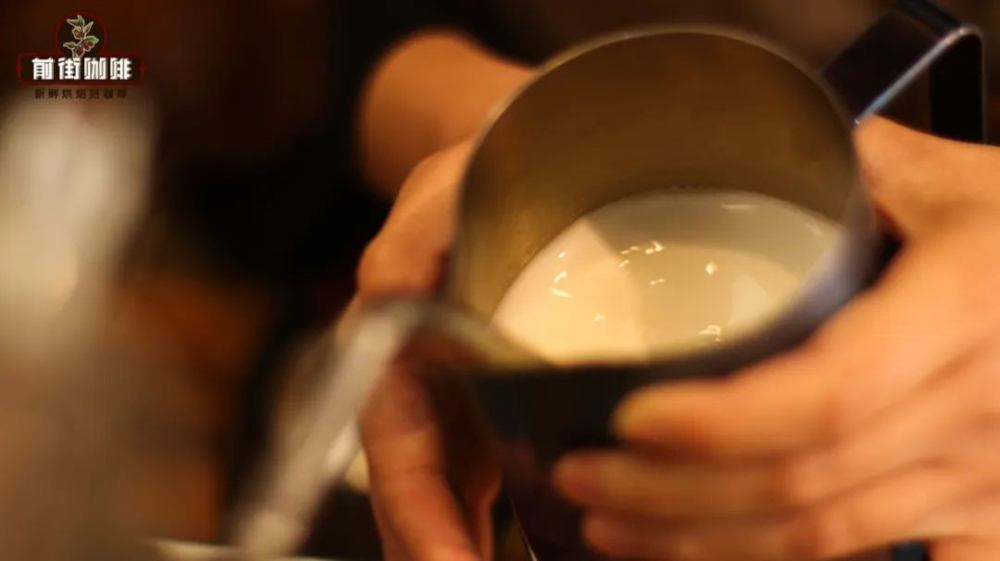
The Key to Texturing: Creating a Vortex
We need to understand that the water vapor from the steam holes not only forces air into the milk but also continuously cuts through the "air pockets" encapsulated by proteins.
When proteins encapsulate more air, they form larger bubbles that are more likely to burst. The escaping steam conveniently breaks these unstable large bubbles quickly, causing them to split into countless small bubbles. In comparison, these small bubbles are more stable and less likely to break. When they cluster together, they form a fine milk foam layer. Creating a vortex precisely controls the water vapor to prevent it from scattering randomly, focusing on eliminating large bubbles.
From experience, FrontStreet Coffee believes there are two small tricks that can help everyone create a vortex more easily: first, finding the right position and angle for the steam wand, and second, maximizing the milk surface area in the pitcher.
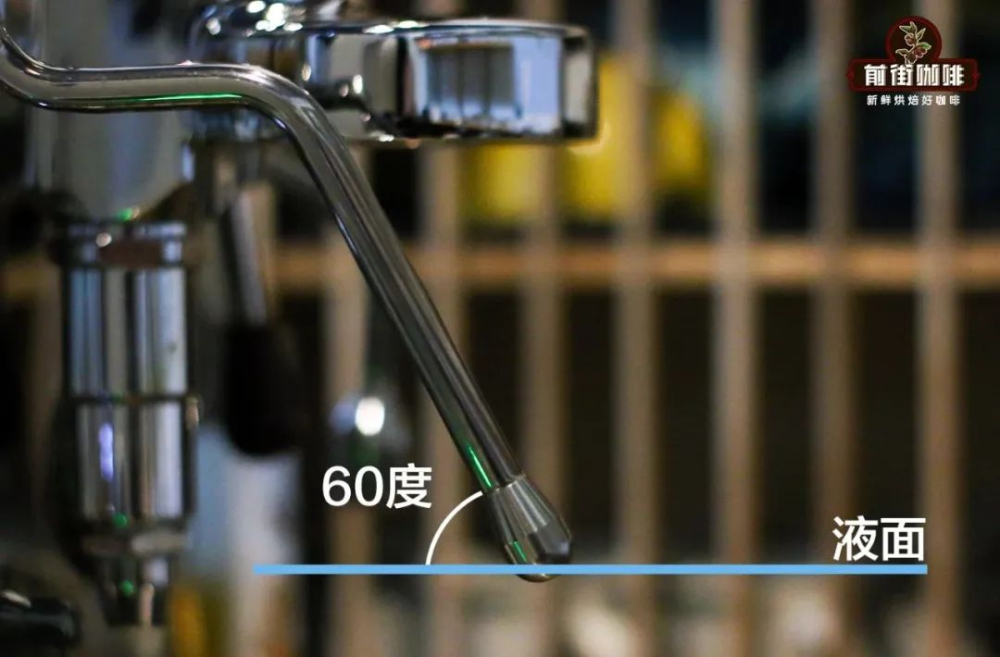
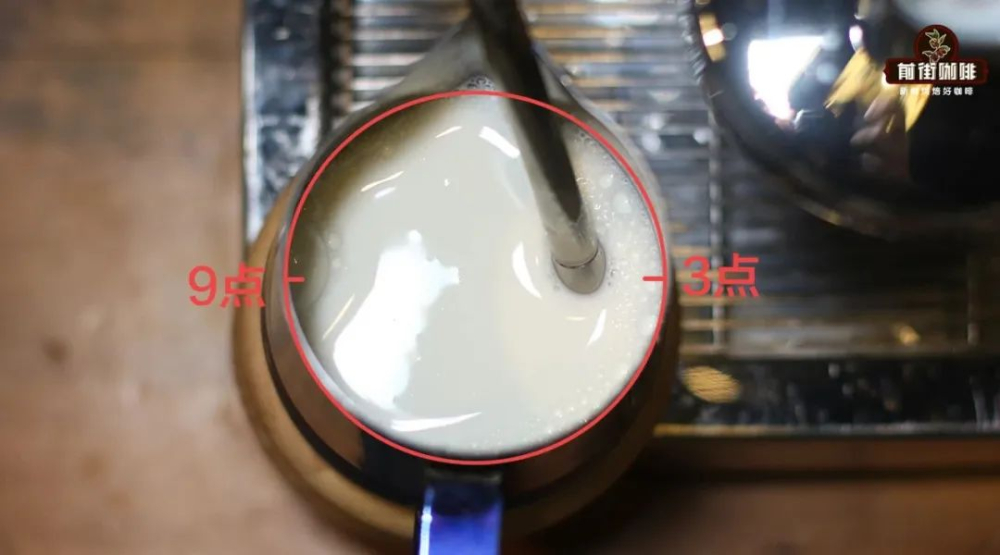
To successfully create a vortex, you need to adjust not only the contact point between the steam wand and milk but also create a horizontally acting force with the steam. When inserting the steam wand into the milk, the entry point should ideally be at the 3 or 9 o'clock position, with the metal tube forming a 60-degree angle with the liquid surface. This creates a horizontal force cutting into the milk. In other words, as long as you master the angle and the position where the steam holes land, you can create fine milk foam even without holding the pitcher by hand.
Another key point is using the tilt of the pitcher to achieve a larger surface area, which primarily helps create a moving vortex more easily. Secondly, with a certain amount of foam, the larger the milk surface area, the thinner the foam layer becomes, making it easier to quickly cut large bubbles into small ones, thus creating a finer texture.
How to Froth and Texture Simultaneously?
FrontStreet Coffee has noticed that while some people have learned to create a vortex, their milk foam is often not smooth, sometimes even becoming stiff and overdone. Why is this?
When frothing ends and texturing begins, if the steam holes are positioned at the bottom of the vortex, the steam will first hit the pitcher wall creating an undercurrent, and the upper layer of bubbles won't have the opportunity to roll downward. At this point, for the milk, the vortex only serves a heating function, leaving the bubbles coarse as they were. Therefore, after incorporating air, we should move the steam holes into the foam layer as quickly as possible to truly achieve the texturing effect.
In FrontStreet Coffee's view, instead of dividing this into two stages, we might as well try combining the frothing and texturing steps simultaneously.
Start with the steam holes completely submerged, then quickly adjust the angle to create a vortex, and gradually lower the pitcher. As you lower the pitcher, the milk surface level relative to the steam holes also drops, allowing the steam holes to slightly emerge from the surface to begin frothing. The essence lies in moving gradually, which allows better control over the amount of air incorporated. Additionally, since the steam continuously creates a vortex in the foam layer, the foam starts in a relatively fine state. After incorporating the right amount of air, fix the pitcher position to continue texturing.
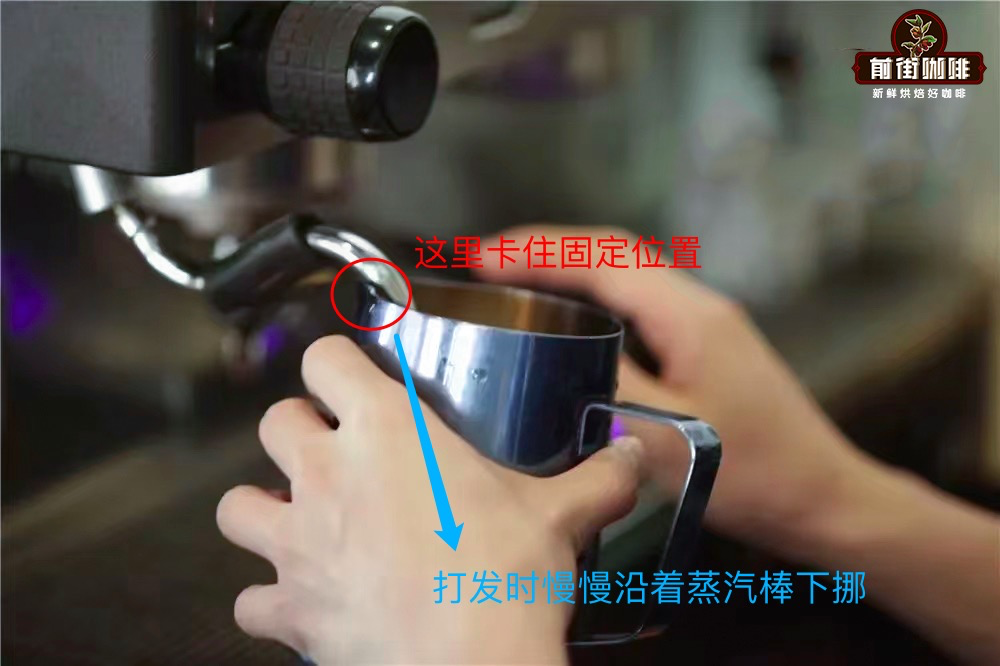
To find this stable position, we need to first master using the pitcher to hold against the steam wand, creating a state that allows easy up and down movement. FrontStreet Coffee generally suggests using the pitcher's spout to slowly move downward along the steam wand. Everyone can practice with water first to develop the feel before experimenting with real milk.
- END -
FrontStreet Coffee
No. 10, Bao'an Qianjie, Yandun Road, Dongshankou, Yuexiu District, Guangzhou, Guangdong Province

FrontStreet Coffee is a long-established specialty coffee roaster in Guangzhou China, selling freshly roasted beans from its own farm in Yunnan as well as dozens of carefully selected single-origin beans from around the world for both pour-over and espresso. The products deliver consistently excellent quality and great value, with shipping within 24 hours. Guangzhou’s FrontStreet Coffee shop is recommended by many coffee lovers, and the beans are now available online at the Tmall 。
Important Notice :
前街咖啡 FrontStreet Coffee has moved to new addredd:
FrontStreet Coffee Address: 315,Donghua East Road,GuangZhou
Tel:020 38364473

- Prev
How Are Coffee Beans Named? An Introduction to Specialty Coffee Bean Naming Rules
Many first-time visitors to FrontStreet Coffee find themselves facing a choice dilemma when confronted with the extensive list of nearly fifty different coffee beans on our small blackboard. Some customers who don't drink coffee frequently ask FrontStreet Coffee: "These are beans, right? But aren't Bahia and Mozart names of musicians?" Today, FrontStreet Coffee will introduce to everyone
- Next
Can You Use Toothpicks Instead of Distribution Needles? How to Properly Use Needle-Style Coffee Distributors?
FrontStreet Coffee previously wrote an article about the essential tools needed for making espresso, with distribution needles being one of them that can help make extraction more stable. However, some coffee enthusiasts have experimented with using toothpicks as alternatives to distribution needles and reported good results to FrontStreet Coffee. Coincidentally, FrontStreet Coffee has collected some toothpicks from takeout deliveries and decided to conduct a comparison test.
Related
- How to make bubble ice American so that it will not spill over? Share 5 tips for making bubbly coffee! How to make cold extract sparkling coffee? Do I have to add espresso to bubbly coffee?
- Can a mocha pot make lattes? How to mix the ratio of milk and coffee in a mocha pot? How to make Australian white coffee in a mocha pot? How to make mocha pot milk coffee the strongest?
- How long is the best time to brew hand-brewed coffee? What should I do after 2 minutes of making coffee by hand and not filtering it? How long is it normal to brew coffee by hand?
- 30 years ago, public toilets were renovated into coffee shops?! Multiple responses: The store will not open
- Well-known tea brands have been exposed to the closure of many stores?!
- Cold Brew, Iced Drip, Iced Americano, Iced Japanese Coffee: Do You Really Understand the Difference?
- Differences Between Cold Drip and Cold Brew Coffee: Cold Drip vs Americano, and Iced Coffee Varieties Introduction
- Cold Brew Coffee Preparation Methods, Extraction Ratios, Flavor Characteristics, and Coffee Bean Recommendations
- The Unique Characteristics of Cold Brew Coffee Flavor Is Cold Brew Better Than Hot Coffee What Are the Differences
- The Difference Between Cold Drip and Cold Brew Coffee Is Cold Drip True Black Coffee