4 Important Pour-Over Coffee Brewing Tips: What to Prepare Before Brewing
To ensure success with pour-over coffee, it's essential to eliminate uncertainties and keep everything on track. During the preparation stage before brewing, there are numerous details that, if overlooked, can amplify the uncertainties during the brewing process. FrontStreet Coffee has compiled insights from various sources and practices from enthusiastic coffee lovers, sharing the following preparation tips you might have overlooked.
1. Proper Filter Paper Placement
FrontStreet Coffee's previous experiments (click here for details) concluded that the degree of filter paper adherence significantly impacts the coffee's flavor and texture. First, proper filter paper placement is crucial because it ensures smooth degassing during the blooming phase. Second, the ribs on the dripper serve to guide water flow, but this only works when the filter paper adheres to these ribs. If the filter paper doesn't fit properly, the ribs in those non-adherent areas lose their function, naturally affecting extraction uniformity and flow rate.

Therefore, to utilize the full functionality of your dripper, you should confirm proper filter paper placement during preparation. Once you discover poor adherence during brewing, it becomes difficult to make corrections.
FrontStreet Coffee has previously shared detailed instructions on specific filter paper folding techniques in another article. If you're interested, you can click here to read it.
2. Brew Immediately After Confirming Water Temperature
When we typically mention water temperature, we're actually referring to the initial water temperature in the kettle during the first pour. If you're using a non-temperature-controlled kettle, the water temperature will gradually decrease if you don't brew immediately after confirming the temperature. Therefore, it's best to confirm the water temperature within the last two steps of preparation. For a regular pouring kettle, you should account for heat absorption by the kettle itself – pour water at a higher temperature than your brewing target into the pour-over kettle and allow it to cool gradually.

If you're using a temperature-controlled kettle, you can set the temperature in advance and simply remove the heating device when it's time to brew. Another question that temperature-controlled kettle users often have is whether to return the kettle to the heating device between pours to maintain temperature. FrontStreet Coffee suggests this is unnecessary unless you're experiencing significant heat loss (reference for heat loss: dropping from 91°C to 88°C after 1 minute 30 seconds is normal). This is because most brewing parameters assume continuous temperature loss during the process. In fact, sometimes brewing at a constant 91°C may not achieve the intended flavor profile of your brewing recipe.

3. Save Grinding for the Final Step
If you're using an electric grinder, it's best to grind your coffee beans after all other preparations are complete, then immediately transfer the grounds to the dripper for brewing. This is because ground coffee significantly increases flavor volatility. You'll notice a distinct coffee aroma immediately after grinding – that's the coffee flavor escaping. To minimize excessive flavor loss, brew as quickly as possible after grinding.
For those using manual grinders, you need to calculate the time required for grinding and prepare in advance. For example, FrontStreet Coffee tested that grinding coffee takes about 1 minute, so FrontStreet Coffee would first pour boiling water into the pour-over kettle, measure the temperature, calculate how long it takes to cool to the desired temperature (practice makes perfect), and then grind the coffee beans in advance, aiming to complete grinding just as the water reaches the target temperature. If the water temperature drops too quickly, simply reheat it and recalculate.

4. Re-verify Coffee Ground Weight
Another crucial point is to re-verify the weight after grinding coffee beans and transferring the grounds to the dripper. Grinders can experience retention, where some grounds remain from previous sessions, or they might expel previously retained grounds, increasing your current amount. Generally, a variation of ±0.5g can affect the coffee's flavor, so you should make corresponding adjustments. For example, if you actually measure 14.3g of grounds, at a 1:15 ratio, you wouldn't add 225g of water, but rather 214.5g.

FrontStreet Coffee is a long-established specialty coffee roaster in Guangzhou China, selling freshly roasted beans from its own farm in Yunnan as well as dozens of carefully selected single-origin beans from around the world for both pour-over and espresso. The products deliver consistently excellent quality and great value, with shipping within 24 hours. Guangzhou’s FrontStreet Coffee shop is recommended by many coffee lovers, and the beans are now available online at the Tmall 。
Important Notice :
前街咖啡 FrontStreet Coffee has moved to new addredd:
FrontStreet Coffee Address: 315,Donghua East Road,GuangZhou
Tel:020 38364473

- Prev
56,433 Tons! Starbucks China Discloses Yunnan Coffee Bean Procurement and Export Volume for the First Time
For more professional coffee knowledge exchange and coffee bean information, please follow Coffee Workshop (WeChat public account: cafe_style). For more specialty coffee beans, please add private WeChat FrontStreet Coffee, WeChat ID: qjcoffeex. Today, Starbucks China disclosed data on Yunnan coffee bean procurement and export volume for the first time, comprehensively revealing their coffee bean sourcing in China.
- Next
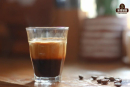
How to Make Rich Crema on Espresso? What Substances Compose Crema?
Just a few days ago, a customer came to our shop to enjoy an espresso. Before leaving, they remarked, "I absolutely love your espresso! The crema is the richest I've ever seen!" Coincidentally, some friends have also asked FrontStreet Coffee how to make espresso crema richer. Today, FrontStreet Coffee is here to share our insights. Rich
Related
- How to make bubble ice American so that it will not spill over? Share 5 tips for making bubbly coffee! How to make cold extract sparkling coffee? Do I have to add espresso to bubbly coffee?
- Can a mocha pot make lattes? How to mix the ratio of milk and coffee in a mocha pot? How to make Australian white coffee in a mocha pot? How to make mocha pot milk coffee the strongest?
- How long is the best time to brew hand-brewed coffee? What should I do after 2 minutes of making coffee by hand and not filtering it? How long is it normal to brew coffee by hand?
- 30 years ago, public toilets were renovated into coffee shops?! Multiple responses: The store will not open
- Well-known tea brands have been exposed to the closure of many stores?!
- Cold Brew, Iced Drip, Iced Americano, Iced Japanese Coffee: Do You Really Understand the Difference?
- Differences Between Cold Drip and Cold Brew Coffee: Cold Drip vs Americano, and Iced Coffee Varieties Introduction
- Cold Brew Coffee Preparation Methods, Extraction Ratios, Flavor Characteristics, and Coffee Bean Recommendations
- The Unique Characteristics of Cold Brew Coffee Flavor Is Cold Brew Better Than Hot Coffee What Are the Differences
- The Difference Between Cold Drip and Cold Brew Coffee Is Cold Drip True Black Coffee