How to Perfectly Prepare Latte Art Foam: A Comprehensive Guide to Espresso Latte Foam Techniques
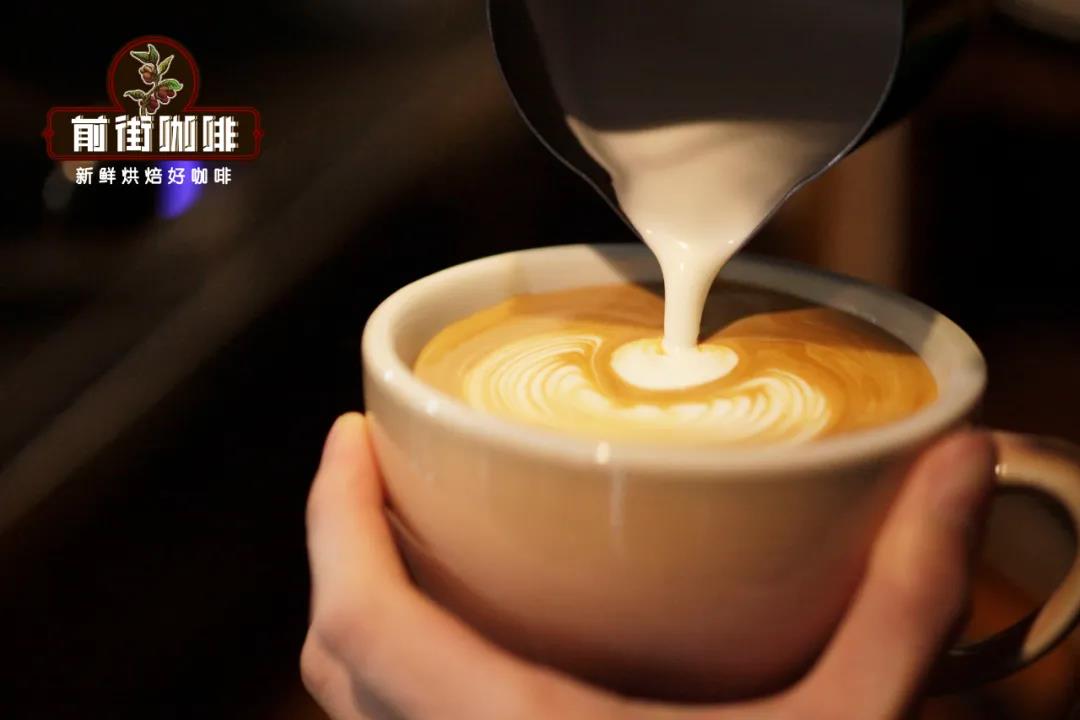
The daily journey of beginners learning to froth milk is filled with thoughts like: "Should I just give up! No, I must persist... Oh, it's too thick again, I give up! I'm not giving up, let me try again!" I know what you'll say: "Please take away the surveillance camera!" As an essential part of making latte coffee, the degree and quality of milk frothing directly affect the visual and tactile experience of a latte.
Why can milk form stable foam?
What is the principle of milk frothing?
What affects the stability of milk foam are the casein micelles and whey proteins in milk protein. The existence of casein micelles creates tension on the milk surface. When steam impacts the milk surface, it forms numerous bubbles of different sizes. Then, adjusting the position of the steam wand creates a vortex in the milk that "chops up" larger bubbles, thereby obtaining fine milk foam with a smooth surface texture.
Under normal circumstances, whey protein has a hydrophilic exterior. Through stirring or heating, it gradually "unfolds," exposing its hydrophobic parts. These parts adhere to the generated bubbles, reducing surface tension and slowing down the bursting speed, making the milk foam more stable.
Common problems for beginners in milk frothing,
Try these small tips!
Problem 1: Milk splashes during frothing
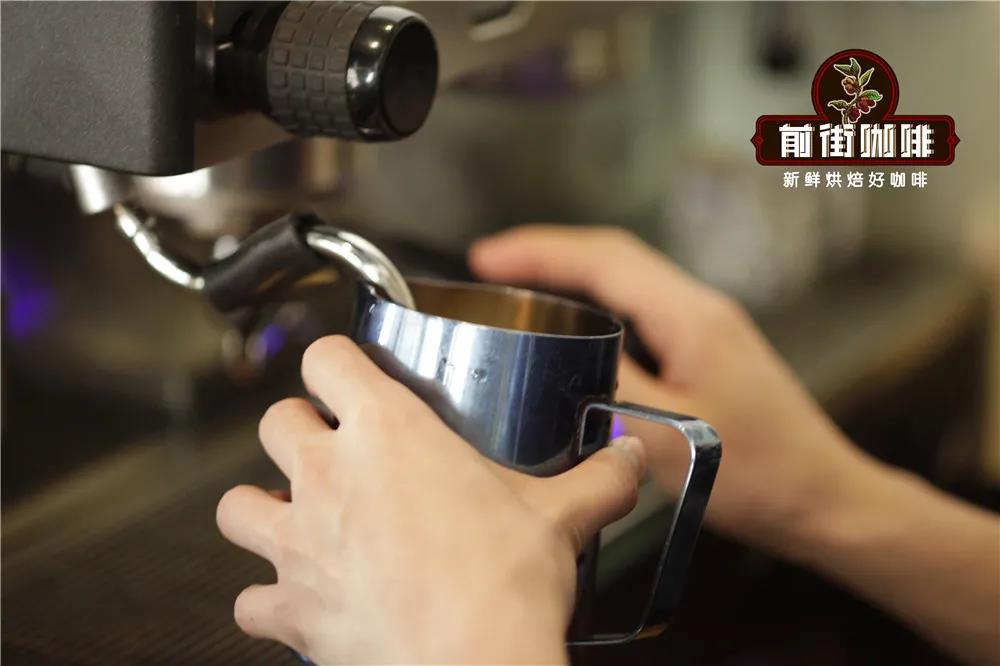
This is a very dangerous situation. Beginners learning milk frothing lack stable control and grasp of the steam wand angle and the depth of the steam wand tip (hereafter referred to as the steam tip) in the milk. This can happen when steam is first turned on or when hands become unsteady during heating, causing excessive movement of the milk pitcher, making the air vent contact the milk surface, and the impact of steam causes milk to splash out.
Tip 1: Always keep the milk pitcher in contact with the steam wand
When beginners cannot stably control the movement range of the milk pitcher, FrontStreet Coffee suggests using the pitcher's spout as a pivot point, keeping the edge of the pitcher in contact with the steam wand. Later, whether changing the angle of the pitcher or moving it up and down, maintain contact between the two to avoid suddenly becoming "suspended" and having steam escape from the milk.
Problem 2: Milk foam is not fine enough
What makes beginners break down is not failed latte art, but rather that the milk foam never becomes fine, with many large bubbles. When mixed with coffee and consumed, the texture in your mouth sends you this signal: Do you think I'm happy?
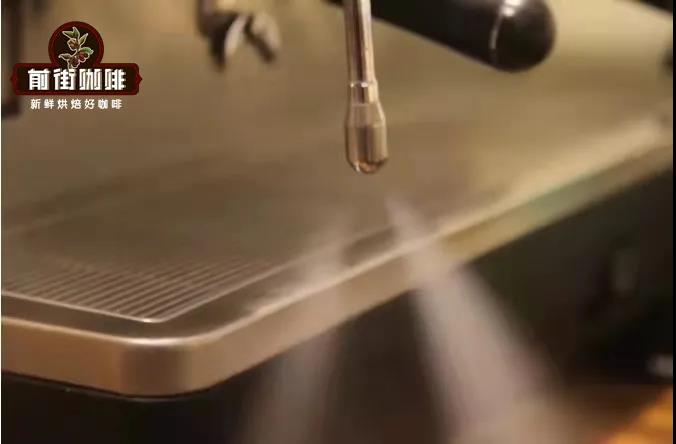
Tip 1: Turn on the steam briefly before frothing milk
When steam in the steam wand of semi-automatic coffee machines cools down, it becomes water and remains in the tube. Therefore, before each milk frothing session, please release some steam first until no water sprays from the tube. Steam containing water will produce large bubbles when frothing milk.
Tip 2: Place the steam wand in the milk pitcher at a 45-degree angle
The 45-degree angle means positioning toward the 2-3 o'clock or 9-10 o'clock direction of the pitcher. Using this angle to froth milk helps it quickly form a small vortex. The appearance of this vortex can "roll" coarser milk foam into the liquid surface.

Tip 3: Insert the steam tip 0.8-1cm deep into the milk surface
The steam tip shouldn't be inserted too deeply, after all, milk frothing is mainly about incorporating air into the milk. If it's too deep, the steam holes cannot contact air to create a vortex. If it's too shallow, steam impacts the surface, creating rough bubbles and causing milk to splash.
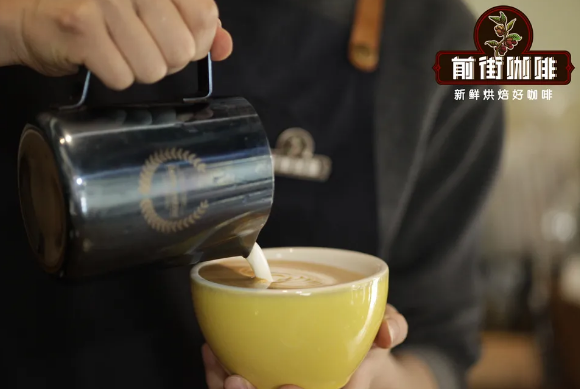
Problem 3: Milk foam becomes too thick
The thickness of milk foam depends on the foam produced when steam properly contacts the surface, which we call the aeration process. The longer the aeration time, the more foam produced, and the thicker the milk foam becomes.
Tip 1: Only need to "hiss" 4-5 times during aeration
Adjust the steam tip insertion depth to 0.3cm and turn on the steam switch. You'll hear a "hiss—hiss" sound. This is the aeration stage. For latte art, the ideal milk foam thickness is 1cm, so we don't need excessive aeration. After hearing the hissing sound 4-5 times, adjust the steam tip depth back to 0.8-1cm, maintain the 45-degree angle to create a vortex that eliminates large bubbles and heats to the appropriate temperature.
Problem 4: How to determine the temperature for milk frothing?
Is milk temperature really that important? Yes! The ideal temperature for milk frothing is between 55-65°C, never exceeding 70°C. Within these temperature ranges, lactose and other sugars are most "active." When milk is frothed to this temperature range and then combined with coffee, you'll find that this milk coffee tastes sweet both in aroma and taste, even without adding sugar.
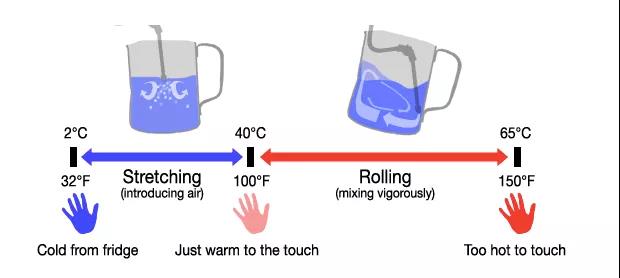
Tip 1: Use a thermometer, don't practice "iron palm technique" from the start
Insert a digital thermometer into the milk pitcher before starting to froth, and gradually feel the temperature change of the pitcher with your palm during the process. One important note! For example, if you need to froth milk to 55°C, you can stop heating when the thermometer shows 53°C, as the milk will continue to rise by 1-2°C after stopping.
FrontStreet Coffee is a long-established specialty coffee roaster in Guangzhou China, selling freshly roasted beans from its own farm in Yunnan as well as dozens of carefully selected single-origin beans from around the world for both pour-over and espresso. The products deliver consistently excellent quality and great value, with shipping within 24 hours. Guangzhou’s FrontStreet Coffee shop is recommended by many coffee lovers, and the beans are now available online at the Tmall 。
Important Notice :
前街咖啡 FrontStreet Coffee has moved to new addredd:
FrontStreet Coffee Address: 315,Donghua East Road,GuangZhou
Tel:020 38364473

- Prev

Coffee Trading Models: Understanding Fair Trade Auctions, Direct Trade, and More
In his book, James Hoffmann outlines four primary coffee trading models: partnership coffee, direct trade, fair trade, and auction coffee. While the distinctions between these models may seem apparent from their names, FrontStreet Coffee invites you to delve deeper into the specific details of each approach.
- Next
Guatemala Huehuetenango Washed Bourbon Coffee Flavor Characteristics and Guatemala's Eight Major Coffee Regions
In most cases, Guatemala has a well-functioning network of producers. Although infrastructure generally remains lacking (no national postal service), coffee farmers are surprisingly well-connected. This is largely thanks to the efforts of Anacafé (Asociación Nacional del Café), a trade group that supports coffee growers. Anacafé has branded eight growing regions: Acatenango
Related
- How to make bubble ice American so that it will not spill over? Share 5 tips for making bubbly coffee! How to make cold extract sparkling coffee? Do I have to add espresso to bubbly coffee?
- Can a mocha pot make lattes? How to mix the ratio of milk and coffee in a mocha pot? How to make Australian white coffee in a mocha pot? How to make mocha pot milk coffee the strongest?
- How long is the best time to brew hand-brewed coffee? What should I do after 2 minutes of making coffee by hand and not filtering it? How long is it normal to brew coffee by hand?
- 30 years ago, public toilets were renovated into coffee shops?! Multiple responses: The store will not open
- Well-known tea brands have been exposed to the closure of many stores?!
- Cold Brew, Iced Drip, Iced Americano, Iced Japanese Coffee: Do You Really Understand the Difference?
- Differences Between Cold Drip and Cold Brew Coffee: Cold Drip vs Americano, and Iced Coffee Varieties Introduction
- Cold Brew Coffee Preparation Methods, Extraction Ratios, Flavor Characteristics, and Coffee Bean Recommendations
- The Unique Characteristics of Cold Brew Coffee Flavor Is Cold Brew Better Than Hot Coffee What Are the Differences
- The Difference Between Cold Drip and Cold Brew Coffee Is Cold Drip True Black Coffee