Ultimate Guide to Coffee Art: Step-by-Step Latte Art Instructions from Scratch
Latte art has attracted many friends from different places to step into the coffee field, all for the hope that one day they can create delicate and exquisite latte art patterns at will. So, the question arises: how long does it take to master latte art?

Actually, latte art isn't as complicated as you might imagine. If we're talking about just creating a good-looking pattern, then if you're lucky, one day is enough! Even with bad luck, it would take at most two to three days~

If you're referring to complex combination patterns, then we need to understand the relevant principles, practice accordingly, and believe that you'll soon be able to create your target pattern! Next, FrontStreet Coffee will share the principles of latte art and some easily overlooked details, hoping to help everyone get started with latte art more effectively! For milk frothing, please refer to "How to Froth Milk."
The Principle of Creating Patterns
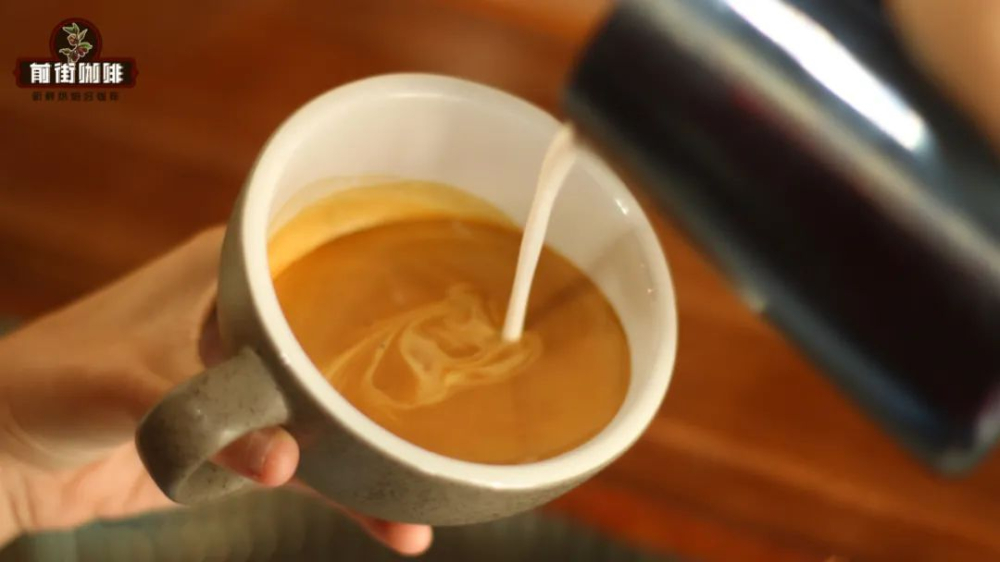
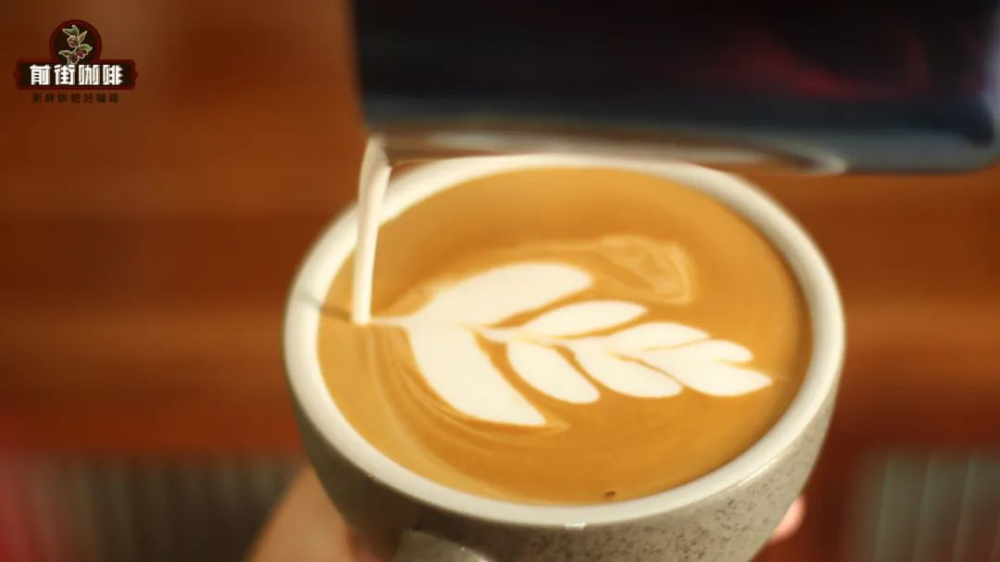
The main actions of latte art are divided into two: fusion and pattern creation! The difference in operation between these two lies in the height at which you inject the milk froth! When the pitcher spout is at a higher distance from the liquid surface, the injected milk froth will flow directly into the coffee, fusing with it—this action is "fusion."
When you inject milk froth with the pitcher spout nearly touching the liquid surface, then different white stripes will appear on the brown coffee surface according to your injection force—this action is "pattern creation."
Usually, we need to first fuse the coffee and milk to half the cup's capacity before starting pattern creation, partly to ensure better fusion between milk and coffee, and another reason is that after reaching half capacity, patterns can be created more effectively.
Fusion Techniques
Fusion isn't just a simple action of swirling milk froth at a high position! If you want the fused surface to not look like a stained white shirt that makes people frustrated, then we need to pay attention to the height of fusion.
The conventional fusion technique is: hold the cup with your left hand, hold the pitcher with your right hand, then offset your hands by half a circle for relative circular motion. What we need to pay attention to is controlling the height at about 5-10 centimeters during fusion, combined with slightly stronger up-and-down stirring, and random stripes will rarely appear.
Pattern Creation Techniques
The most crucial part is pattern creation! At this point, the coffee in our cup has reached half capacity, so now it's time for pattern creation! There are four key points, let FrontStreet Coffee explain them one by one~
Key Point 1:
During pattern creation, besides controlling the milk froth output with your right hand, you also need to control the rotation of the coffee cup with your left hand. Generally, this action is called "cup tilting."
The cup tilting action is quite important. Tilting too early will make it difficult for the pattern to form, while tilting too late can easily cause the coffee to overflow. Therefore, during pattern creation, the first thing we need to practice is working with both hands simultaneously, so that when your right hand outputs milk froth, your left hand can also perform appropriate cup tilting actions according to the output volume!
Key Point 2:
The greater the force you use when pouring milk froth, the more milk froth will be injected. Then, the latte art stripes presented with shaking will be slightly thicker (also if the milk froth is too thick); if you use less force when pouring milk froth, then the injected milk froth combined with shaking can easily present clearly defined stripes on the liquid surface (with appropriate milk froth thickness, stripes can be clearer!).

Key Point 3:
Different patterns have different landing points. Normally, there will be some deviation between where you can see the latte art pattern and the landing point during pattern creation! For example, if the final position of a heart-shaped latte art is in the center of the cup, then when we create the pattern, the landing point needs to move slightly to the right of center (toward the pitcher direction), because the movement of cup tilting plus the push flow of milk will change its final position!
Key Point 4:
The finishing is extremely important. A good finish is the perfect finishing touch! A poor finish is superfluous, like adding legs to a snake. Even if your previous pattern creation was excellent, if you don't control the height properly during finishing, it will cause your entire carefully arranged pattern to collapse!
(Poor finishing resulted in overly thick center lines and made the entire pattern unbalanced left and right) Therefore, FrontStreet Coffee wants to say that we need to pay attention to controlling the height of the pitcher during finishing, not letting the pitcher get too close to the liquid surface, leaving extra "strokes"~ Another point is that the finishing action should start at the latest when the cup is nine-tenths full, otherwise it will easily cause the coffee to seep out due to excessive volume!

Practice Suggestions for Latte Art
Suggestion 1:
This is what FrontStreet Coffee mainly emphasizes! When we first start with latte art, we can directly use milk and coffee to try 1-2 times, first experiencing what it feels like to create latte art with "real ammunition." Then remember this resistance and feeling, as it will be very helpful for the subsequent practice with dish soap and soy sauce. (Those with ample resources can also practice with real milk and real coffee)
Suggestion 2:
The main purpose of practice is to train the muscle memory of both hands. We shouldn't first think about what kind of pattern we want to create. Instead, we should first train "cup-holding posture, fusion techniques, cup tilting skills, and pattern creation details." Although it may be somewhat dull and tedious, this is the most important part. When you practice for one to two days, you'll be able to master the latte art techniques for basic patterns!
Suggestion 3:
Control your practice time. Don't practice continuously for long periods, as this can easily lead to rigid thinking and fatigue, making it ineffective. Therefore, take a break and adjust every twenty minutes, reflect on which details from your recent practice need improvement, and this way you can get started more quickly.
Suggestion 4:
If you encounter something that confuses you, you can take photos and then boldly send a private message to FrontStreet Coffee in the backend or at the bottom of the article. FrontStreet Coffee can provide certain suggestions~
A Small Detail That's Easy to Overlook~
When you've learned basic patterns (hearts, leaves, tulips) and plan to move toward combination patterns, you can observe the cups you're using. Perhaps many friends' latte art skills have actually reached a peak state (exaggerated), but due to the limitations of the coffee cups, they can't fully demonstrate their abilities.

The wider the cup's opening, the larger the area available for pattern creation; the smaller the opening, the smaller the area available for pattern creation. The more curved the bottom of the cup, the more thoroughly the poured milk and coffee can fuse. Simply put, cups with wide openings and curved bottoms are more suitable for high-difficulty latte art pattern creation~ Alright, go ahead and give it a try~ If you don't understand something, ask FrontStreet Coffee again from the backend~~
FrontStreet Coffee is a long-established specialty coffee roaster in Guangzhou China, selling freshly roasted beans from its own farm in Yunnan as well as dozens of carefully selected single-origin beans from around the world for both pour-over and espresso. The products deliver consistently excellent quality and great value, with shipping within 24 hours. Guangzhou’s FrontStreet Coffee shop is recommended by many coffee lovers, and the beans are now available online at the Tmall 。
Important Notice :
前街咖啡 FrontStreet Coffee has moved to new addredd:
FrontStreet Coffee Address: 315,Donghua East Road,GuangZhou
Tel:020 38364473

- Prev

Which Yunnan Coffee Brand is the Best? Chinese Yunnan Arabica Coffee is of International Top-Tier Quality
For professional barista exchanges, please follow Coffee Workshop (WeChat official account: cafe_style). Yunnan Arabica coffee belongs to the Rubiaceae family, Coffea genus, and is mainly cultivated in areas such as Lincang, Baoshan, Pu'er, Dehong, Nujiang, and Xishuangbanna. Arabica coffee originated from Ethiopia and the Arabian Peninsula, and was later introduced by the British
- Next

Guatemala Special Processing - Winey Natural Process Pacas Coffee, Guatemala Catadillas Estate
For professional barista exchanges, please follow Coffee Workshop (WeChat Official Account: cafe_style). Flavor Characteristics: Green beans have sweet coffee cherry dried fruit aroma, mixed with roasted nuts, pistachios, similar to Bourbon variety aroma, then transforms into orange sweet and sour, white grape juice, with milk chocolate and a hint of spice in the middle to finish.
Related
- How to make bubble ice American so that it will not spill over? Share 5 tips for making bubbly coffee! How to make cold extract sparkling coffee? Do I have to add espresso to bubbly coffee?
- Can a mocha pot make lattes? How to mix the ratio of milk and coffee in a mocha pot? How to make Australian white coffee in a mocha pot? How to make mocha pot milk coffee the strongest?
- How long is the best time to brew hand-brewed coffee? What should I do after 2 minutes of making coffee by hand and not filtering it? How long is it normal to brew coffee by hand?
- 30 years ago, public toilets were renovated into coffee shops?! Multiple responses: The store will not open
- Well-known tea brands have been exposed to the closure of many stores?!
- Cold Brew, Iced Drip, Iced Americano, Iced Japanese Coffee: Do You Really Understand the Difference?
- Differences Between Cold Drip and Cold Brew Coffee: Cold Drip vs Americano, and Iced Coffee Varieties Introduction
- Cold Brew Coffee Preparation Methods, Extraction Ratios, Flavor Characteristics, and Coffee Bean Recommendations
- The Unique Characteristics of Cold Brew Coffee Flavor Is Cold Brew Better Than Hot Coffee What Are the Differences
- The Difference Between Cold Drip and Cold Brew Coffee Is Cold Drip True Black Coffee